
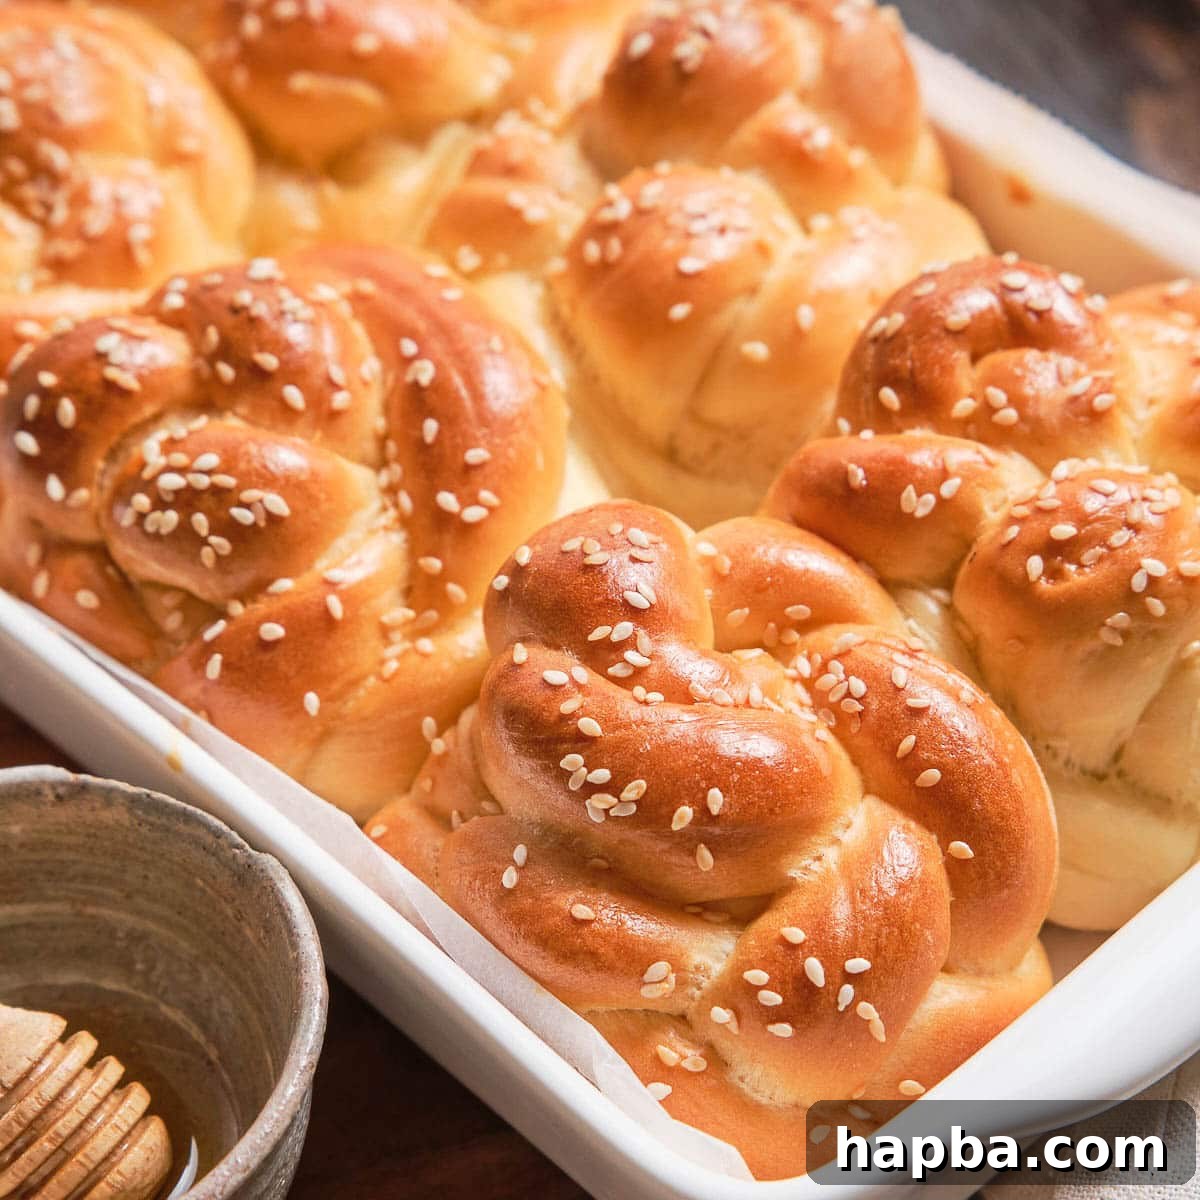
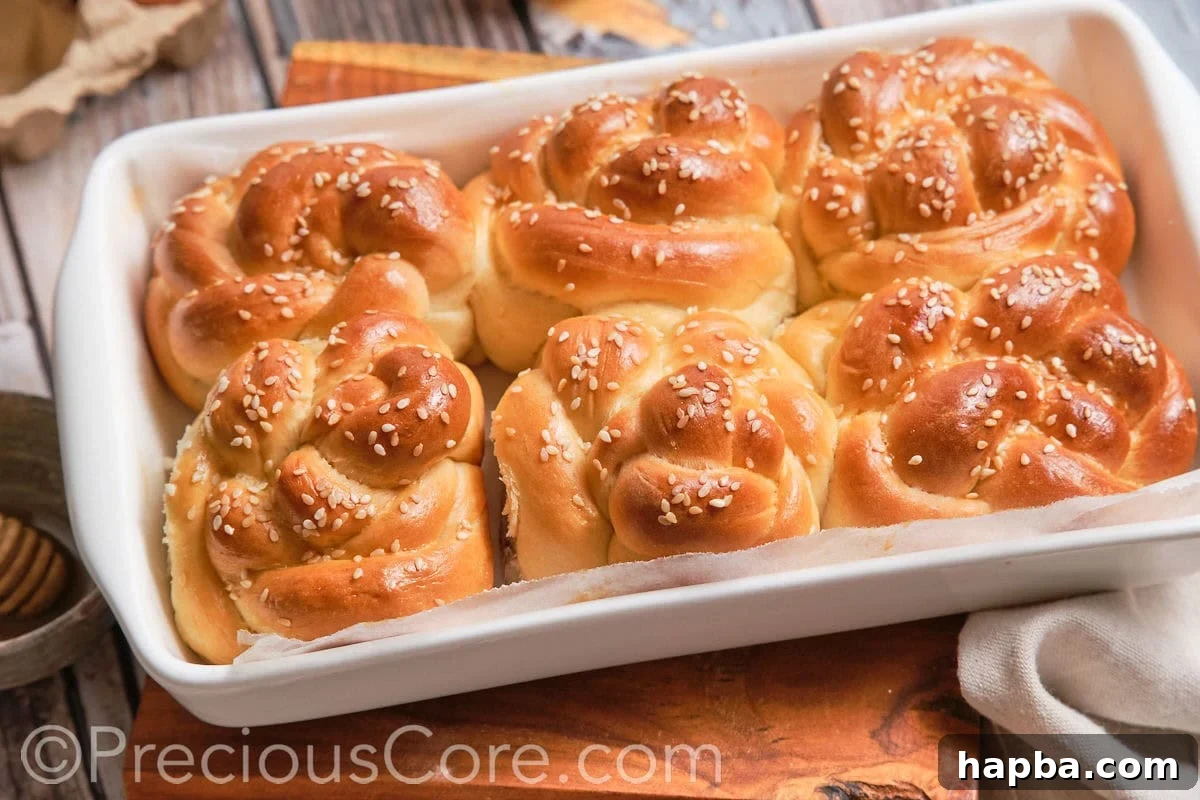
Welcome to the delightful world of homemade baking, where the aroma of freshly baked bread fills your kitchen and warms your soul. Today, we’re diving into the creation of the most exquisite **Challah Dinner Rolls** you’ll ever taste. These aren’t just any dinner rolls; they are a truly special experience, offering a perfect balance of sweetness, richness, and an irresistibly soft, pillowy texture that melts in your mouth. Each roll boasts a gorgeous golden-brown crust, subtly sweet and shining, making them as beautiful to look at as they are delicious to eat.
Imagine pulling one of these warm, braided masterpieces from the oven, its fragrant steam rising gently. Smear it with a dollop of good quality butter, and you’ll discover a culinary delight that transforms an ordinary meal into an extraordinary occasion. These mini challah rolls are more than just a side dish; they are a statement piece, a comforting staple, and a guaranteed crowd-pleaser that will have everyone asking for your secret recipe.
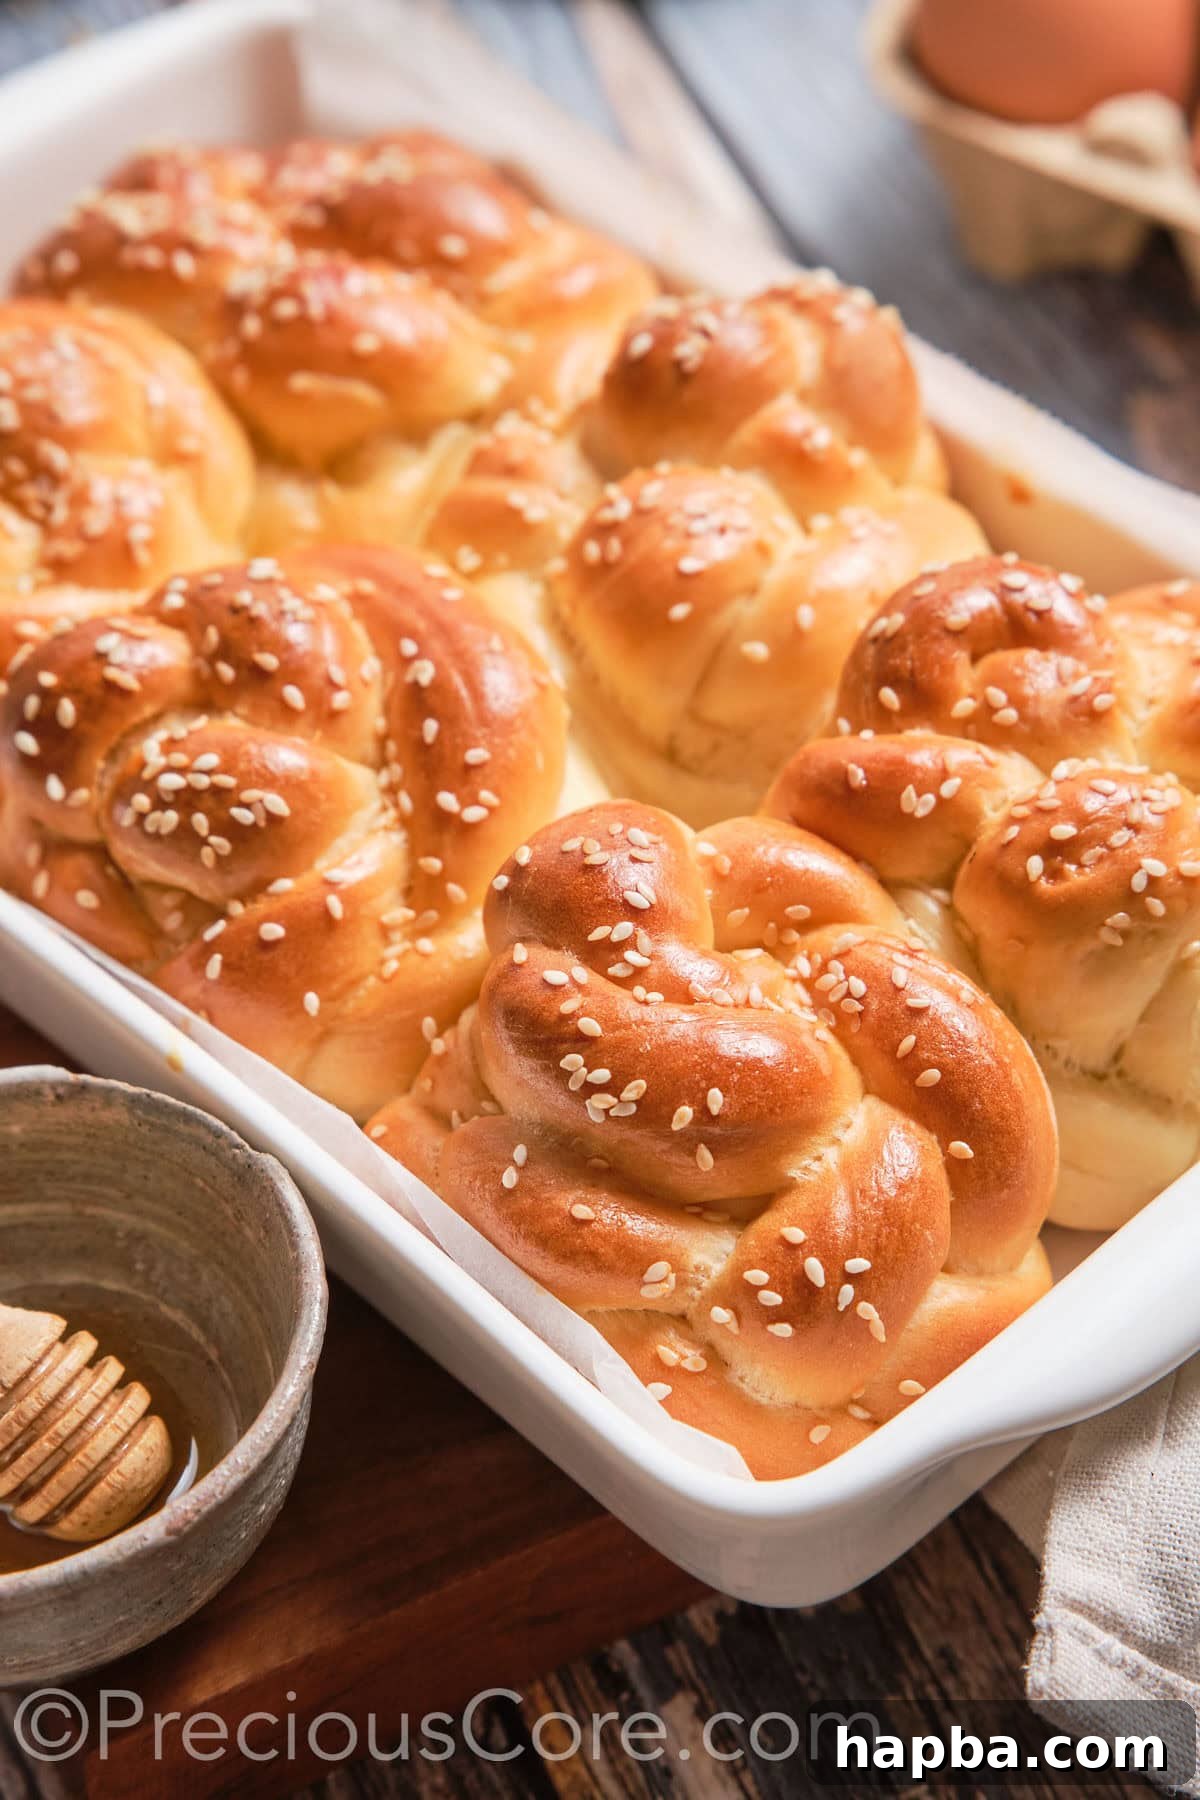
Whether you’re planning an intimate family dinner, hosting a grand holiday feast for Thanksgiving, or celebrating the joyous spirit of Christmas, these charming challah knots are the ideal accompaniment. Their elegant appearance and comforting flavor make them versatile enough for any table, adding a touch of homemade luxury without the complexity. Adapted from a beloved challah bread recipe that has been perfected over many years, these rolls are surprisingly easy to recreate, even for novice bakers. Get ready to transform your home into a fragrant bakery as these golden treasures bake to perfection!
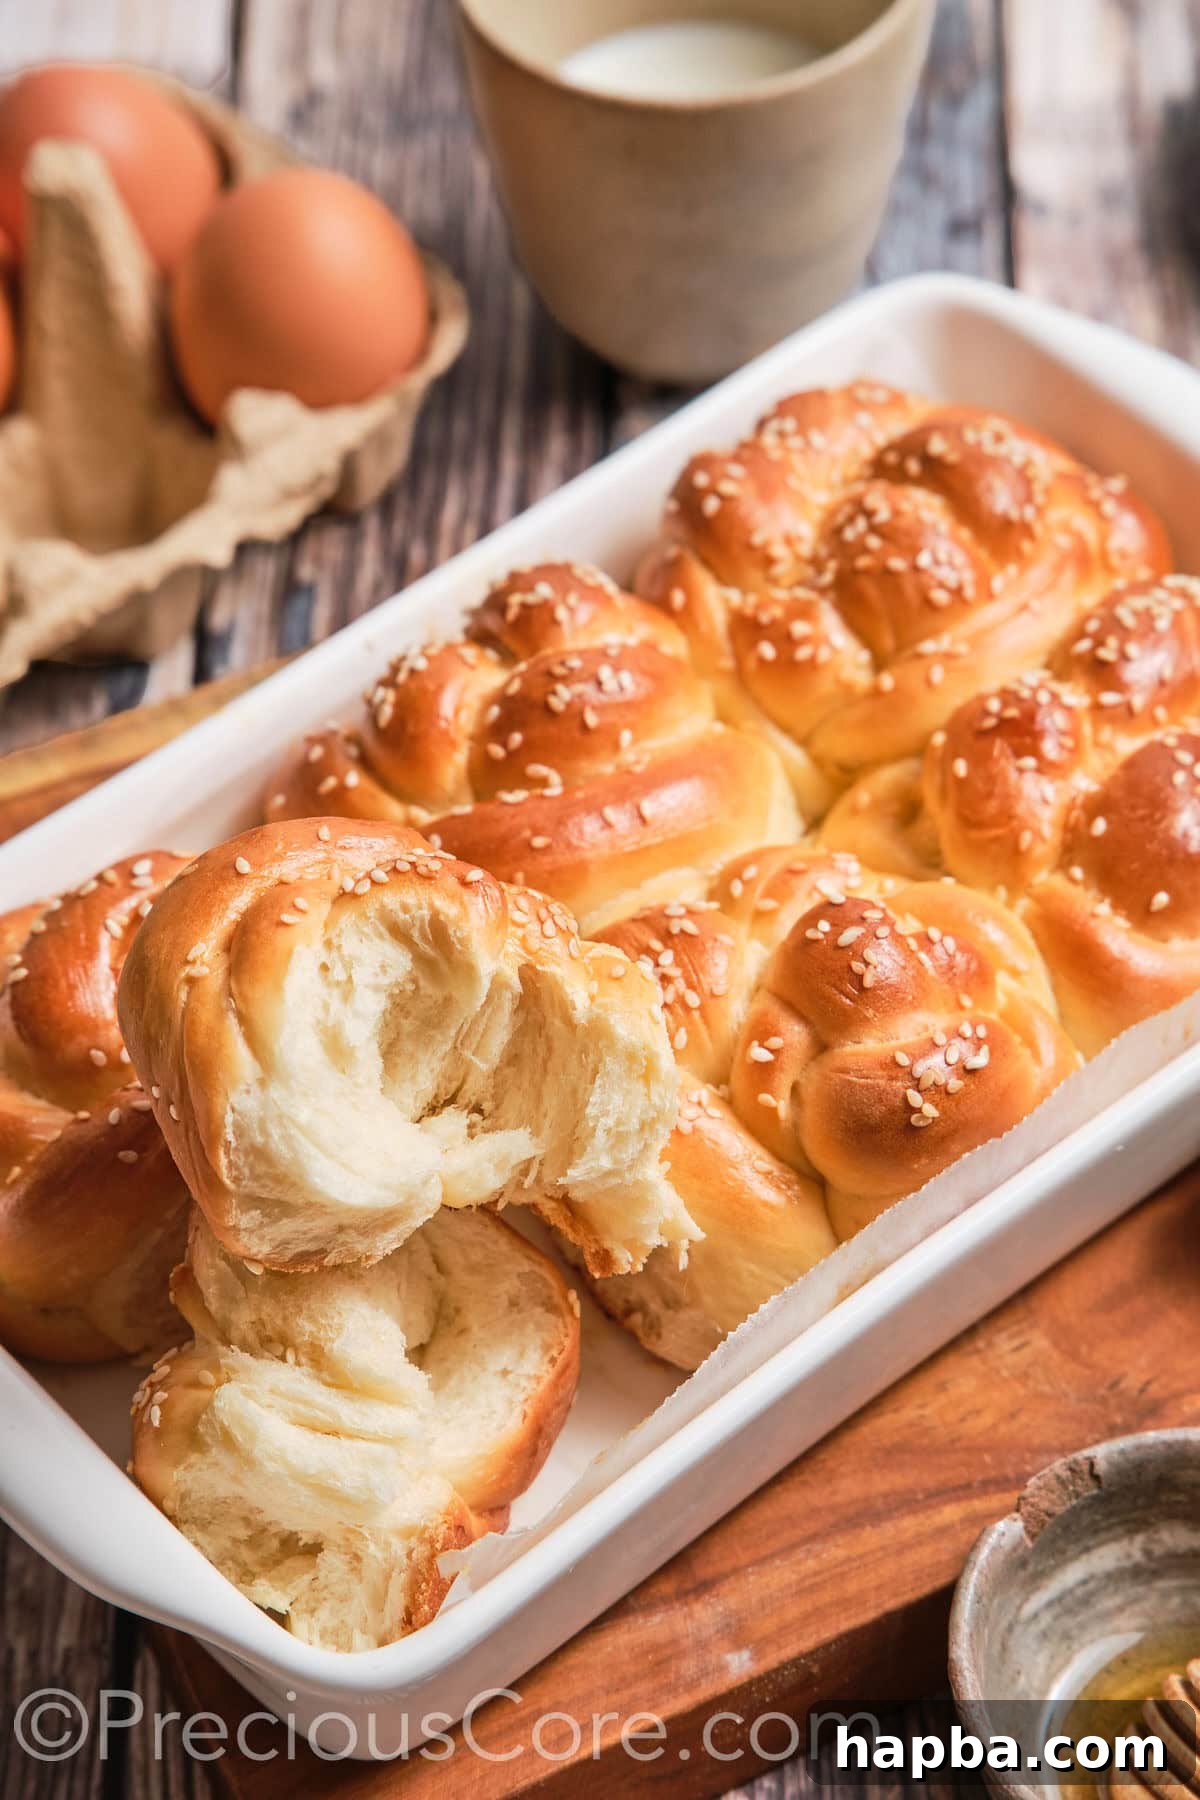
If the joy of baking homemade bread captivates you, we encourage you to explore more of our cherished recipes. Dive into the simplicity of our Easy Homemade French Bread, experience the tender crumb of Milk Bread, or indulge in our classic Sweet Dinner Rolls. Each recipe is designed to bring the warmth and satisfaction of fresh bread to your home.
Why You’ll Adore These Challah Dinner Rolls
Challah dinner rolls are more than just bread; they are an experience. Here’s why this recipe will quickly become a cherished favorite in your kitchen:
- Effortlessly Simple to Create: Don’t let their intricate braided appearance intimidate you. These rolls are remarkably straightforward to make. Our detailed step-by-step photos below will guide you through each stage, making the process enjoyable and accessible, even for beginners. You’ll be amazed at how easily you can achieve such professional-looking results.
- Made with Everyday Ingredients: You won’t need to hunt for exotic items. This recipe relies on common pantry staples you likely already have on hand, ensuring that a craving for warm, sweet challah rolls can be satisfied at a moment’s notice. Quality ingredients, simply combined, yield extraordinary flavor.
- No Fancy Equipment Required: Forget about needing a stand mixer or specialized baking tools. This recipe is designed to be made with basic kitchen essentials and your own two hands, connecting you more intimately with the bread-making process. The satisfaction of kneading dough and watching it transform is unparalleled.
- Unbelievably Versatile: These homemade challah rolls are a chameleon in the kitchen. Enjoy them warm, fresh from the oven, slathered with butter or a dollop of Healthy Strawberry Jam for a sweet treat. Transform leftovers into gourmet delights; they make phenomenal sandwiches, perfect for savory fillings, or even elevate your breakfast by turning them into rich, golden French toast. Their subtly sweet flavor complements both sweet and savory pairings beautifully.
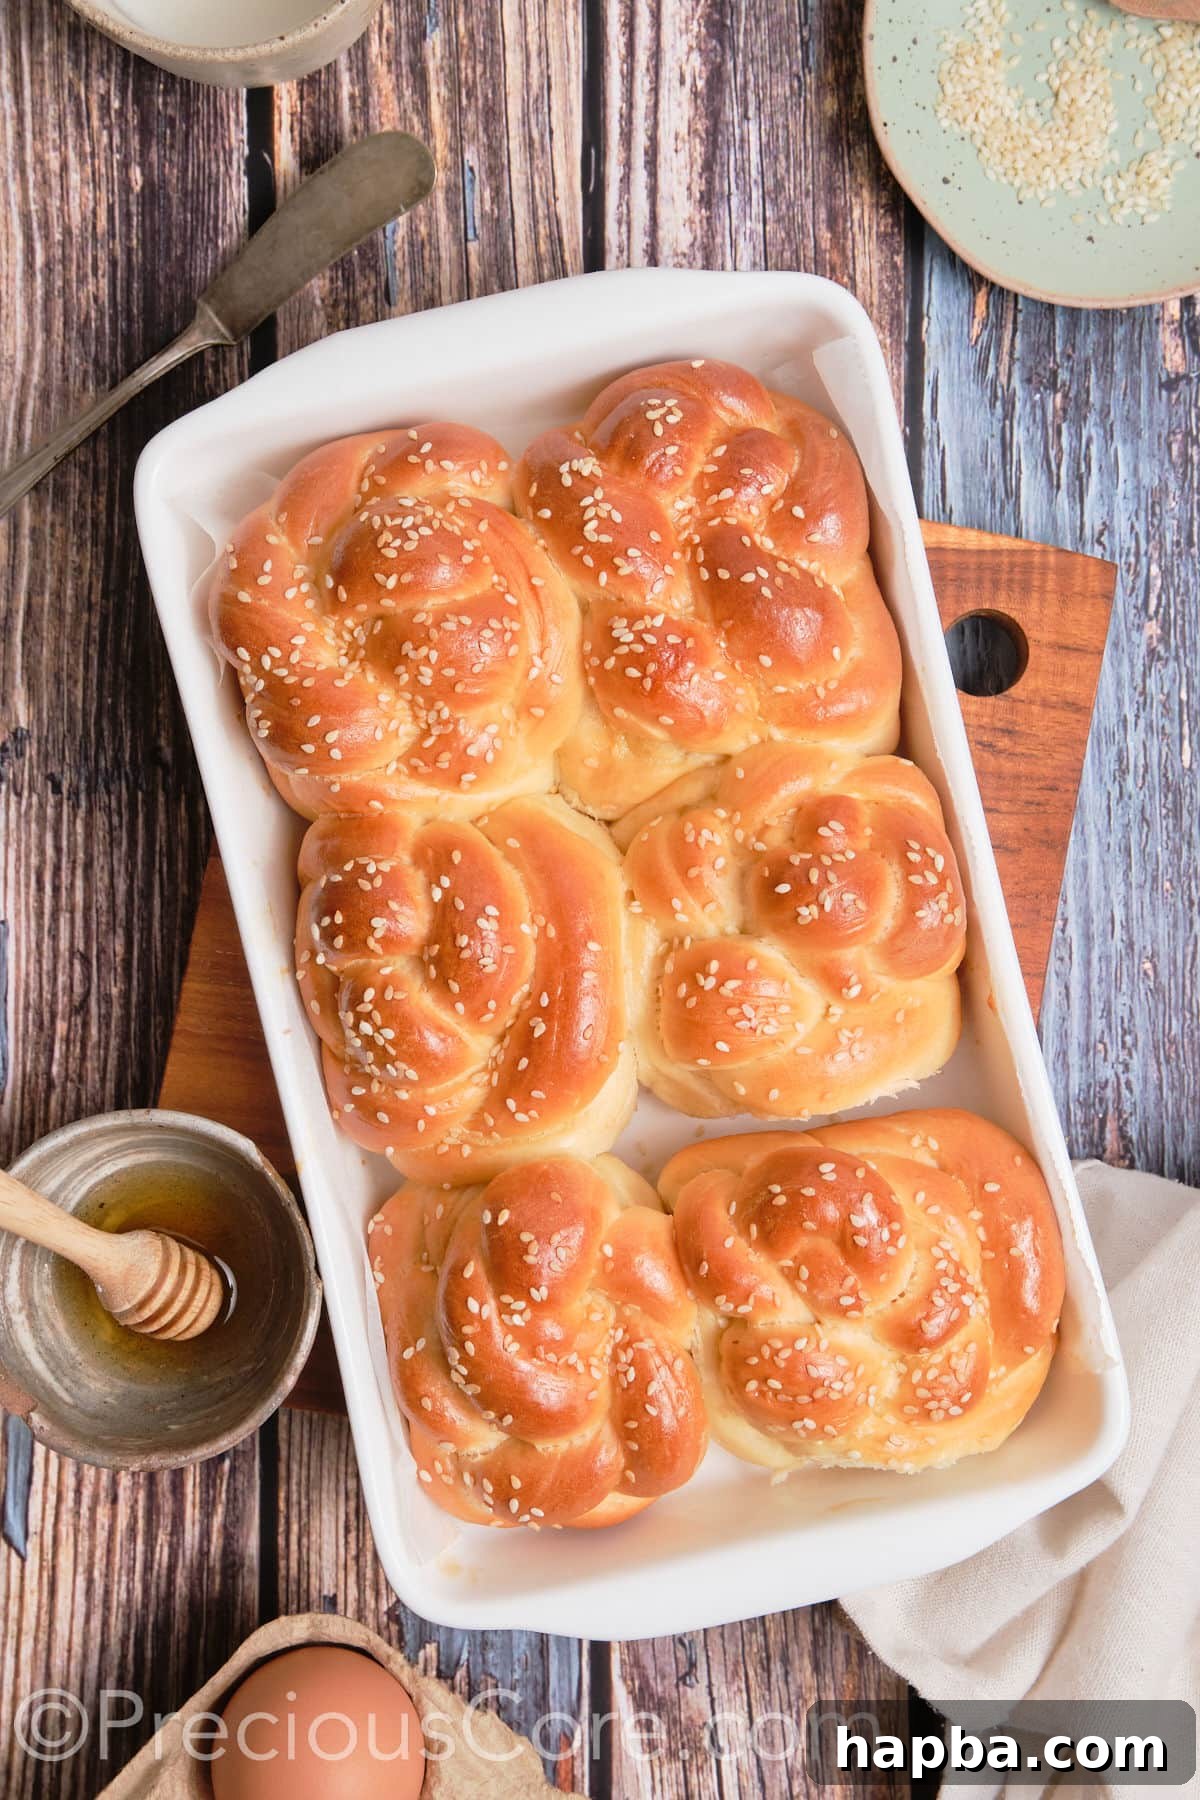
The Charm of Braided Challah Buns
Challah, a traditional Jewish braided bread, has long symbolized warmth, family, and celebration. While often associated with Jewish holidays and weekly Shabbat meals, its rich, slightly sweet flavor and distinctive braided appearance have earned it a cherished place on tables worldwide. There’s a certain magic that surrounds challah, especially during festive seasons like Thanksgiving and Christmas, where its golden hue and comforting texture perfectly embody the spirit of abundance and gathering.
These mini challah rolls are a delightful, approachable version of the classic challah bread. Imagine each guest having their own cute, perfectly portioned mini challah – it adds a special touch to any bread basket! They are crafted from a traditional challah dough, a luscious yeast bread enriched with eggs and a touch of sweetness. The process involves forming the dough into smaller, individual braided knots, which might appear intricate at first glance, but is surprisingly straightforward with a little planning and patience. The result is a visually stunning and incredibly delicious roll that feels both gourmet and homey.
Beyond their holiday appeal, these challah knot rolls are wonderfully versatile for any occasion. Whether you’re orchestrating a grand holiday dinner or simply looking to elevate a weeknight meal, this recipe is one you’ll undoubtedly return to time and again. Its impressive presentation, coupled with its delicious taste and adaptability, makes it a valuable addition to any baker’s repertoire. Plus, any delightful leftovers can be easily transformed into fantastic sandwiches the very next day, extending their enjoyment.
Essential Ingredients for Perfect Challah Rolls
Like many of the world’s most beloved breads, these Challah Dinner Rolls are crafted from a simple yet powerful combination of staple ingredients. When mixed with care and precision, these basic components transform into something truly extraordinary and utterly irresistible. Here’s a closer look at what you’ll need to create these golden, pillowy delights:
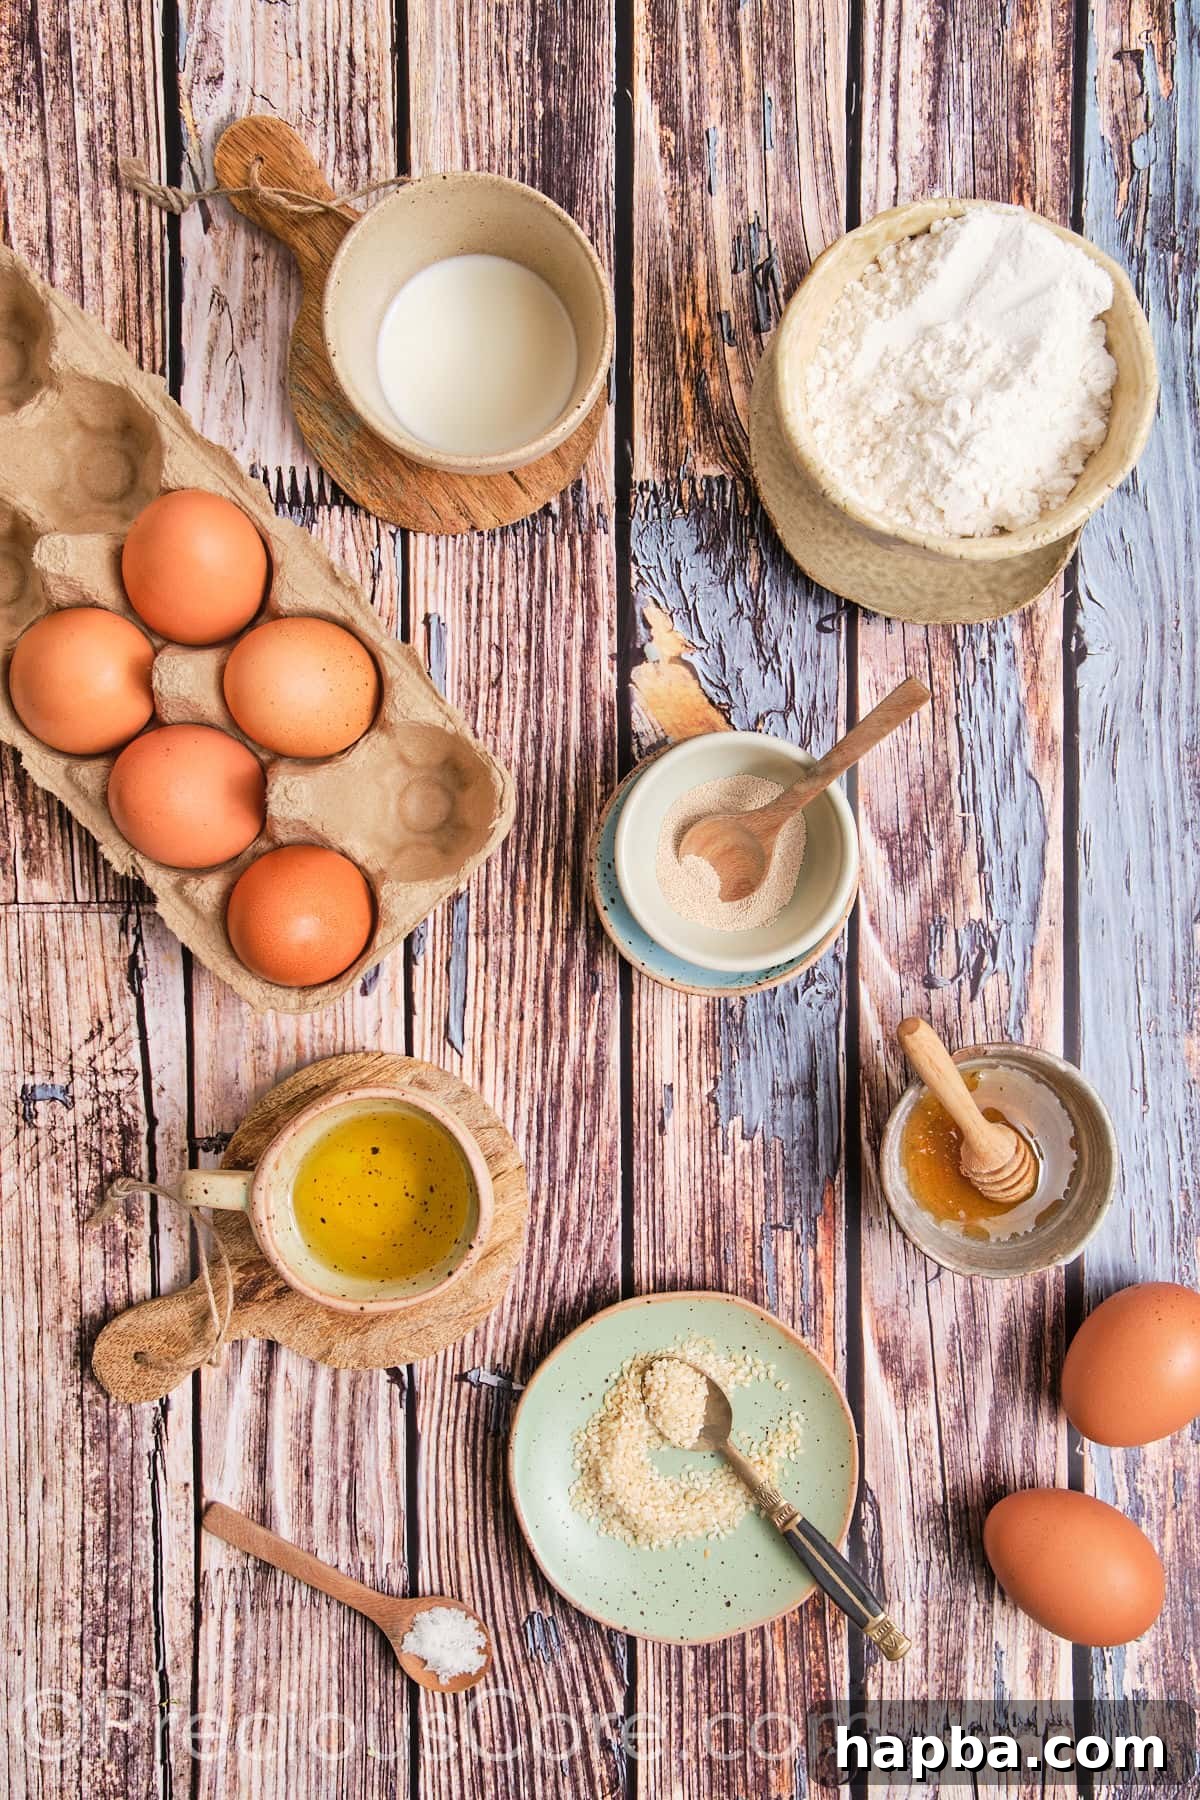
- Flour: The foundation of any great bread. While this recipe utilizes all-purpose flour for its consistent results and accessibility, you can also opt for bread flour. Bread flour has a higher protein content, which contributes to more gluten development, yielding a chewier texture that some bakers prefer in their challah.
- Yeast: The magical leavening agent that gives challah its characteristic light and airy structure. For this recipe, active dry yeast is recommended. It’s absolutely crucial to always check the expiry date of your yeast. Using fresh, active yeast is the most important factor for achieving a proper, vigorous rise in your challah dough, leading to beautifully fluffy rolls.
- Eggs: These are key to challah’s rich flavor, golden color, and tender crumb. Ensure your eggs are at room temperature before mixing. Room temperature eggs emulsify more easily with other ingredients, leading to a smoother, more uniform dough. This recipe calls for two large eggs, which contribute significantly to the dough’s moisture and richness.
- Vegetable Oil: Provides moisture and softness to the rolls without imparting a strong flavor, allowing the natural sweetness of the challah to shine. Vegetable oil was used here, but other neutral-flavored oils like canola oil or a light olive oil would work perfectly as well, offering similar results.
- Honey: The traditional sweetener in Challah bread, honey imparts a unique, subtle floral sweetness and helps achieve that beautiful golden-brown crust. If honey isn’t available or preferred, brown sugar makes an excellent substitute, adding its own depth of flavor.
- Salt: A critical ingredient that might seem counterintuitive in a sweet roll, but salt is essential for balancing the sweetness and enhancing all the other flavors in the dough. It also plays a vital role in controlling yeast activity and strengthening the gluten structure.
- Milk: Contributes to the rolls’ tender texture and adds a layer of richness. Whole milk is highly recommended for the best results due to its fat content, which leads to a more decadent crumb. Alternatively, warm evaporated milk can be used with great success, offering a similar richness and slightly denser texture.
For the complete list of ingredients with precise measurements, please refer to the detailed recipe card found further down the page.
Exciting Challah Dinner Rolls Recipe Variations
One of the beauties of challah dough is its adaptability. While delicious on its own, you can easily customize these rolls to suit your taste preferences or the occasion:
- For Sweeter Rolls: Elevate the sweetness and introduce a warm spice by kneading in one tablespoon of ground cinnamon and a generous handful of plump raisins or dried cranberries into the challah dough during the mixing stage. This creates a more dessert-like roll, perfect for breakfast or brunch.
- For Savory Rolls: Transform these sweet rolls into a savory sensation by incorporating dried herbs such as rosemary, thyme, or oregano, a pinch of garlic powder, or even shredded Parmesan or cheddar cheese into the dough. These are fantastic alongside stews, soups, or roasted meats.
- Cardamom Rolls: For a uniquely aromatic and subtly spicy flavor, add a small amount (about half a teaspoon) of ground cardamom to the dry ingredients. Cardamom lends a delightful warmth and complexity, reminiscent of traditional Nordic pastries.
- Different Toppings: While sesame seeds are classic, feel free to experiment with other toppings. Sprinkle the rolls with crunchy poppy seeds, delicate flaky sea salt for a sweet and salty contrast, or a mix of both before baking to add visual appeal and an extra layer of texture.
Smart Substitutions for Your Challah Rolls
Don’t have every ingredient on hand, or simply want to try a different approach? Here are some excellent substitutions that won’t compromise the deliciousness of your challah rolls:
- Whole Wheat Flour: For a slightly healthier and heartier roll, you can replace up to half of the all-purpose flour with whole-wheat flour. This will add more fiber and a nutty flavor. However, it’s advisable to avoid using 100% whole-wheat flour, as it can result in denser, heavier rolls that lack the characteristic fluffiness of traditional challah. Using bread flour will give you a slightly chewier and more structured roll due to its higher protein content.
- Alternative Oils/Fats: If vegetable oil isn’t your preference, feel free to use canola oil, light olive oil (avoid strong-flavored extra virgin olive oil), or even melted unsalted butter. Using melted butter will impart a richer, more dairy-forward flavor, creating an even more decadent roll.
- Maple Syrup or Agave Nectar: In place of honey, both maple syrup and agave nectar are excellent liquid sweeteners that can be used in equal amounts. Maple syrup will add a distinctive warm, woody flavor, while agave nectar is more neutral, allowing the other flavors to shine.
- Dairy-Free Milk: For a dairy-free version, unsweetened almond milk or soy milk can be substituted for regular milk. Ensure it is warmed to the appropriate temperature for yeast activation.
P.S. Please note that the process photos in this guide show six rolls being made, which represents half of the recipe. The complete recipe provided will yield a full batch of 12 beautiful challah dinner rolls.
How to Craft Perfect Homemade Challah Rolls
Creating these golden, tender challah rolls is a rewarding process that breaks down into a few manageable steps. Follow these instructions carefully, and you’ll be enjoying warm, homemade bread in no time!
Step 1: Activate Your Yeast with Warm Milk
Begin by gently warming your milk until it reaches an ideal temperature of about 105-115°F (40-46°C). It should feel pleasantly warm, not hot, to the touch. Pour the warmed milk into a large mixing bowl. Sprinkle the active dry yeast over the milk, followed by a small pinch of sugar (this sugar acts as food for the yeast, helping it to activate). Give it a gentle stir to combine, then set it aside for 5-10 minutes. During this time, the mixture should become visibly foamy and bubbly, indicating that your yeast is alive and ready to work its magic. This crucial step ensures a good rise for your dough.
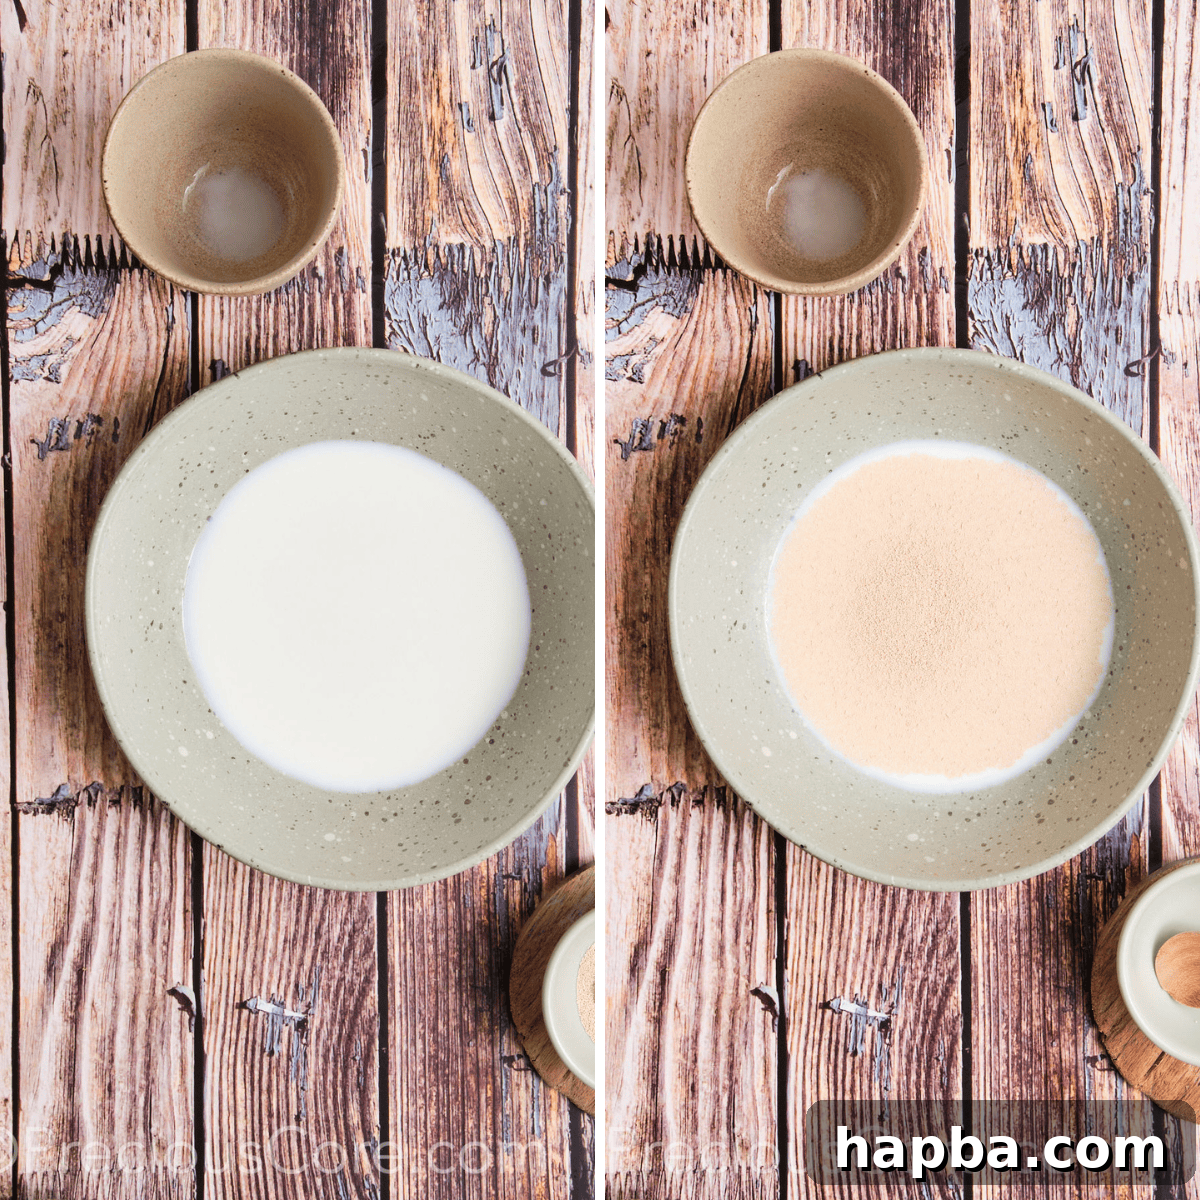
Yeast Check: It’s absolutely vital not to use expired yeast, as this will hinder your dough from rising properly, resulting in dense rolls. To quickly check if your yeast is active, take about ¼ teaspoon of dry yeast and add it to ¼ cup of lukewarm water (around 110°F or 43°C) with a pinch of sugar. If, after 10 minutes, the mixture is frothy and slightly puffy, your yeast is active and ready to use. If there’s no bubbling or foam, your yeast is likely expired, and you’ll need a fresh batch.
Step 2: Incorporate the Enriching Wet Ingredients
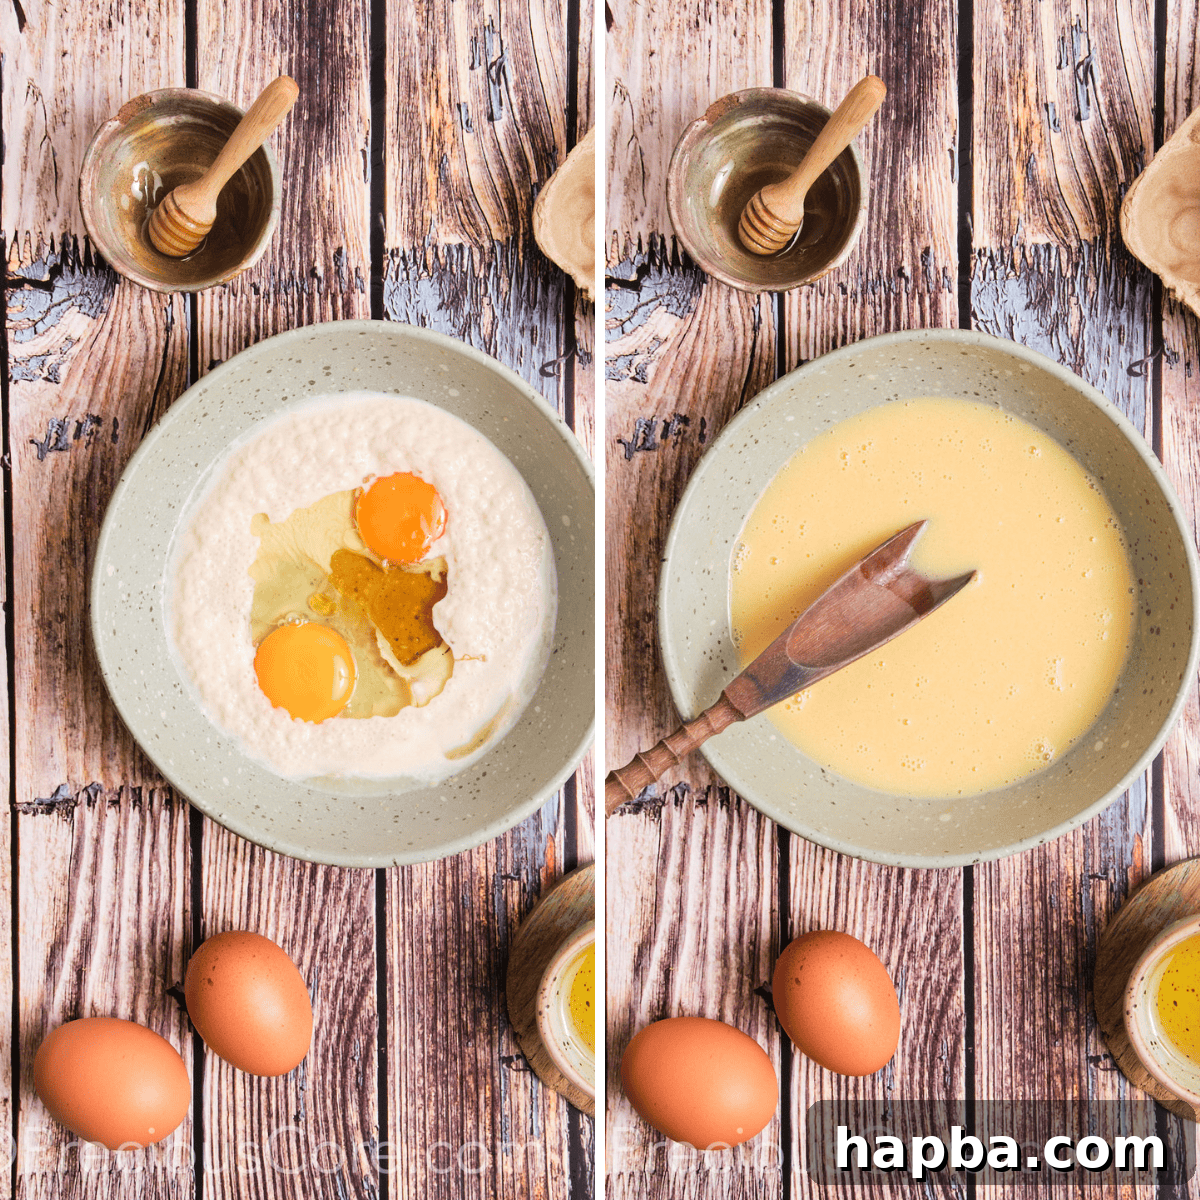
Once your yeast mixture is beautifully foamy, signaling its vitality, it’s time to add the enriching wet ingredients. Crack in the two room-temperature large eggs, pour in the vegetable oil, and drizzle in the honey. Using a whisk or a sturdy spoon, mix all these ingredients thoroughly until they are well combined and the mixture appears smooth and uniform. This blend of fats and sweeteners is what gives challah its signature rich flavor and tender texture.
Step 3: Combine Dry Ingredients and Knead the Dough
Gradually add the all-purpose flour to the wet mixture in the bowl, along with the salt. Begin mixing with clean hands or a sturdy spoon. As you combine, the dough will start to come together, forming a shaggy mass. Once the dough has mostly absorbed the flour, turn it out onto a lightly floured, clean work surface. Knead the dough vigorously for about 8-10 minutes, or until it becomes smooth, elastic, and no longer sticky. A well-kneaded dough will spring back when gently poked, indicating proper gluten development, which is essential for fluffy rolls.
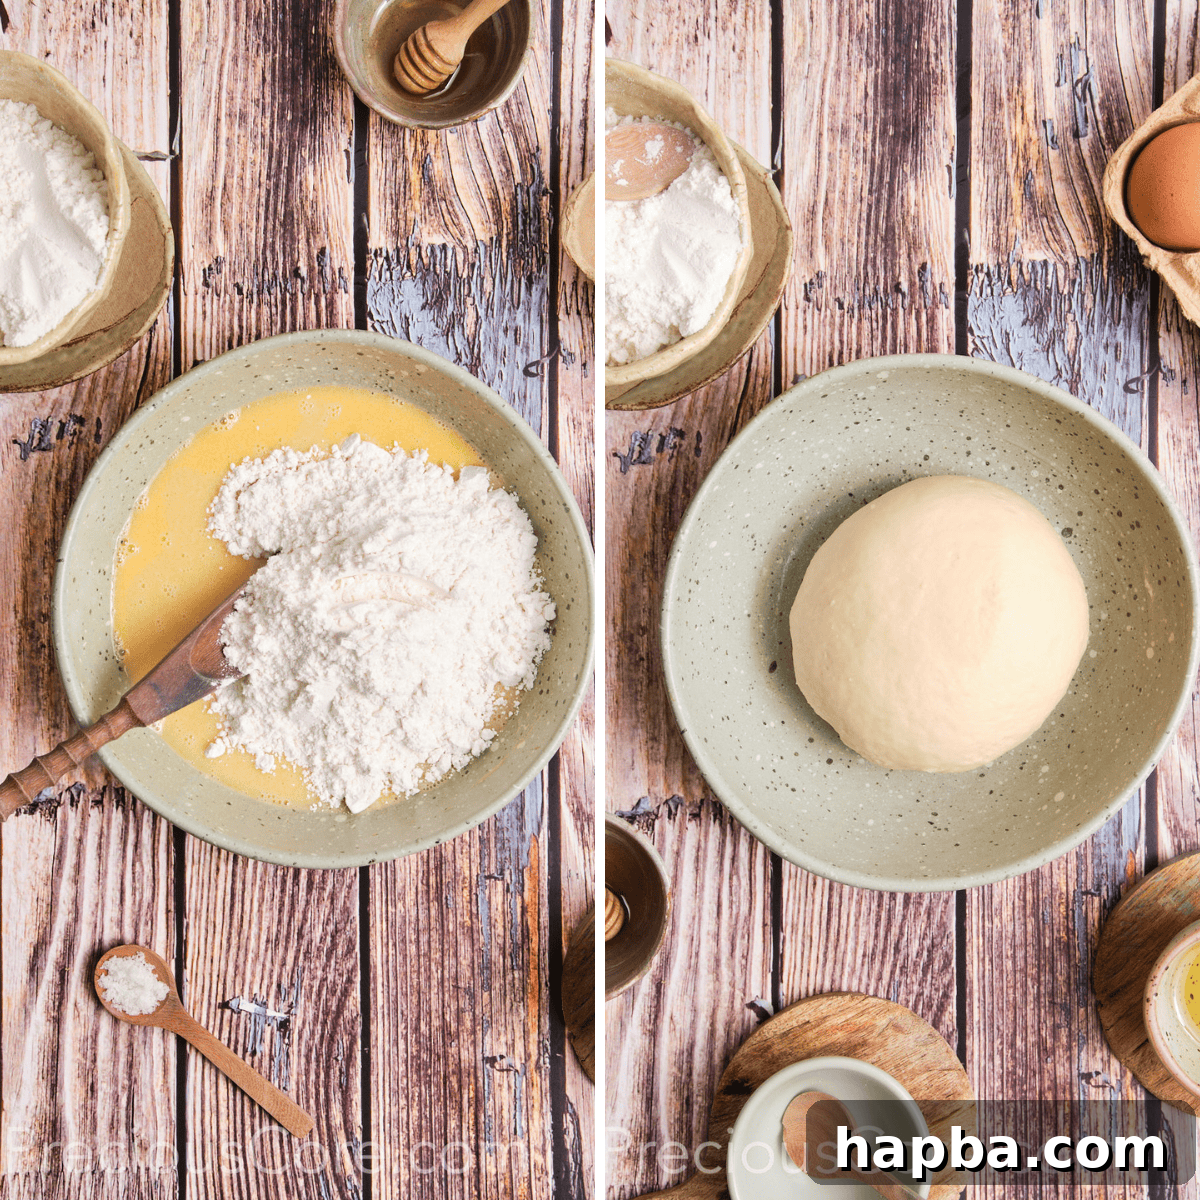
Step 4: The Crucial First Rise (Bulk Fermentation)
Lightly grease a large bowl with a little oil. Place the kneaded challah dough into the bowl, turning it once to coat all sides. Cover the bowl tightly with a clean kitchen towel or plastic wrap to prevent the dough from drying out. Transfer the covered bowl to a warm, draft-free place in your kitchen. Allow the dough to rise for 1.5-2 hours, or until it has visibly doubled in size. This first rise, known as bulk fermentation, is vital for developing the dough’s flavor and achieving its characteristic airy texture.
Step 5: Deflate, Divide, and Prepare for Shaping
Once the dough has successfully doubled in size, gently punch it down to release the trapped gases. This step helps to redistribute the yeast and creates a finer crumb. Turn the dough out onto a lightly floured, clean work surface. Gently shape the challah dough into a long, even log. Using a sharp knife or a bench scraper, cut the log into 12 equal portions. For precise and uniform rolls, we highly recommend weighing each piece of dough on a kitchen scale to ensure consistent size and even baking.
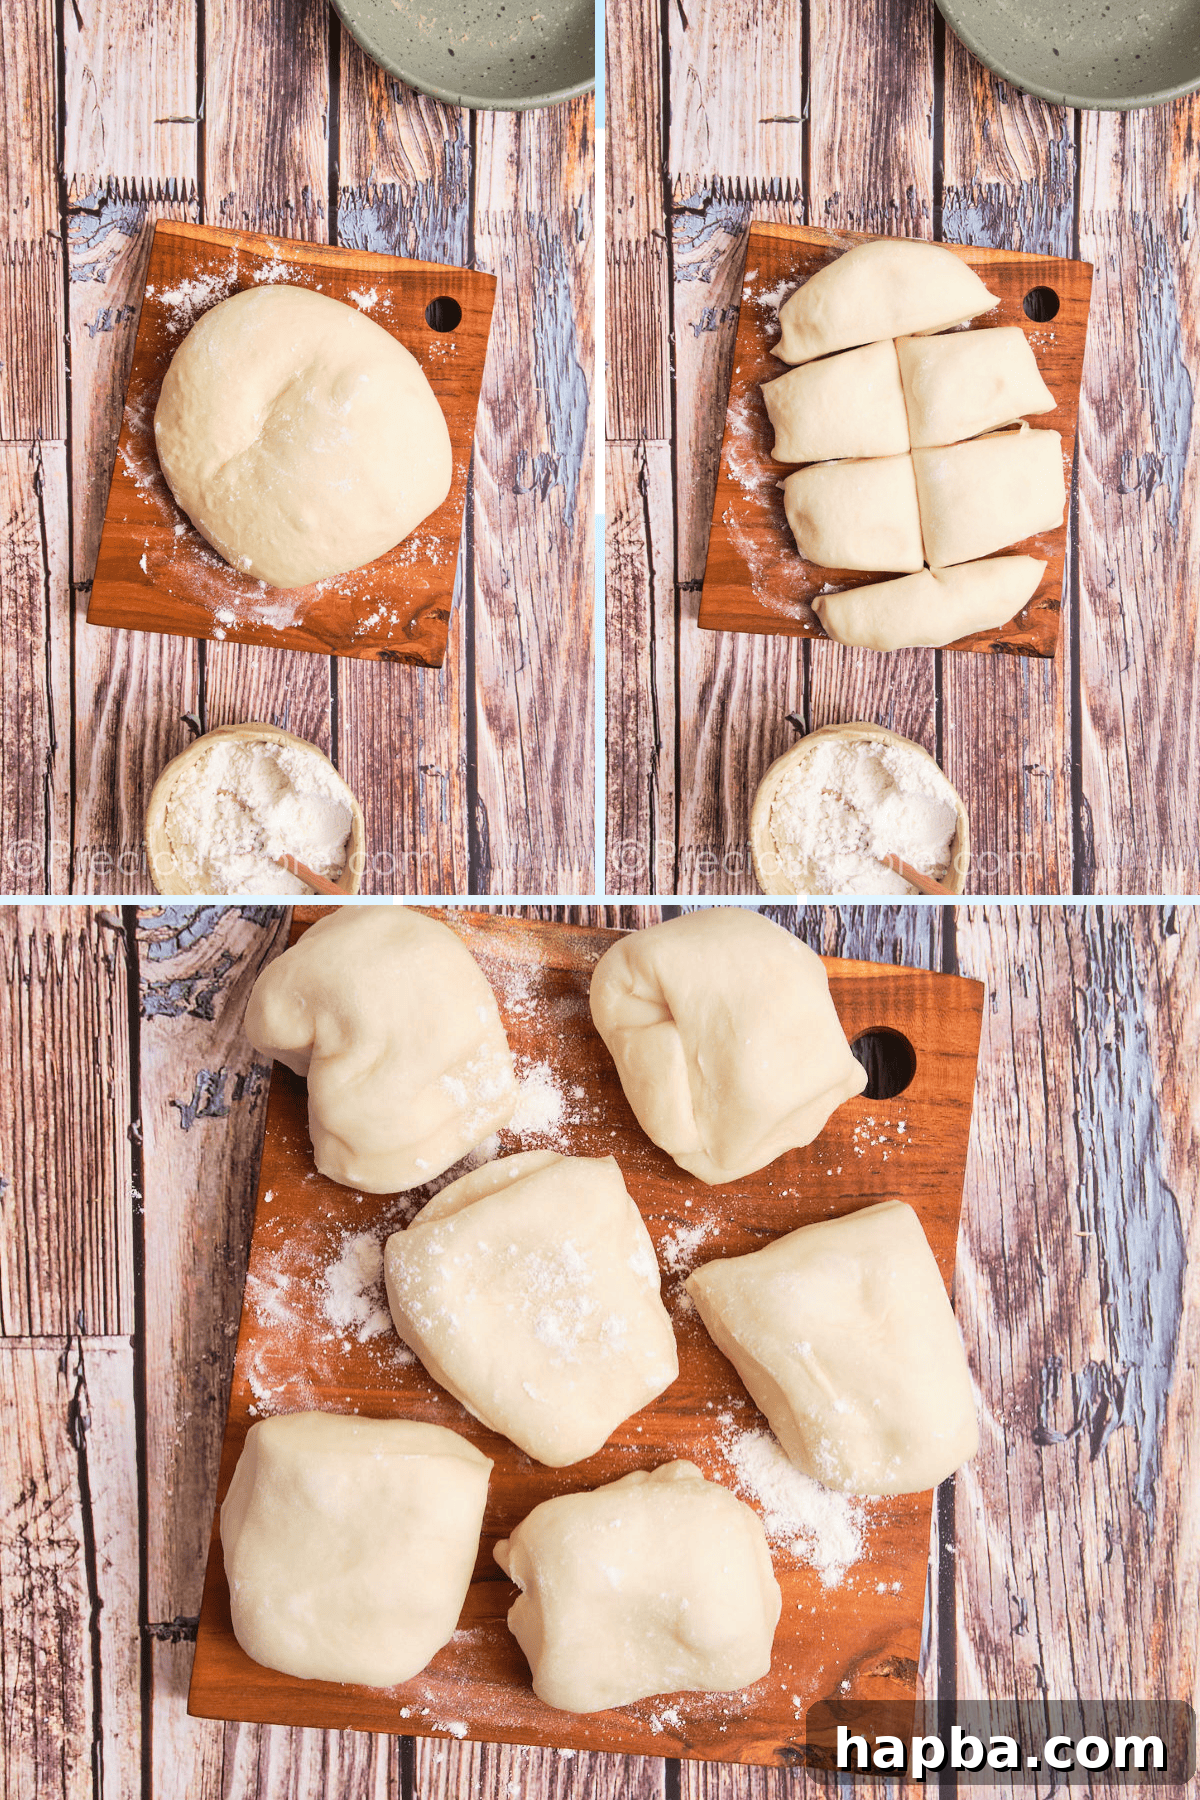
Step 6: Master the Art of Braiding Your Challah Rolls
Take each of the 12 dough portions and divide it into three smaller, equal pieces. Roll each of these smaller pieces into a long, thin rope, approximately 8-10 inches in length, tapering slightly at the ends. Arrange three ropes side by side, pressing them firmly together at one end to create an anchor. Now, braid them just like you would braid hair: cross the right strand over the middle, then the left strand over the new middle. Continue this pattern until you reach the end, then firmly pinch the tips together to seal. Gently tuck both ends of the braid underneath the roll to create a neat, round braided bun shape. Carefully arrange the shaped challah rolls onto a baking sheet that has been lined with parchment paper, leaving ample space between each roll for expansion.
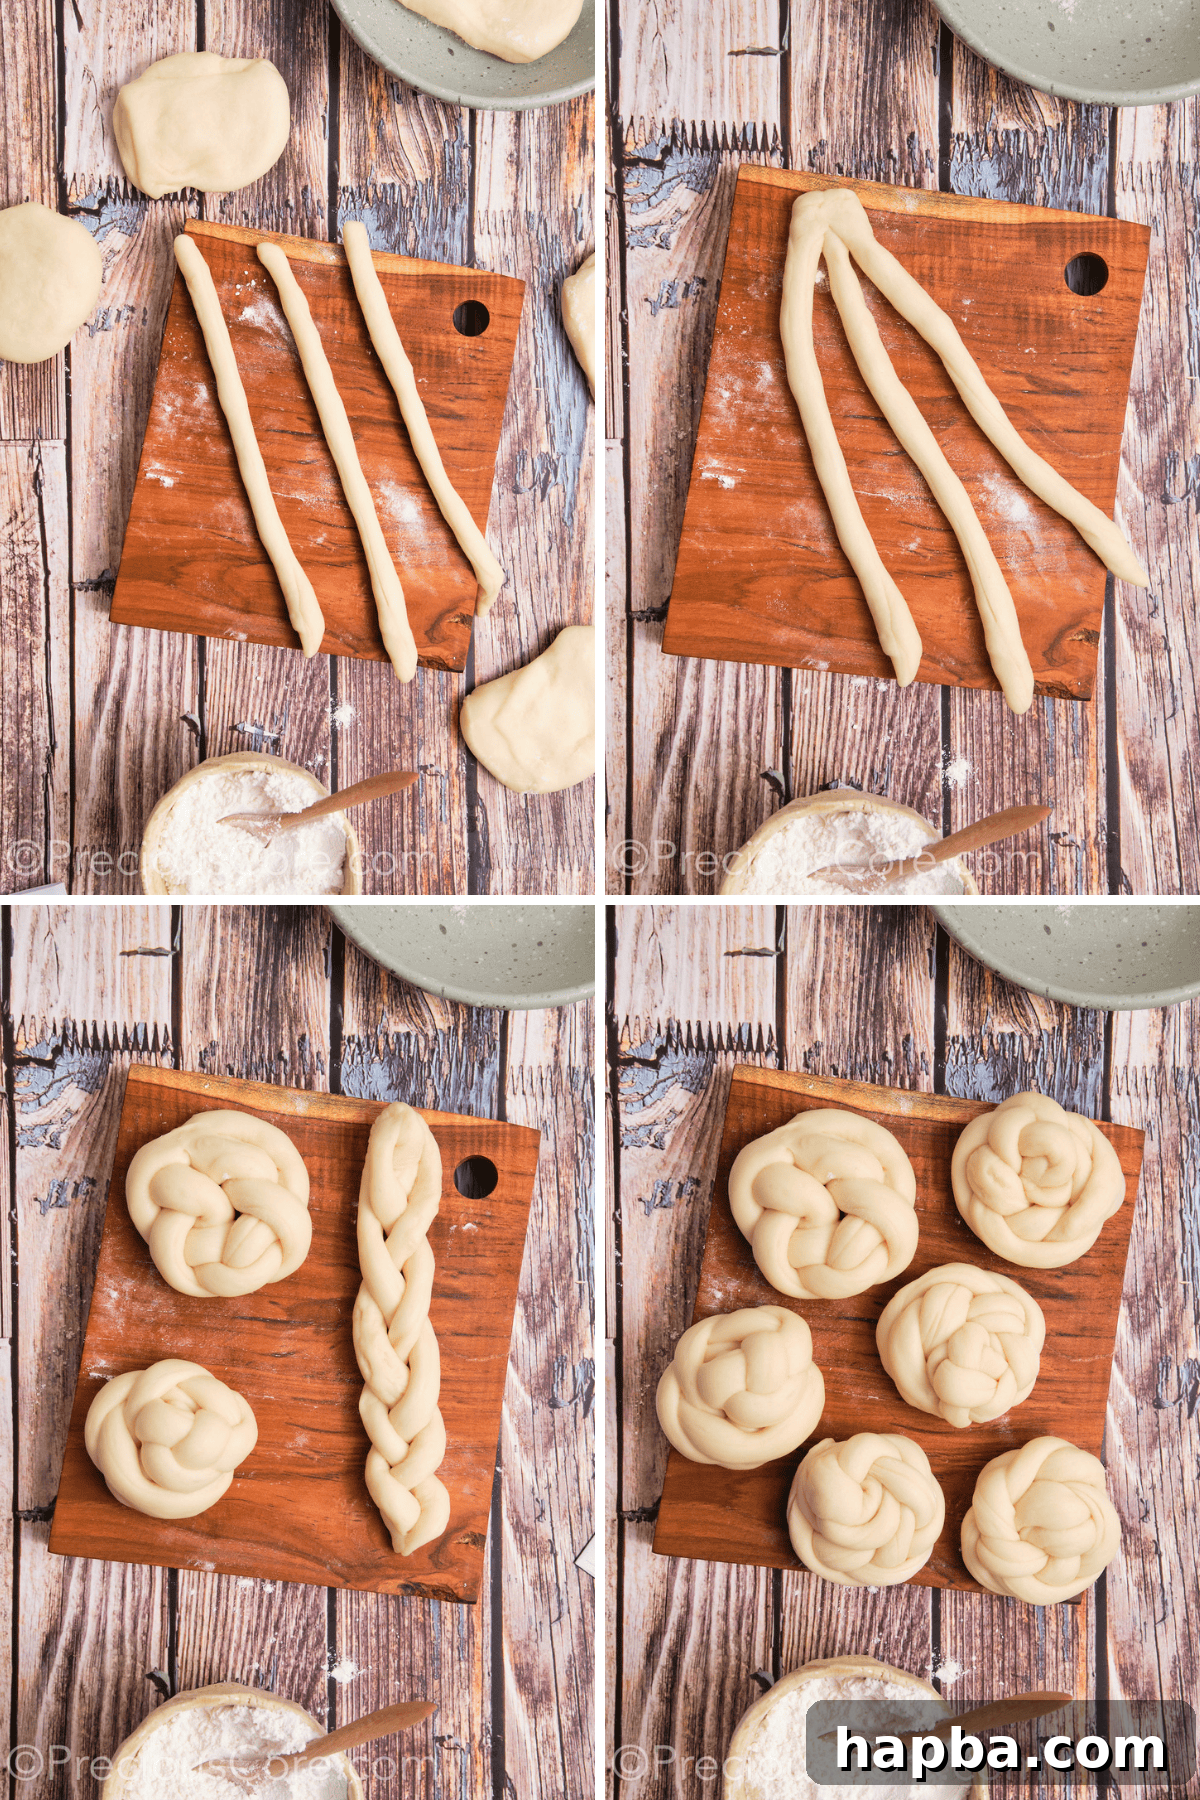
Step 7: The Final Rise (Proofing)
Once all your rolls are beautifully braided and arranged on the baking sheet, lightly cover them with a clean kitchen towel. Return the baking sheet to a warm, draft-free spot. Allow the rolls to undergo their second rise, or proofing, for at least 30 minutes, or until they have nearly doubled in size and appear visibly puffy. This final rise is crucial for achieving that light, airy texture and ensures the rolls are at their optimal state for baking.
Step 8: The Golden Touch – Egg Wash and Toppings
While your rolls are undergoing their second rise, preheat your oven to 350°F (180°C). In a small bowl, whisk one large egg (or just an egg yolk for a deeper color) with a teaspoon of water to create an egg wash. Once the rolls have sufficiently risen, very gently brush the tops of each challah roll with the egg wash using a pastry brush. Be careful not to deflate the delicate dough. This egg wash is what will give your rolls their gorgeous, glossy, golden-brown crust. For an authentic touch, generously sprinkle the tops with sesame seeds or poppy seeds.
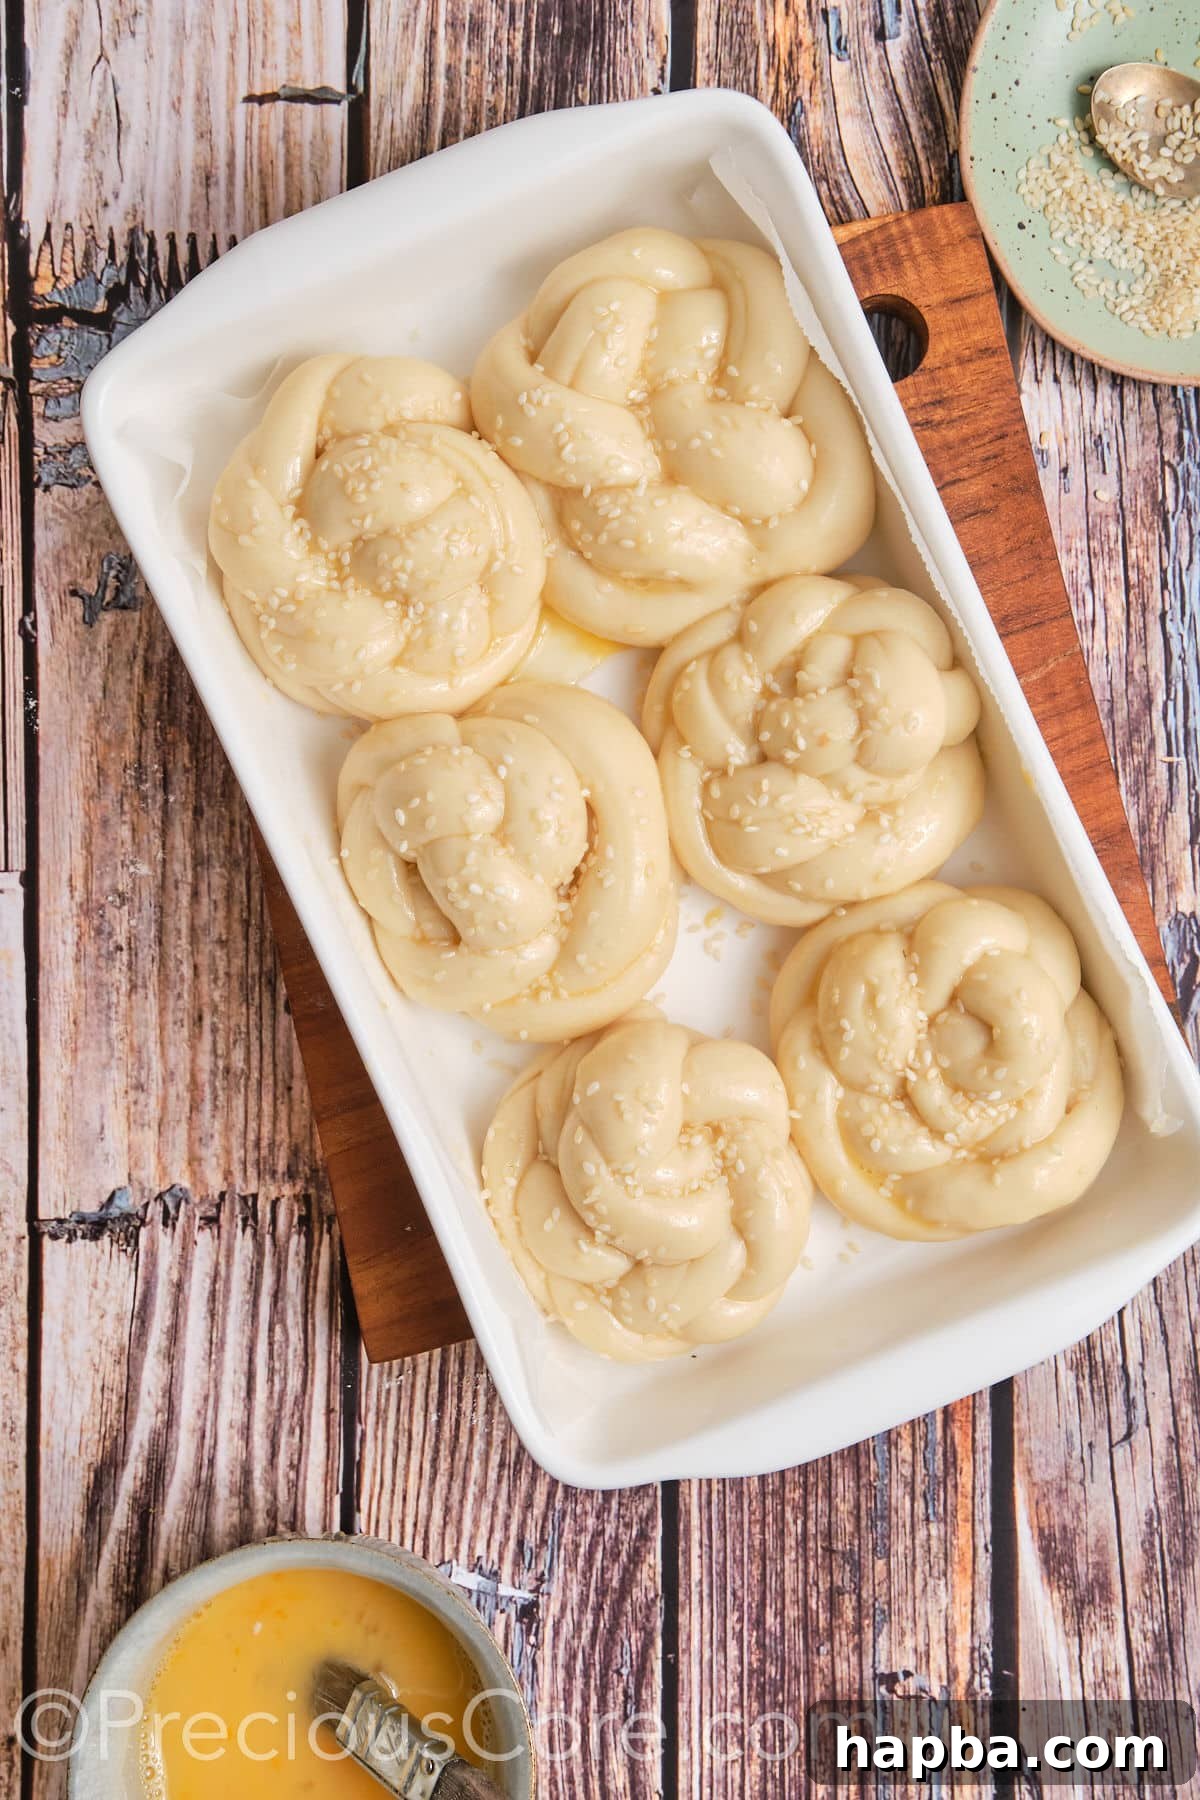
Step 9: Bake to Golden Perfection
Carefully transfer the baking sheet with your prepared challah rolls to the preheated oven. Bake for 20-25 minutes, or until the rolls have achieved a beautiful, rich golden-brown color on top and sound hollow when gently tapped on the bottom. The rich aroma filling your kitchen will be your first clue that they’re almost ready! Keep an eye on them towards the end of baking to prevent over-browning.
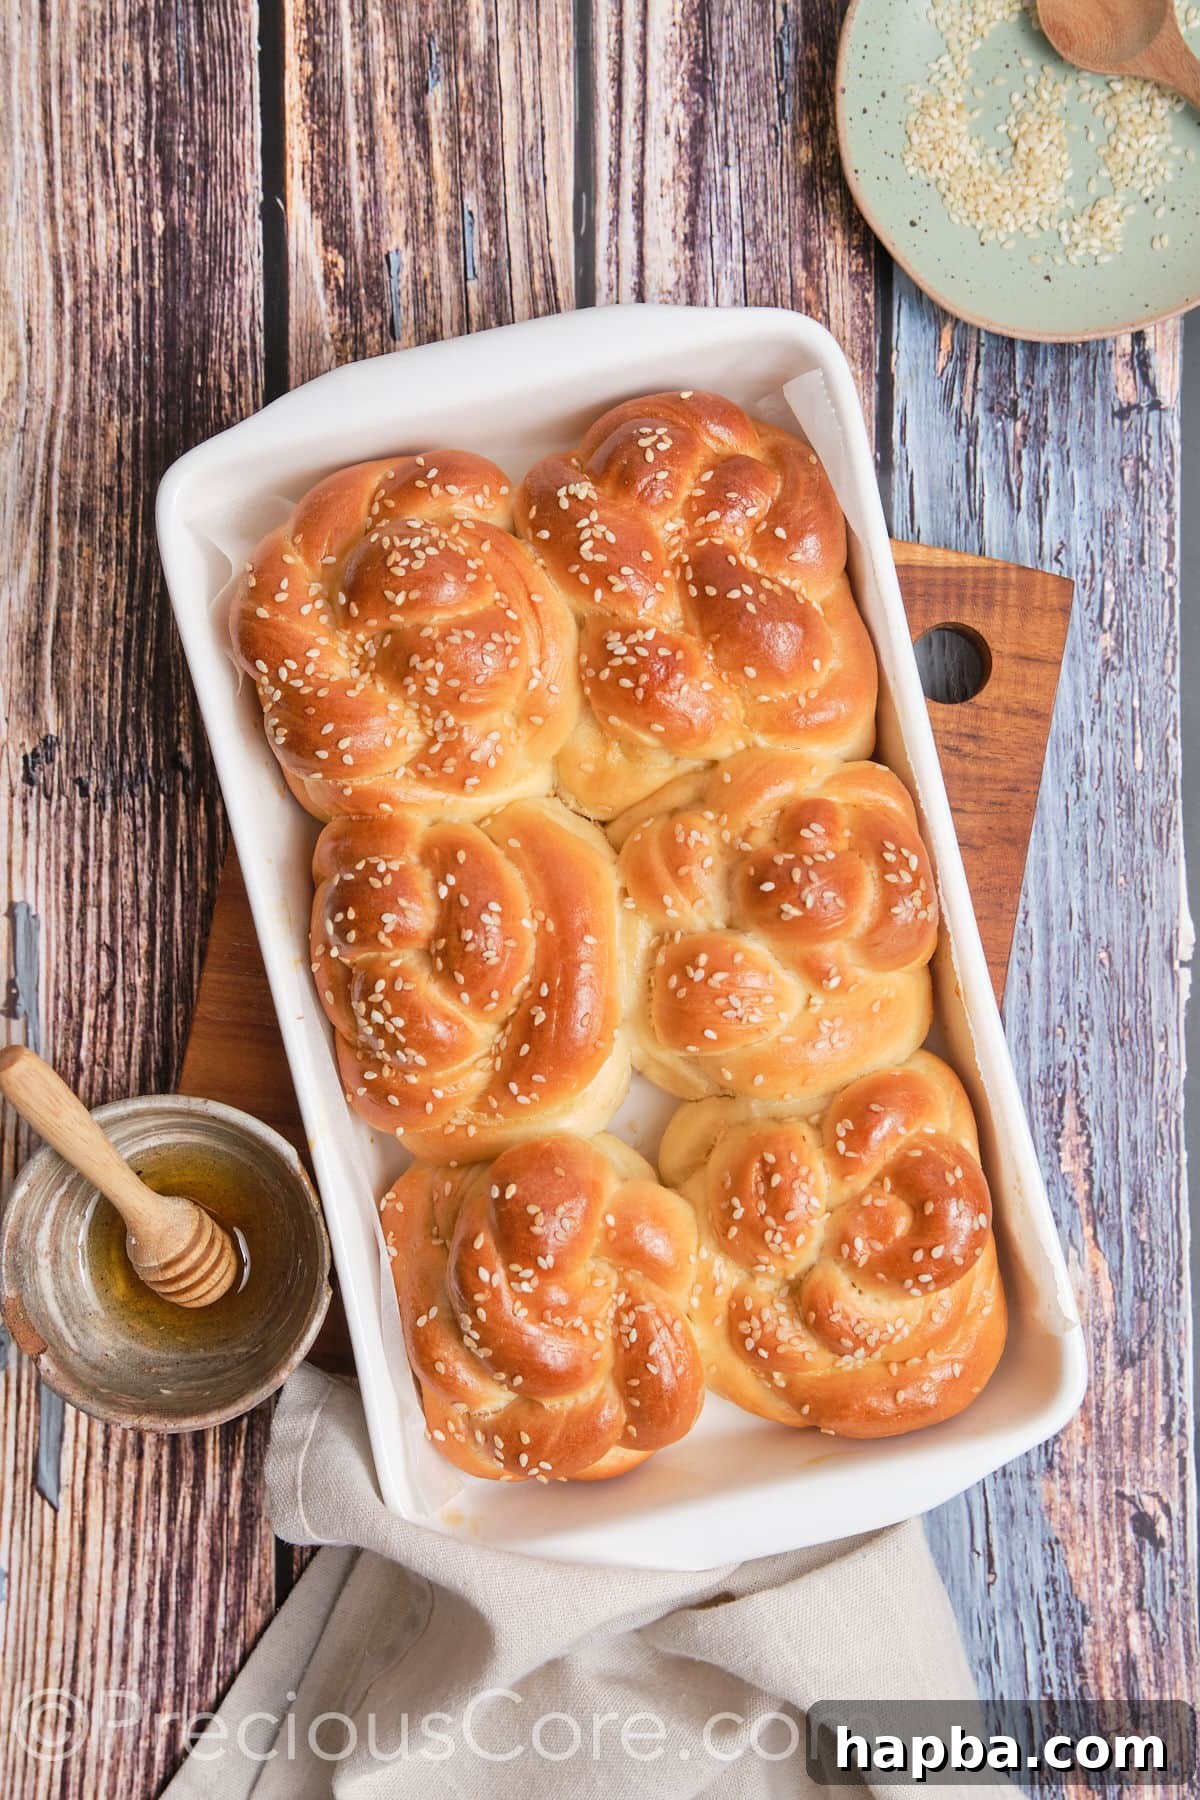
And there you have it – a batch of irresistible, homemade challah rolls, ready to grace your table! For those planning ahead, especially for big holidays like Thanksgiving, you can prepare these rolls in advance. Simply shape the rolls as instructed, then freeze them individually on a baking sheet until solid. Once frozen, transfer them to a freezer-safe ziploc bag and store them for up to a month.
When you’re ready to bake, place the frozen rolls on a parchment-paper-lined baking sheet and thaw them overnight in the refrigerator. The next morning, allow them to come to room temperature and complete their second rise (about 1-2 hours) before brushing them with egg wash and baking as usual. This makes holiday meal prep a breeze!
If you’re a true enthusiast of dinner rolls, don’t miss out on our phenomenal Garlic Butter Rolls – another absolute favorite!
Patience is Key! The most critical step in achieving beautifully soft and airy challah rolls is allowing the dough ample time to rise. Don’t rush this process! Ensure your dough, during both the first and second rises, doubles in size. This generous rising period allows the yeast to work its magic fully, developing the gluten structure and creating the perfect light, tender texture that makes challah so special.
Baking Tips from the Experts
To ensure your challah dinner rolls turn out perfectly every time, keep these expert tips in mind:
- Choose the Right Flour: For optimal texture and ease of handling, I highly recommend using either good quality all-purpose flour or bread flour for your challah dough. Bread flour, with its higher gluten content, produces a more elastic and resilient dough. This makes it easier to knead and shape, especially when forming those beautiful braids, and results in a slightly chewier yet tender crumb.
- Mind Your Flour Dusting: When shaping your rolls, a light dusting of flour on your work surface is helpful to prevent sticking. However, be cautious not to add too much additional flour to the dough. Excess flour can be absorbed into the dough, leading to a dry and tough final product, compromising that desirable pillowy texture. Use just enough to prevent sticking.
- For Ultimate Decadence: If you’re aiming for an even richer, more tender, and luxuriously soft challah roll, try incorporating two extra egg yolks into your dough alongside the whole eggs. Egg yolks add extra fat and richness, resulting in a deeper golden color and an incredibly moist, melt-in-your-mouth crumb that elevates these rolls to a truly gourmet level.
- Avoid Drafts During Rising: Yeast doughs are sensitive to cold drafts, which can slow down or even halt the rising process. Find a consistently warm, draft-free spot in your kitchen for your dough to rise, such as inside a turned-off oven (with the light on), or a warm pantry.
- Don’t Overbake: Challah rolls can quickly dry out if overbaked. Keep an eye on them, and once they reach a beautiful golden brown and sound hollow when tapped, they are likely done. A digital thermometer inserted into the center should read around 200-210°F (93-99°C).
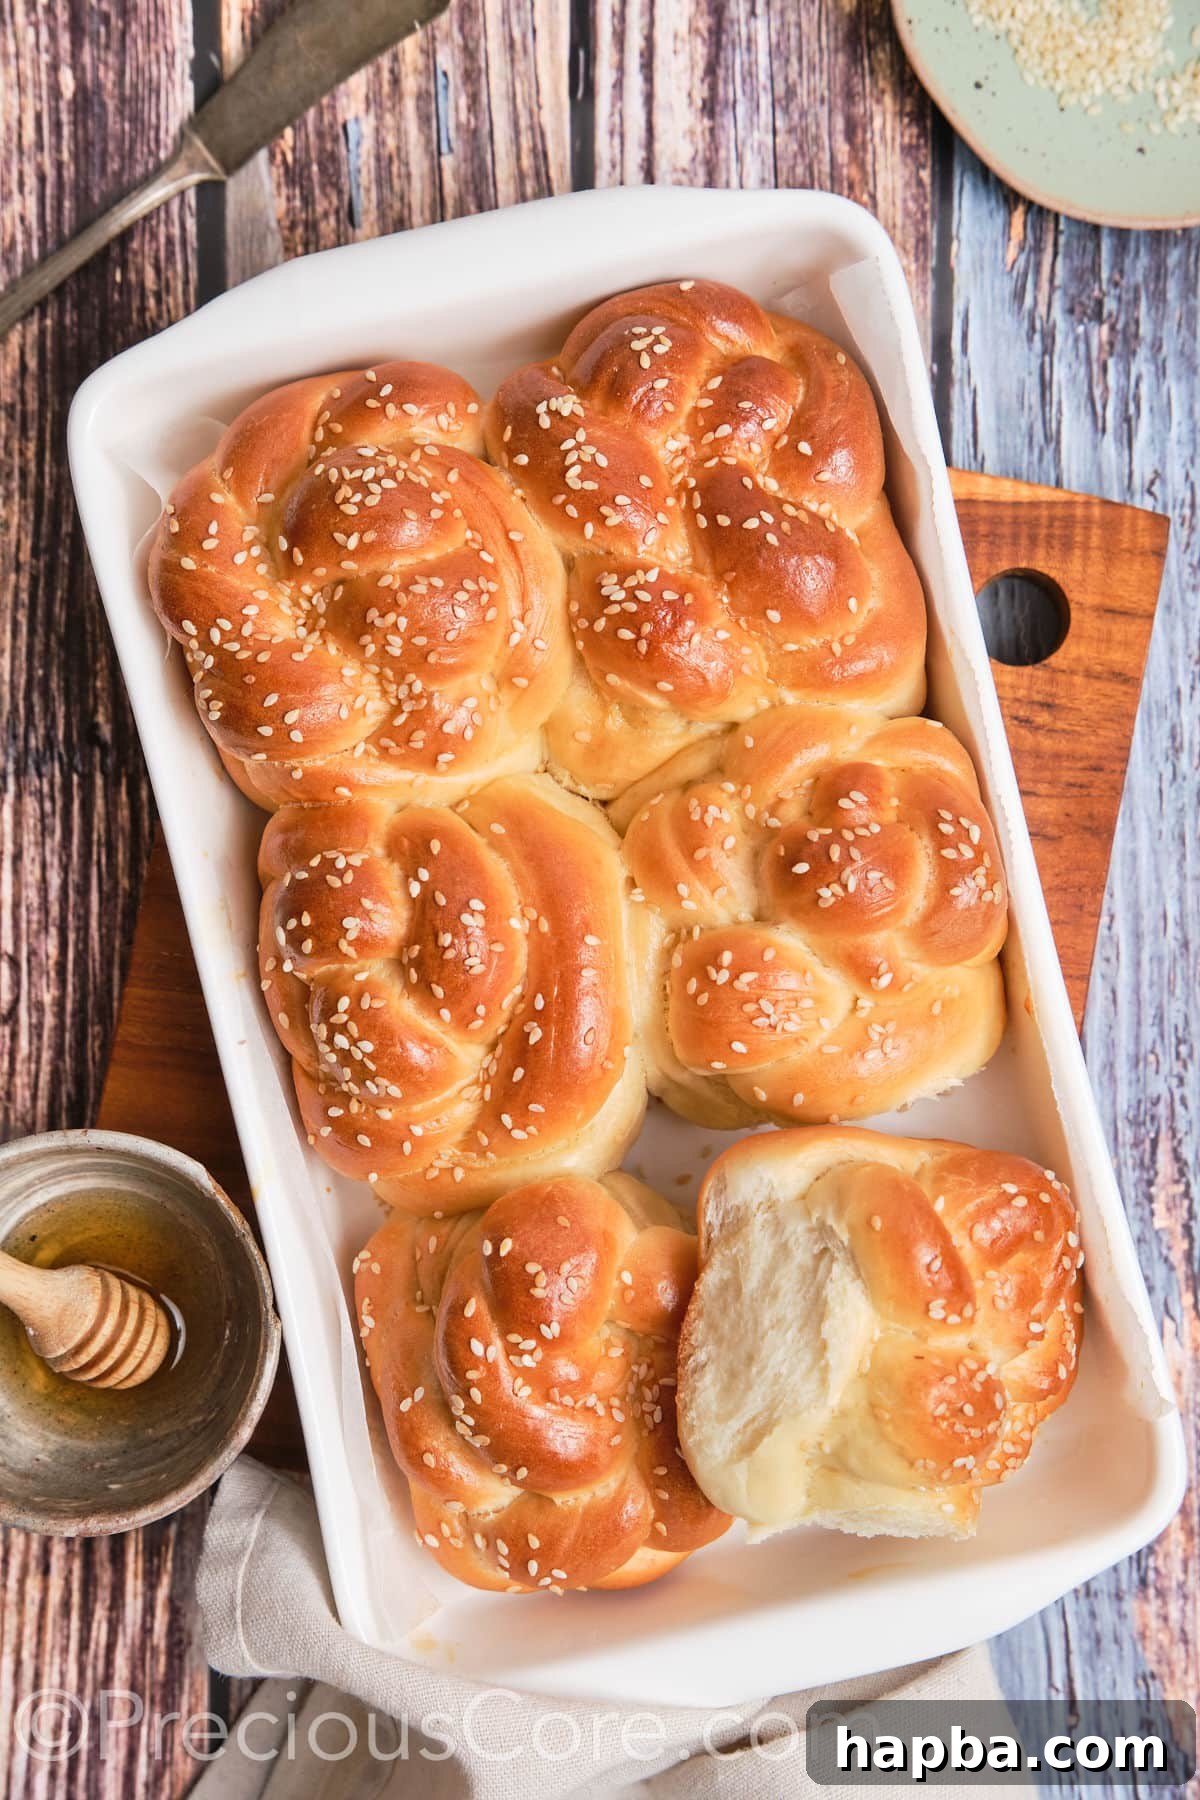
Perfect Serving Suggestions
These versatile Challah Dinner Rolls are an exquisite addition to nearly any meal. Their subtle sweetness and tender texture complement a wide range of dishes, making them a year-round favorite. Here are some ideal pairings to consider:
- Beef Stew Without Wine: The rolls are perfect for soaking up the rich, savory broth of a hearty beef stew.
- Chicken Meatballs: Serve alongside tender chicken meatballs in a light sauce for a comforting and satisfying meal.
- Lentil Stew: A wholesome and flavorful lentil stew finds its ideal partner in these soft rolls, providing a delicious contrast in texture.
- Quick Chicken Noodle Soup: There’s nothing quite like dipping a warm, fluffy challah roll into a steaming bowl of chicken noodle soup on a chilly day.
- Roasted Chicken or Turkey: Their rich flavor makes them a fantastic accompaniment to any roast, absorbing savory juices beautifully.
- Holiday Feasts: Naturally, these rolls are a showstopper for Thanksgiving and Christmas dinners, adding elegance and a homemade touch to your holiday spread.
- Breakfast and Brunch: Beyond dinner, enjoy them toasted with jam, honey, or cream cheese, or transform them into decadent French toast.
Storing and Refreshing Leftover Challah Rolls
While these challah dinner rolls are undeniably best enjoyed immediately on the day they are baked, or within 24 hours for peak freshness, you can certainly store any leftovers to savor later. The rolls will retain their delicious flavor for up to 3 days when stored properly, though their super soft texture may slightly diminish over time.
To store them at room temperature, place the cooled rolls in an airtight container or a large resealable plastic bag. This will help prevent them from drying out. For longer storage, challah rolls freeze exceptionally well! The best method is to first arrange the completely cooled rolls in a single layer on a baking sheet lined with parchment paper. Freeze them for about 1-2 hours until they are solid. Once frozen, transfer the individual rolls to a freezer-safe container or a heavy-duty freezer bag, ensuring as much air is removed as possible. They can be stored in the freezer for up to 3 months.
To enjoy frozen rolls, you can defrost them at room temperature for a few hours, or pop them directly into a toaster or a preheated oven (at 300°F/150°C for 5-10 minutes) until warmed through and soft again. A quick reheat can bring back much of their original warmth and tenderness.
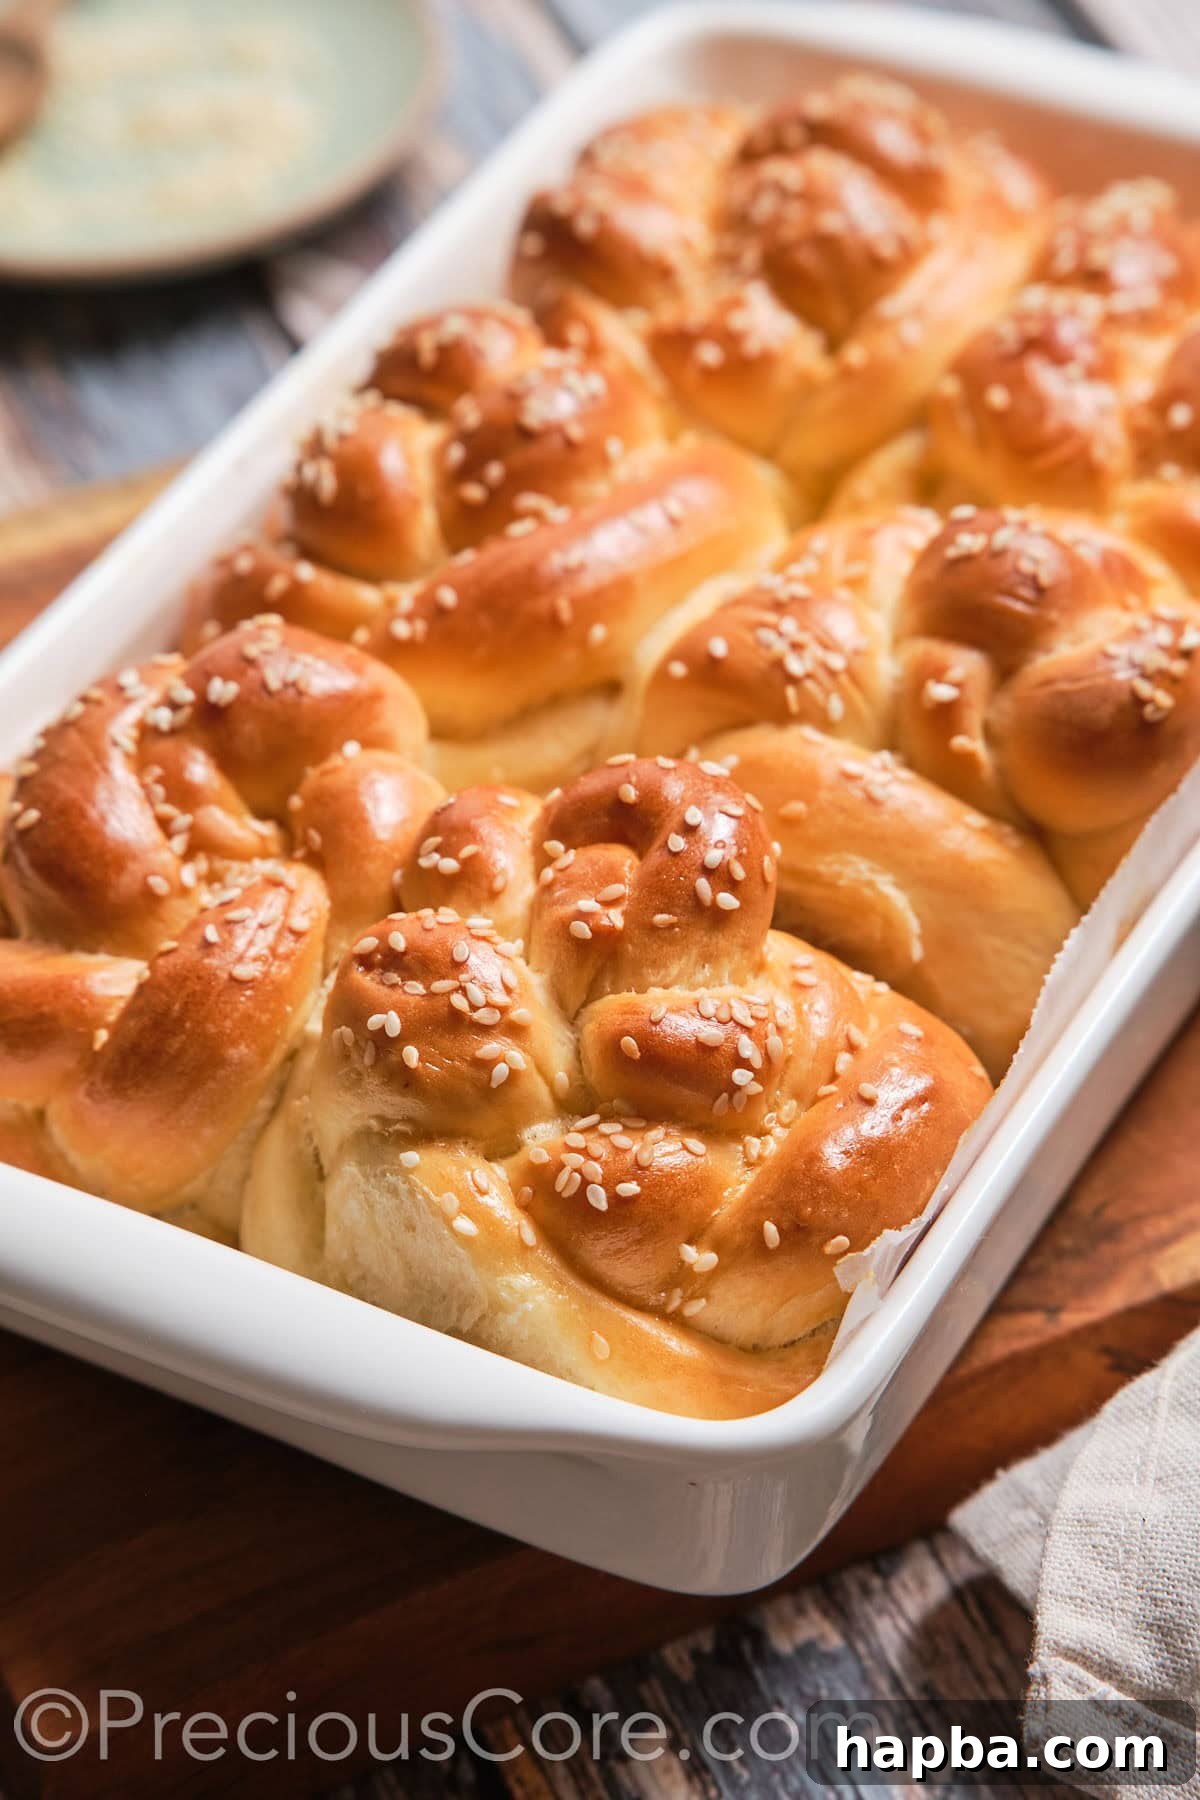
Complementary Thanksgiving Recipes for Your Holiday Table
These Challah Dinner Rolls are a stellar addition to any Thanksgiving spread. Pair them with these festive dishes for an unforgettable holiday meal:
- Baked Brie and Preserves: An elegant appetizer that beautifully complements the sweet rolls.
- Southern Deviled Eggs: A classic side dish that always disappears quickly.
- Oven Baked Turkey Wings: A flavorful alternative or addition to a whole roasted turkey.
- Baked Turkey Drumsticks: Juicy and tender, perfect for individual servings.
- 3 Cheese Mac and Cheese: The ultimate comfort food that pairs wonderfully with rich bread.
- Street Corn Casserole: A vibrant and zesty side that adds a kick to your meal.
- Cinnamon Rolls With Apple Pie Filling: For a sweet ending or a delightful breakfast the next day.
- Rosemary Garlic Mashed Potatoes: A fragrant and creamy side dish that’s always a hit.
Explore More Delicious Dinner Roll Recipes
If you’ve fallen in love with these Challah Dinner Rolls, you’ll be thrilled to discover more of our irresistible dinner roll creations. Each recipe offers a unique flavor and texture, perfect for any meal or occasion. Expand your baking repertoire with these fantastic options:
Easy Dinner Rolls
Honey Whole Wheat Dinner Rolls
Sweet Dinner Rolls Recipe
Garlic Butter Rolls
If you make this recipe, please share your experience and leave a star rating below. Your feedback helps others discover delicious recipes, and I always love hearing from you! Thank you!
Challah Dinner Rolls
Pin Recipe
Rate
Print Recipe
Ingredients
- ¾ cup warm milk about 110℉ warm, whole or 2% milk would work
- 2¼ teaspoon active dry yeast
- Pinch of sugar abt ¼ teaspoon
- 2 large eggs
- ½ cup vegetable oil
- ¼ cup honey
- 4 cups all-purpose flour
- ½ teaspoon salt
- 1 egg for egg wash
- 2 teaspoons Sesame seeds or poppy seeds to sprinkle on top
Instructions
-
Warm the milk until it’s just slightly warm (about 110°F). Pour into a large mixing bowl. Add the yeast and a pinch of sugar. Stir to combine. Let it sit for 5-10 minutes until foamy.¾ cup warm milk, 2¼ teaspoon active dry yeast, Pinch of sugar
-
When the yeast mixture is foamy, add the eggs, vegetable oil and honey and mix well to combine.2 large eggs, ½ cup vegetable oil, ¼ cup honey
-
Add the flour and salt and mix with clean hands until the dough comes together. Knead until the dough becomes smooth.4 cups all-purpose flour, ½ teaspoon salt
-
Cover the challah dough with a clean towel and leave it in a warm place to rise. Let it rise for 1.5-2 hours or until doubled in size.
-
Punch down the risen dough to deflate it, and turn it out on a lightly floured surface.
-
Shape the challah dough into a long log and cut it into 12 equal portions.
-
Divide each portion into three equal parts and roll each part into a small log.
-
Braid the three strands together, pinching the ends to seal. Tuck the ends under to form a round braided bun shape.
-
Arrange the challah rolls onto a baking sheet lined with parchment paper. Cover the rolls with a clean kitchen towel and allow them to rise until doubled in size, about half an hour. Brush the tops of the buns lightly with egg wash (one beaten egg) and sprinkle with sesame seeds.2 teaspoons Sesame seeds or poppy seeds, 1 egg for egg wash
-
Preheat oven to 350°F (180°C).
-
Bake in the preheated oven for 20-25 minutes until the rolls turn golden brown and sound hollow when tapped on the bottom.
-
Remove the braided buns from the oven and let them cool a bit before you enjoy them.
Notes
- Do not use expired yeast, as this will not allow the dough to rise well. You can confirm if it is expired or not by taking a teaspoon of dry yeast and adding ¼ cup of lukewarm water. If it is active, it will bubble for 10 minutes after stirring and become slightly puffy; this indicates that the yeast is active. If this is not the case, your yeast has probably expired.
- You can also proof the challah dough in the refrigerator overnight. This will give you more developed flavors.
- To ensure even sizes, use the kitchen scale. Weigh the whole dough first, then cut the challah dough into equal pieces of that weight.
- Remember that all the ingredients should be fresh.
- The photographed rolls are only half of the recipe. This complete recipe will yield 12 rolls.