
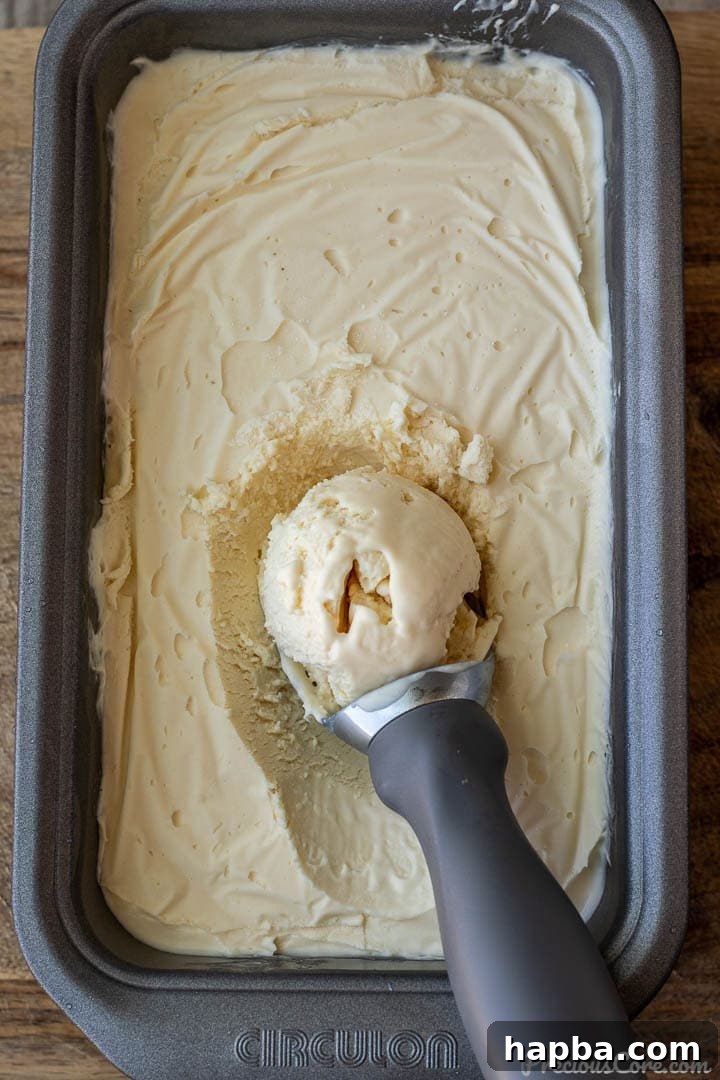
Homemade Vanilla Ice Cream: The Easiest 3-Ingredient No-Churn Recipe for Creamy Perfection
Imagine a dessert that’s incredibly creamy, bursting with authentic vanilla flavor, and astonishingly simple to make. What if we told you this culinary dream requires only three basic ingredients and absolutely no old-fashioned ice cream maker? Get ready to transform your dessert game with this unbelievably straightforward recipe for Homemade Vanilla Ice Cream, a treat that promises to be a true highlight in your kitchen.
This isn’t just another recipe; it’s a revelation. With just about 15 minutes of active preparation, you can effortlessly craft a batch of luscious vanilla ice cream that’s far superior to any store-bought alternative. Forget tedious trips to the grocery store for a long list of obscure ingredients; this easy, no-churn method simplifies everything, delivering pure satisfaction with minimal effort. Prepare to fall in love with the easiest, creamiest ice cream recipe you’ll ever encounter!
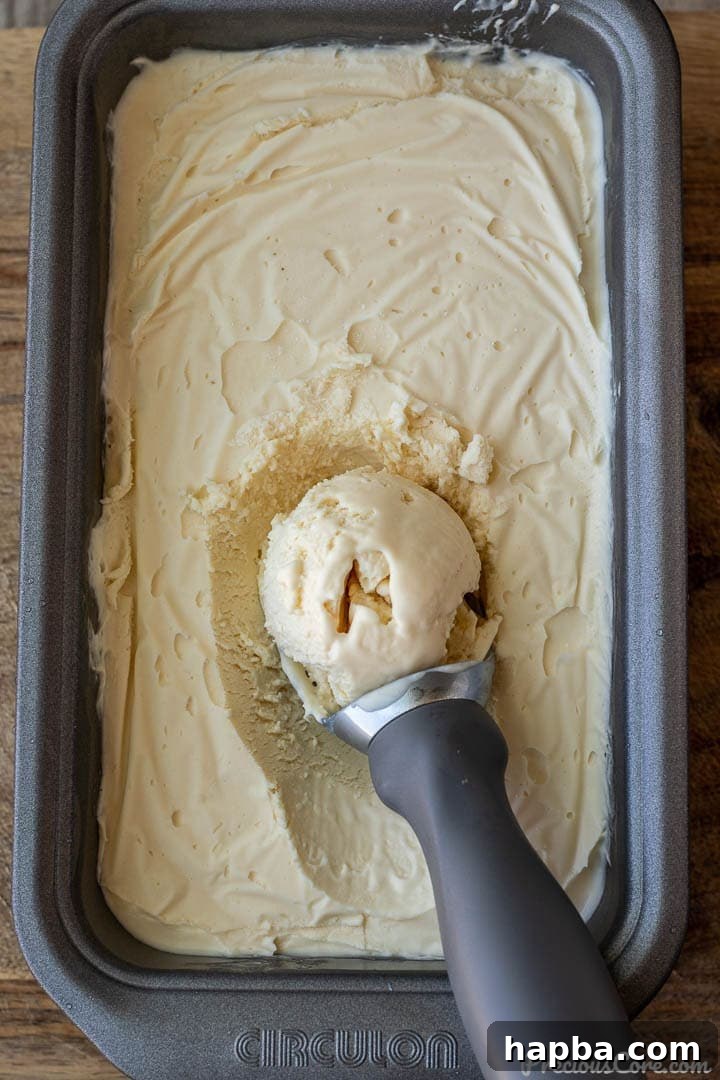
Why This No-Churn Vanilla Ice Cream Will Be Your New Favorite Dessert
This effortless ice cream recipe isn’t just easy; it’s an absolute game-changer for anyone craving a decadent, homemade dessert without the hassle. You’re going to fall in love with it for so many compelling reasons, making it your go-to treat:
- Unrivaled Creaminess: Experience a luxurious, velvety-smooth texture that melts beautifully on your tongue, free from any unwanted ice crystals often found in homemade versions.
- Perfectly Balanced Sweetness: Enjoy an ideal level of sweetness that satisfies your craving without being overpowering, catering to every palate.
- Authentic Vanilla Flavor: Revel in a deep, rich, and truly authentic vanilla profile that shines through, thanks to the quality ingredients.
- Wonderfully Refreshing: The ultimate cool indulgence, perfect for a hot summer day or as a comforting treat during any season.
- Amazingly Simple: Achieve maximum deliciousness with minimal effort, making it suitable for even the most novice of home cooks.
- No Special Equipment Needed: Say goodbye to bulky and expensive ice cream machines! All you require is a basic electric mixer and a freezer-safe container.
- Quick Hands-On Prep: Spend just a quarter of an hour actively preparing this delightful dessert, allowing more time for enjoyment.
- Better Than Store-Bought: Once you taste the fresh, vibrant flavors and superior texture of your homemade creation, you’ll likely never look back at commercial ice creams.
Prepare to elevate your dessert repertoire and impress your family and friends with this surprisingly simple yet utterly delightful homemade vanilla ice cream!
The Genius of No-Churn: Crafting Vanilla Ice Cream Without a Machine
Traditionally, the process of making ice cream is quite involved. It typically begins with preparing a custard base, which often includes egg yolks, milk, sugar, and cream. This mixture is carefully cooked to a specific temperature, then chilled thoroughly, and finally churned in a specialized ice cream machine. The churning process is crucial; it slowly freezes the mixture while simultaneously incorporating air, which prevents the formation of large ice crystals and results in the characteristic smooth, creamy texture we all love. While this method yields fantastic results, it can be time-consuming and requires an electric ice cream maker, which isn’t a staple in every kitchen.
This recipe, however, introduces an ingenious shortcut: a no-cook, no-churn method that simplifies the entire process dramatically. You won’t need to worry about tempering eggs, managing a double boiler, or even dirtying a medium saucepan or a fine-mesh strainer. That’s right – no cooking is required whatsoever! This innovative approach means you can achieve incredibly satisfying, creamy ice cream without any of the traditional fuss or specialized equipment. It truly is a revolutionary way to make homemade ice cream.
The beauty of this technique lies in its incredible simplicity and accessibility. It democratizes the art of ice cream making, proving that you don’t need to be a culinary expert or own fancy gadgets to create a truly delicious frozen treat. Many enthusiasts believe this is one of the best homemade ice cream recipes available today, not only for its exceptional taste and texture but also for its sheer ease and convenience.
Furthermore, this simple no-churn method serves as a versatile base for endless flavor experimentation. Once you’ve mastered the classic vanilla, you can easily adapt it to create a diverse range of other delightful ice cream flavors. Imagine whipping up chocolate ice cream, vibrant mango, refreshing strawberry, or rich coffee ice cream using the exact same core technique. Feel free to unleash your creativity, experiment with various extracts, purées, and mix-ins, and enjoy recreating your favorite ice cream parlor flavors right in the comfort of your own home!
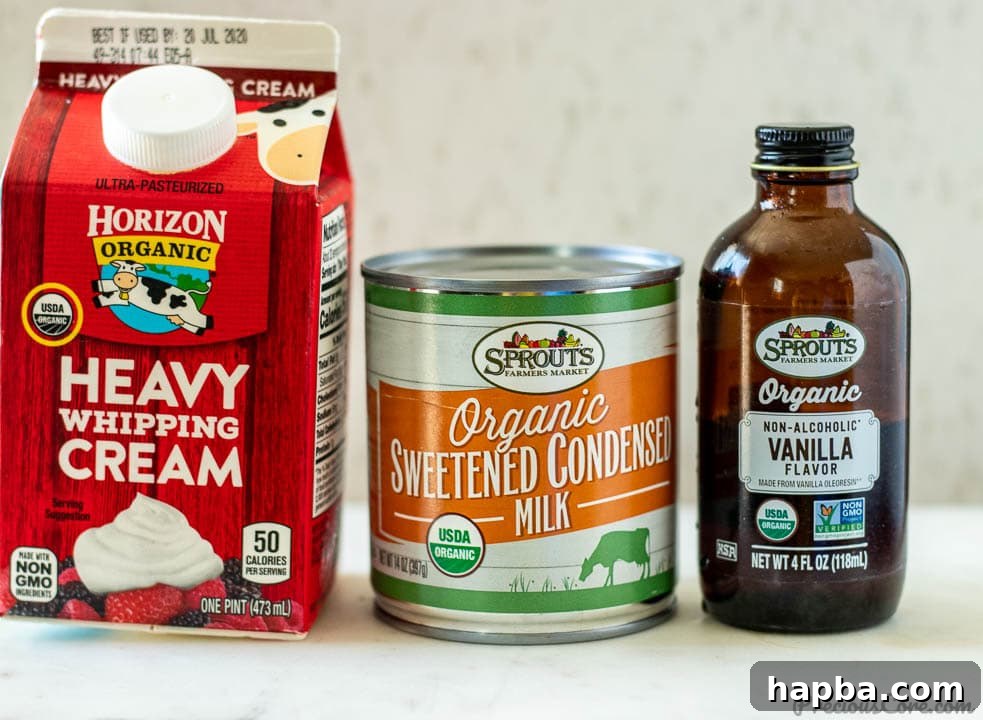
The Essential Trio: Simple Ingredients for Sublime Vanilla Ice Cream
Even if you’re a complete novice in the kitchen or making ice cream for the very first time, there’s no need to worry! One of the most appealing aspects of this recipe is its incredible approachability. For this deliciously easy homemade vanilla ice cream, you only need three fundamental ingredients, each playing a crucial role in achieving that perfect creamy consistency and rich flavor. The magic truly lies in the quality and proper handling of these simple components:
1. Heavy Whipping Cream
Often referred to interchangeably as heavy cream or simply “cream,” this dairy product is the undeniable cornerstone of our rich and creamy ice cream. Unlike regular whole milk, heavy whipping cream boasts a significantly higher fat content, typically ranging from 36% to 40% milk fat. This high fat percentage is absolutely crucial for achieving the characteristic luscious, velvety texture that defines a truly good ice cream. When properly whipped, the fat globules within the cream trap air, creating a stable, airy structure that prevents the formation of large, undesirable ice crystals during the freezing process. Always ensure your heavy whipping cream is well-chilled, ideally straight from the refrigerator, for optimal whipping results.
2. Sweetened Condensed Milk
This remarkable ingredient serves a vital dual purpose in our no-churn recipe: it provides all the necessary sweetness and contributes significantly to the ice cream’s luxurious body and exceptionally creamy texture. Sweetened condensed milk is essentially cow’s milk from which a substantial amount of water has been removed (condensed), and a generous quantity of sugar has been added. Its thick, syrupy consistency and inherent sweetness eliminate the need for any additional granulated sugar, making the recipe even more straightforward. It imbues the ice cream with that nostalgic, old-fashioned vanilla ice cream taste and an incredibly rich, silky mouthfeel that is simply irresistible. It’s one of those dairy products that truly enhances richness and texture.
3. Pure Vanilla Extract
As the primary flavor agent, the quality of your vanilla extract can make or break this recipe. For the most exquisite and authentic taste, always opt for a high-quality, pure vanilla extract. It is crucial to avoid imitation vanilla, as these often contain artificial flavors that can leave a subtle, sometimes unpleasant, chemical or medicinal aftertaste, preventing the true essence of vanilla from shining through. A good quality pure vanilla extract will impart a deep, complex, and aromatic vanilla profile that elevates the entire dessert to gourmet status. If you’re looking to get extra fancy and enhance both flavor and visual appeal, consider using vanilla bean paste or even scraping the fragrant seeds from a fresh vanilla pod. This will not only intensify the vanilla notes but also add those beautiful, tiny black specks of vanilla, visually signaling its premium quality and artisanal charm.
Below, you will find the precise quantities needed for each of these ingredients, along with valuable nutrient information for the complete recipe. If you follow a low-calorie diet or are conscious of your sugar intake, this available nutrient data can help you determine the best portion size for your individual dietary goals, allowing you to enjoy this delightful treat responsibly.
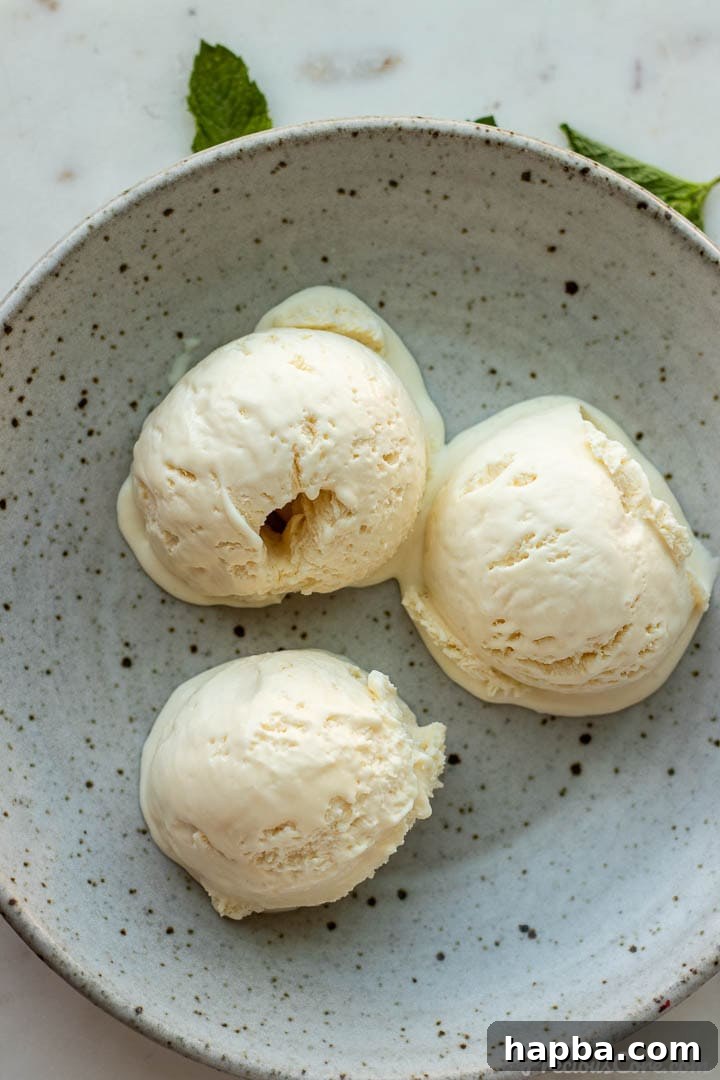
Step-by-Step Guide: Crafting Your Creamy Homemade Vanilla Ice Cream
Creating this luscious, no-churn vanilla ice cream is surprisingly simple. Just follow these straightforward steps to achieve creamy perfection in no time:
- Whip the Heavy Cream: Begin by pouring the well-chilled heavy whipping cream into a large mixing bowl. Using an electric mixer (either a handheld mixer or a stand mixer fitted with the whisk attachment), beat the cream on medium-high speed until stiff peaks form. Stiff peaks mean that when you lift the beaters, the cream holds its shape firmly and doesn’t droop. Be vigilant here: stop beating as soon as stiff peaks are achieved to avoid over-whipping and turning it into butter.
- Gently Fold in Sweetness and Flavor: Once your cream is perfectly whipped, gently add the sweetened condensed milk and your chosen pure vanilla extract to the whipped cream.
- Combine Until Smooth: Continue to whip the mixture briefly, just until all the ingredients are thoroughly combined and the mixture appears smooth, uniform, and beautifully integrated. This final gentle whip ensures consistent flavor and texture throughout your ice cream base.
- Prepare for Freezing: Carefully pour the entire mixture into a loaf pan (a standard 9×5 inch pan works perfectly) or any other suitable freezer-safe, large container. Use a spatula to gently smooth the top for an even surface.
- Cover for Protection: To prevent the formation of undesirable ice crystals on the surface of your ice cream, press a sheet of plastic wrap directly onto the surface of the mixture, ensuring it touches every part. This creates a protective barrier against air and moisture.
- Freeze to Perfection: Transfer the covered pan to your freezer and allow it to freeze for a minimum of 7 hours. For the best and firmest results, it’s highly recommended to freeze it overnight, ensuring it is completely solid and perfectly set.
- Scoop and Savor: Once thoroughly frozen, remove the pan from the freezer. If it’s too hard to scoop immediately, let it rest at room temperature for about 5-10 minutes to soften slightly. Then, scoop generously and delight in your incredibly creamy, perfectly flavored homemade vanilla ice cream!
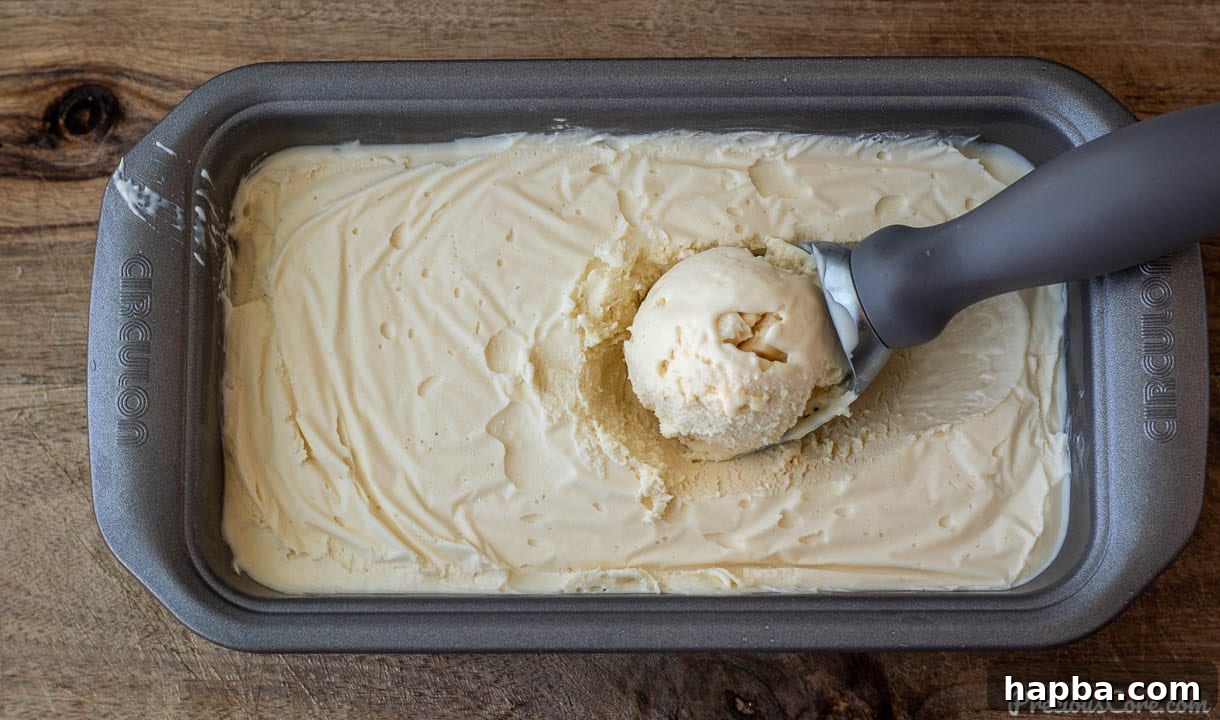
Unleash Your Creativity: Exciting Variations and Topping Ideas
While this homemade vanilla ice cream is undeniably delightful on its own, its classic flavor profile also makes it an exquisite canvas for a plethora of creative additions. Consider elevating your next gathering by setting up an elaborate ice cream bar for special occasions, loaded with a diverse array of delicious toppings and tempting mix-ins. This sweet treat pairs wonderfully with various garnishes, and you can also easily incorporate ingredients directly into the ice cream mixture itself. Here are some fantastic ideas to elevate your dessert experience:
- Decadent Dessert Sauces: Generously drizzle your scoops with a warm caramel sauce, a rich hot fudge, a tangy berry coulis, or even a simple melted peanut butter for a delightful nutty twist. Chocolate syrup or butterscotch sauce are also classic favorites.
- Chocolate Lover’s Dream: Sprinkle on your favorite chocolate chips – whether dark, milk, or white chocolate. For an even more textural experience, chop up a high-quality chocolate bar into small chunks or pulse them briefly in a food processor to create homemade chocolate flakes or shavings.
- Fresh Fruit Fiesta: Enhance the refreshing quality of the vanilla ice cream with a vibrant array of fresh, seasonal fruits. Sliced ripe bananas, juicy strawberries, plump blueberries, exotic mango cubes, or tart raspberries add natural sweetness, a lovely pop of color, and varying textures.
- Classic Ice Cream Cones: Serve your masterpiece in crispy, crunchy ice cream cones – sugar cones, waffle cones, or even plain cake cones. It’s a timeless presentation that both children and adults adore, perfect for a nostalgic and portable treat.
- A Touch of Silky Smoothness (Corn Syrup): For an extra level of silkiness in your ice cream and to help further prevent the formation of ice crystals, you can add a small amount (about 1 to 2 tablespoons) of light corn syrup when you’re mixing in the sweetened condensed milk. It contributes to a wonderfully smooth texture without making the ice cream excessively sweet.
- Tangy Cream Cheese Twist: For a unique and surprisingly delicious tangy flavor, consider whipping a softened block of cream cheese (approximately 4 ounces or 113 grams) into your heavy cream before adding the sweetened condensed milk. This unexpected addition creates a delightful cheesecake-like dimension that will surely impress your guests.
- Crunchy Nut Additions: Add a satisfying crunch and depth of flavor with chopped nuts such as pecans, walnuts, almonds, pistachios, or roasted peanuts. Toasting them lightly beforehand can enhance their flavor.
- Cookie & Candy Crumble: Crush your favorite cookies (think Oreos, graham crackers, chocolate chip cookies, or shortbread) or candies (M&M’s, butterfingers, Heath bars) and either fold them directly into the ice cream mixture before freezing or sprinkle generously on top just before serving.
- Coffee Infusion: For coffee lovers, a tablespoon of instant espresso powder or a few tablespoons of strong, cooled cold-brew coffee added to the mixture will transform it into a delightful coffee-flavored ice cream.
- Spiced Delights: A pinch of cinnamon, nutmeg, or cardamom can add a warm, complex layer to the classic vanilla flavor, particularly appealing during colder months.
- Citrus Zest Brightness: Finely grated lemon or orange zest can add a refreshing, bright counterpoint to the sweetness of the vanilla ice cream.
Expert Tips for Achieving the Ultimate Homemade Vanilla Ice Cream
While this recipe is incredibly forgiving and simple, a few expert tips can make the difference between good homemade vanilla ice cream and an absolutely sublime one. Follow these suggestions to ensure your dessert turns out perfectly creamy and delicious every single time:
- Always Use Very Cold Heavy Whipping Cream: This is arguably the most crucial tip for success. Your heavy whipping cream must be thoroughly chilled, ideally straight from the coldest part of the refrigerator. Cream that isn’t cold enough will struggle immensely to form stiff peaks, no matter how long you beat it. Proper whipping incorporates the necessary air, which acts as a natural stabilizer, meaning you won’t need any artificial thickeners like xanthan gum.
- Avoid Overbeating the Cream: Once your heavy whipping cream forms firm, stiff peaks, stop beating immediately. Continuing to whip beyond this point will cause the fat and liquid to separate, eventually leading to butter. The goal is a light, airy, and voluminous consistency that holds its shape.
- Taste and Adjust the Mixture: Before you pour the ice cream mixture into the pan for freezing, take a small spoonful and taste it. Your palate is your best guide! If you desire a stronger vanilla presence, feel free to add a touch more vanilla extract. Similarly, if you find the mixture a bit too sweet (some brands of sweetened condensed milk can vary in sweetness), a tiny pinch of salt can work wonders to miraculously balance the flavors without making it taste salty.
- Choose the Optimal Freezing Container: A standard loaf pan (approximately 9×5 inches or 23×13 cm) is an excellent choice because its rectangular shape provides a large surface area, making scooping incredibly easy. For prolonged storage and to further combat the formation of ice crystals, consider investing in specialized airtight ice cream containers. These are specifically designed to minimize air exposure, keeping your ice cream fresher and more pristine for longer.
- Plan Ahead for Events and Best Results: If you are preparing this ice cream for a special event, gathering, or simply want the best possible texture, I strongly suggest freezing it overnight. While 7 hours is the minimum, freezing it for 10-12 hours or even overnight ensures it’s perfectly firm, scoopable, and thoroughly set, allowing you to relax and enjoy your time without rushing the freezing process.
- Thawing for Optimal Scoopability: If your ice cream is rock solid straight from the freezer, don’t force your scoop into it. Instead, let it sit at room temperature for 5 to 10 minutes (the exact time may vary depending on your room’s temperature and the ice cream’s firmness) before attempting to scoop. This brief rest will allow it to soften just enough, making it much easier to portion without damaging your scoop or compromising the ice cream’s delightful texture.
Frequently Asked Questions About Homemade Vanilla Ice Cream
What Ingredients Is Vanilla Ice Cream Made Of?
Traditional vanilla ice cream typically features a more extensive list of ingredients, commonly including egg yolks, granulated sugar, various types of milk (such as whole or skim milk), heavy cream, and vanilla. Our special no-churn recipe, however, significantly simplifies this by ingeniously using only three core ingredients: sweetened condensed milk, heavy cream, and pure vanilla extract. This streamlined approach makes it far more accessible for home cooks without compromising on its delicious flavor or creamy texture.
What Ingredient Makes Homemade Ice Cream Soft?
The inherent softness and smooth consistency of this homemade ice cream, despite its minimal ingredient list, primarily stem from two key factors: the high fat content of the heavy whipping cream and the method of whipping it to stiff peaks. The high fat content contributes significant richness and a luxurious mouthfeel, while the air trapped during the whipping process prevents the formation of large, hard ice crystals. Additionally, some recipes, including a variation mentioned above, suggest adding a small amount of corn syrup, which acts as an anti-crystallization agent, further enhancing the ice cream’s desirable soft and scoopable texture.
What Are The Two Main Types Of Vanilla Ice Cream?
Broadly speaking, there are two primary classifications of vanilla ice cream: classic (often referred to as American-style) vanilla and French vanilla. This particular recipe falls under the classic vanilla category. Both types are undeniably delicious in their own right, but they differ fundamentally in their base composition. French vanilla ice cream utilizes an egg-yolk enriched custard base, which imparts a distinctive yellowish hue and a richer, more custardy flavor profile. Classic vanilla, conversely, typically relies on a simpler base of milk and cream, offering a lighter, purer vanilla flavor and a whiter appearance.
How Long Does Homemade No-Churn Ice Cream Last in the Freezer?
When stored correctly in an airtight container, preferably placed in the coldest section of your freezer, homemade no-churn vanilla ice cream can maintain its optimal quality and texture for up to two weeks. While it will generally remain safe to eat beyond this period, you might notice a gradual degradation in its texture, with ice crystals becoming more prominent and the creaminess diminishing.
Can I Make This Recipe Dairy-Free or Vegan?
While this specific recipe is inherently dairy-based and relies heavily on dairy products for its signature creamy texture, it is certainly possible to adapt the concept for a dairy-free or vegan version. To do so, you would need to substitute the heavy whipping cream with a full-fat coconut cream (ensure it’s well-chilled overnight so the thick cream separates from the water) and replace the sweetened condensed milk with a dairy-free sweetened condensed coconut milk. Keep in mind that the flavor profile will naturally shift towards coconut, but you can still achieve a wonderfully creamy, no-churn frozen dessert.
Visual Guide: Watch How To Make Easy Vanilla Ice Cream
For those who prefer a visual learning experience, watching the steps in action can be incredibly helpful and inspiring. I invite you to watch me prepare this wonderfully easy Vanilla Ice Cream recipe in the video below. It’s a fantastic way to see the simple process come to life before you try it yourself!
While you’re there, don’t forget to SUBSCRIBE to my YouTube Channel! By subscribing, you’ll ensure you never miss out on any of my delicious new recipes, helpful cooking tips, and inspiring culinary content. Join our community of food lovers today!
Don’t miss out on more delicious recipes!
Subscribe to My Channel
Explore More Irresistible Ice Cream Recipes You’ll Adore!
If you’ve discovered the joy of making homemade ice cream with this vanilla recipe, your culinary journey doesn’t have to end here! The world of frozen delights is vast and exciting. Once you’ve mastered this delightful vanilla creation, I encourage you to expand your horizons and try these other fantastic and equally accessible ice cream recipes:
Mango Ice Cream
No Churn Coconut Ice Cream
No Churn Strawberry Ice Cream
Homemade Chocolate Ice Cream
Watermelon Ice Cream
If you make this delightful Homemade Vanilla Ice Cream recipe, please take a moment to leave a star rating and a comment below. Your valuable rating helps other dessert lovers discover and enjoy this incredible recipe, and I absolutely love hearing from you and learning about your culinary adventures! Thank you for your continued support!
Want to save this recipe for later inspiration?
Enter your email address below, and we’ll send the full recipe straight to your inbox, so you can easily access it whenever you’re ready to whip up this delicious treat!
Homemade Vanilla Ice Cream
Super easy homemade vanilla ice cream with only 3 ingredients and no ice cream machine. This vanilla ice cream is incredibly creamy, perfectly sweet, and wonderfully refreshing!
Rate Recipe
Print Recipe
Equipment
- Electric mixer (handheld or stand mixer with whisk attachment)
- Large mixing bowl
- Loaf pan (approx. 9×5 inches) or other freezer-safe container
- Spatula
Ingredients
- 2 cups heavy whipping cream (500 ml, must be very cold)
- 14 oz sweetened condensed milk (300 ml)
- 2 tablespoons pure vanilla extract
Instructions
-
Whip Cream: Pour cold heavy whipping cream into a large mixing bowl. Using an electric mixer, beat until stiff peaks form.
-
Add Sweetener & Flavor: Gently add the sweetened condensed milk and vanilla extract to the whipped cream.
-
Combine Smoothly: Beat briefly until all ingredients are smoothly combined and uniform.
-
Pour & Cover: Pour the mixture into a loaf pan, leveling the top. Press plastic wrap directly onto the surface to prevent ice crystals.
-
Freeze: Freeze for at least 7 hours, or ideally, overnight, until completely solid.
-
Serve: Scoop and enjoy your incredibly creamy homemade vanilla ice cream!
Notes
- If the ice cream is too hard to scoop directly from the freezer, let it rest at room temperature for 5-10 minutes to soften slightly.
- It is crucial to use very cold heavy whipping cream. Room temperature cream will not whip properly to stiff peaks, affecting the final texture.
Nutrition Information (per serving, estimated)
- Calories: 297 kcal
- Carbohydrates: 23g
- Protein: 4g
- Fat: 21g
- Saturated Fat: 13g
- Polyunsaturated Fat: 1g
- Monounsaturated Fat: 5g
- Cholesterol: 67mg
- Sodium: 63mg
- Potassium: 196mg
- Sugar: 23g
- Vitamin A: 806 IU
- Vitamin C: 1mg
- Calcium: 144mg
- Iron: 0.1mg
Nutritional values are approximate and may vary based on specific brands, ingredient quantities, and preparation methods.
Additional Information
Course: Dessert
Cuisine: Western
Calories per serving: 297
Tried this delicious recipe?
We’d love to see your creations! Mention @preciouscore or tag your posts with #PreciousCore on Instagram!