
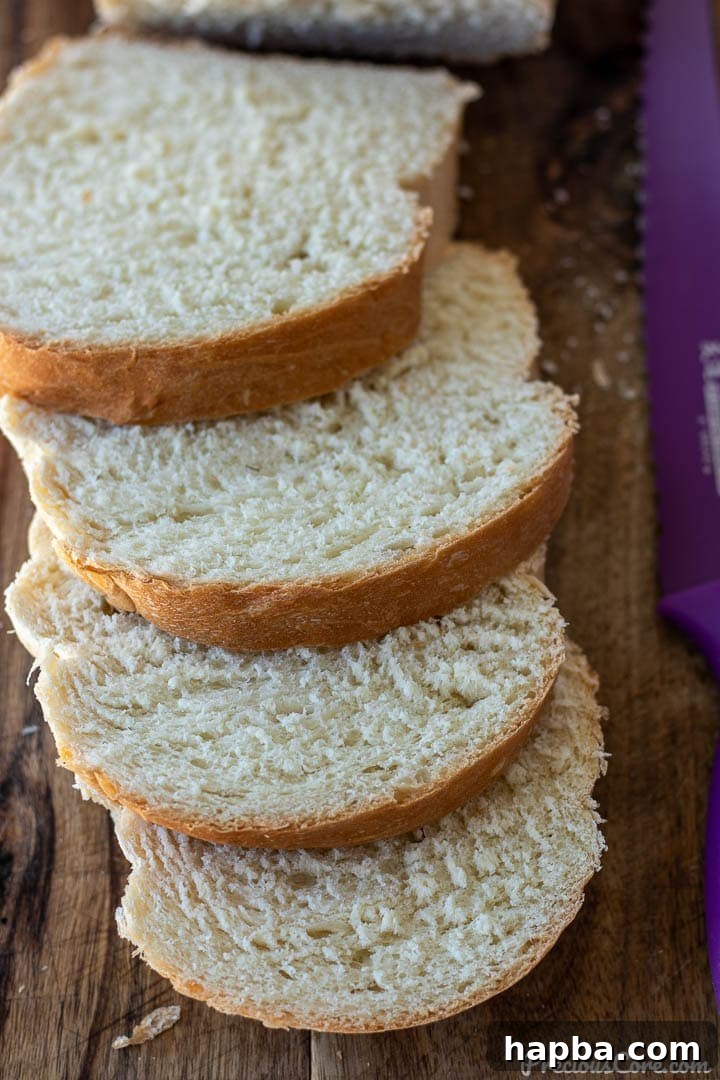
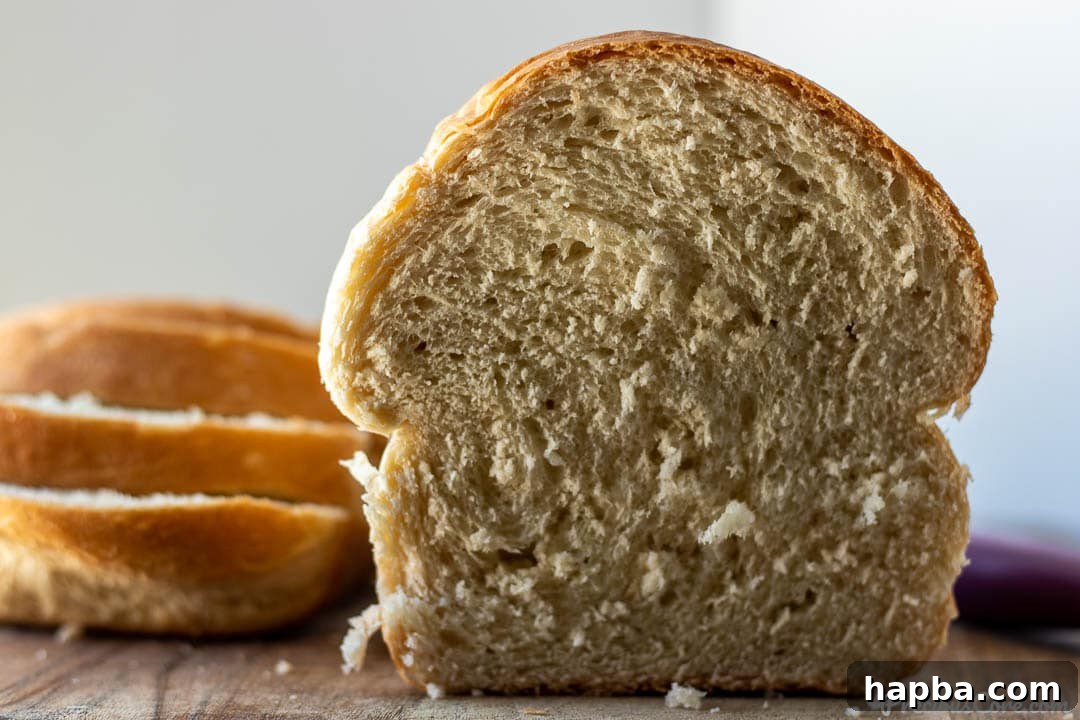
Welcome to the ultimate guide for the **Easy Sandwich Bread Recipe**! This isn’t just another bread recipe; it’s a game-changer for anyone aspiring to bake their own bread, especially beginners. Imagine a loaf so soft and irresistibly fluffy, fresh from your oven. The aroma alone is enough to make your mouth water, and trust us, a slice of this warm bread slathered with butter is an experience you won’t soon forget.
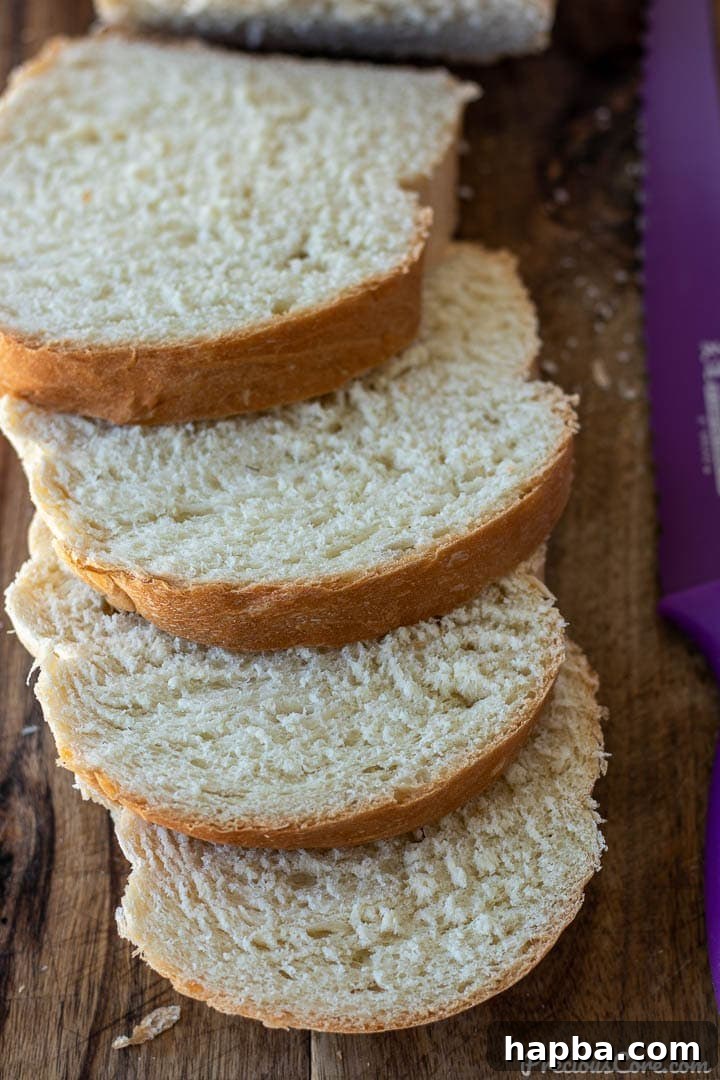
This versatile homemade sandwich bread is more than just a staple; it’s the foundation for countless delicious meals. Use it to craft the most satisfying Chicken Mayonnaise Sandwiches, elevate your breakfast with some Savory French Toast, or simply enjoy it with your favorite spread. The possibilities are truly endless, and every bite confirms that making it yourself is absolutely worth the effort!
Table of Contents
- Effortlessly Delicious: The Easy Sandwich Bread Recipe
- Why Bake Your Own Homemade Bread?
- Essential Ingredients for This Soft Sandwich Bread
- Smart Substitutions for Your Bread Recipe
- How to Make This Easy Sandwich Bread Recipe: A Detailed Guide
- Expert Tips for Perfect Homemade Bread Every Time
- Watch: Easy Sandwich Bread Tutorial
- Explore More Homemade Bread Recipes
- Complete Easy Sandwich Bread Recipe Card
Effortlessly Delicious: The Easy Sandwich Bread Recipe
Having baked bread countless times over the years, I’m thrilled to share with you a truly simple homemade sandwich bread recipe that anyone, regardless of their baking experience, can master. This classic white sandwich bread is incredibly versatile and remarkably straightforward to make. Forget the complexities of sourdough starters; this recipe uses conventional yeast, making it accessible and fast. You don’t need years of practice or a special bread machine to achieve bakery-quality results right in your own kitchen.
This is a no-fuss recipe, specifically designed for first-time bakers or those seeking a reliable, easy method for homemade bread. From mixing the dough to pulling golden loaves from the oven, the entire process takes approximately two hours. It’s truly amazing to discover how simple it is to create soft, fluffy white sandwich bread from scratch, transforming basic ingredients into something truly extraordinary.
One of the many reasons I adore this particular recipe is its emphasis on simplicity and accessibility. It beautifully demonstrates that you absolutely do not need a dedicated bread machine. All that’s required are a few standard loaf pans, about 6 cups of flour, and a handful of other common pantry items. If you’re planning to stock up on fresh bread or prepare for a larger gathering, this recipe is also incredibly easy to double, allowing you to bake multiple loaves with minimal extra effort.
Beyond this fantastic sandwich bread, if you’re eager to expand your baking repertoire, I have several other delightful bread recipes you’ll love. Don’t miss out on our light and airy Dinner Rolls, the crusty and flavorful Homemade French Bread, and the incredibly soft Easy Milk Bread. And for those with a sweet tooth, yes, there’s even a recipe for decadent Cinnamon Rolls with Cream Cheese Frosting!
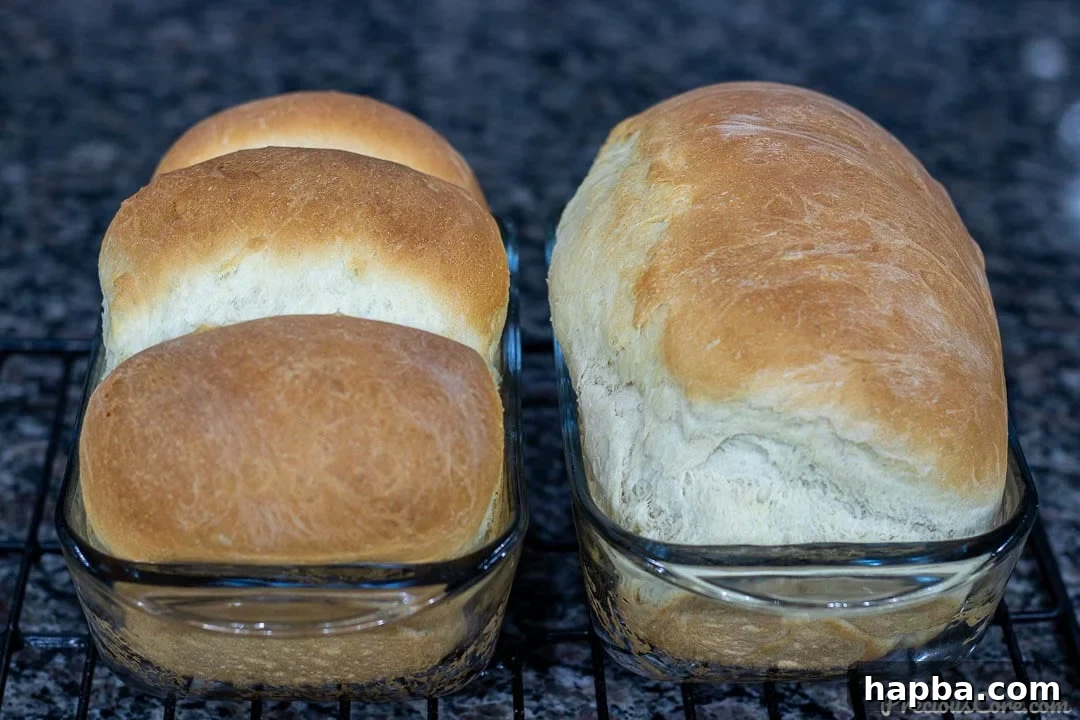
The resulting bread is perfectly fluffy, making it an ideal canvas for a generous slather of butter, the perfect base for any sandwich filling, or a delightful accompaniment for dunking into hearty stews and soups. In fact, many find it tastes even better the next day! You can also transform stale slices into delicious French Toast or spread them with melted butter and garlic for quick and easy garlic bread. The versatility of this simple loaf truly knows no bounds, making it a fantastic addition to your regular meal rotation.
Why Bake Your Own Homemade Bread?
There’s a unique satisfaction that comes with baking your own bread, a feeling that store-bought loaves simply can’t replicate. Beyond the incredible aroma that fills your kitchen, there are several compelling reasons to embrace homemade sandwich bread.
- Unmatched Freshness and Flavor: The taste of freshly baked bread, still warm from the oven, is unparalleled. It boasts a depth of flavor and a tender texture that mass-produced bread often lacks.
- Control Over Ingredients: When you bake at home, you know exactly what goes into your bread. This means no artificial preservatives, additives, or high-fructose corn syrup. You can choose organic flours, adjust sugar and salt levels to your preference, and even cater to specific dietary needs.
- Cost-Effective: While specialty breads can be expensive, the basic ingredients for this sandwich bread are quite affordable. Making your own loaves regularly can lead to significant savings over time compared to buying artisan bread or even standard sandwich bread from the grocery store.
- A Rewarding and Therapeutic Process: The act of kneading dough, watching it rise, and seeing it transform in the oven can be incredibly relaxing and rewarding. It’s a mindful activity that connects you to the food you eat and provides a sense of accomplishment.
- Endless Versatility: A good homemade sandwich bread serves as a perfect blank canvas. It’s ideal for sweet or savory applications, from breakfast toast to hearty lunch sandwiches, and even as a side for dinner. Its sturdy yet soft structure holds up well to various fillings and spreads.
Embracing this easy sandwich bread recipe means bringing more than just food to your table; it brings warmth, comfort, and the undeniable charm of a homemade meal.
Essential Ingredients for This Soft Sandwich Bread
You only need 7 simple ingredients, readily available in most kitchens, to create this incredibly easy homemade bread. Each component plays a crucial role in achieving that perfect soft and fluffy texture.
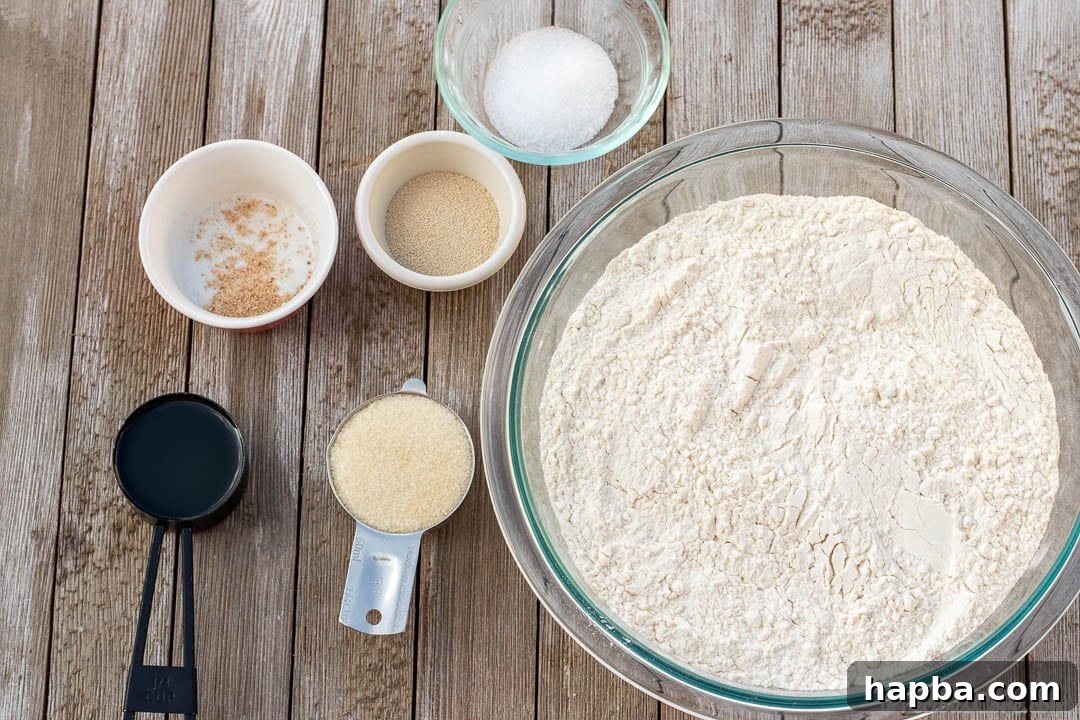
- All-Purpose or Bread Flour: I’ve thoroughly tested this recipe with both all-purpose flour and bread flour, and both yield excellent results. Bread flour, with its higher protein content, develops more gluten, which can lead to a slightly chewier and more structured loaf. However, if you can only find all-purpose flour, don’t fret – it will still produce wonderfully soft bread. King Arthur is a highly recommended brand if you’re looking for quality flour.
- Yeast: As one of those classic yeast breads, this recipe relies on active dry yeast or instant dry yeast (also known as rapid rise yeast) to give the bread its signature light and airy texture. Yeast is a living organism that ferments sugars, producing carbon dioxide gas that makes the dough rise.
- Sugar: Granulated sugar or cane sugar works perfectly. Beyond adding a touch of sweetness, sugar plays a vital role in activating the yeast, providing it with food to kickstart the fermentation process. It also contributes to the beautiful golden-brown crust and a more tender crumb.
- Oil: Any neutral-tasting oil is suitable for this homemade bread. Vegetable oil, canola oil, or corn oil are excellent, easily accessible options. A light olive oil can also be used. The oil adds moisture to the dough, contributing to the bread’s soft texture and extending its shelf life, keeping it fresh for longer.
- Lukewarm Water: This recipe uses water as its primary liquid, offering a wonderfully light crumb. For optimal yeast activation, the water needs to be lukewarm, ideally between 105-115°F (40-46°C). Water that’s too hot can kill the yeast, while water that’s too cold won’t activate it effectively. It should feel comfortably warm to the touch, not hot.
- Salt: Often underestimated, salt is incredibly important for bringing out the flavors of the bread. It also helps to control yeast activity, preventing the dough from over-rising too quickly, and strengthens the gluten structure, contributing to a better texture.
- Nutmeg: I include a small amount of freshly grated nutmeg in this bread recipe. It imparts a subtle, warm, and inviting flavor that beautifully enhances the bread without being overpowering. While optional, I highly recommend using it if you can, as it truly elevates the flavor profile.
Smart Substitutions for Your Bread Recipe
While the original recipe provides a perfect balance for a soft and easy sandwich bread, sometimes you might want to experiment or adapt to what you have on hand. Here are some smart substitutions you can consider:
- Flour: If you wish to incorporate whole grains, you can adjust the recipe to include whole wheat flour. However, I don’t suggest substituting the entire amount, especially for beginners, as whole wheat flour absorbs more liquid and can result in a denser loaf. Instead, for a lighter whole wheat bread, use 50% whole wheat flour and 50% all-purpose or bread flour for the remainder. This will give you a good balance of flavor and texture.
- Yeast: If you have fresh yeast instead of instant dry yeast or active dry yeast, you can absolutely use it. A general rule of thumb is to use twice the amount of fresh yeast compared to active dry or instant dry yeast. So, for 1 tablespoon of dry yeast, you would use 2 tablespoons of fresh yeast. Ensure it’s fresh and active for the best rise.
- Salt: While table salt works well, you can certainly use sea salt in a pinch. Just be mindful of the grind; fine sea salt can be substituted cup for cup, but coarser sea salt might require a slight adjustment in quantity to achieve the same saltiness and ensure even distribution.
- Sugar: For a different flavor profile or if you’re trying to reduce refined sugar, you can substitute the granulated sugar with honey or maple syrup. If using a liquid sweetener like honey or maple syrup, you might need to slightly reduce the amount of lukewarm water by a tablespoon or two to maintain the desired dough consistency, as liquid sweeteners contribute moisture.
- Oil: For a richer flavor, especially if you’re not concerned about keeping it vegan, you can substitute the vegetable oil with melted unsalted butter. Butter will add a lovely depth of flavor and contribute to a very tender crumb. Coconut oil (melted) can also be used for a slightly different note.
- Liquid: While this recipe calls for water, you can experiment with milk (whole milk or a non-dairy alternative like almond or soy milk). Milk will make the bread richer, slightly denser, and contribute to an even softer crumb and a beautifully browned crust due to its sugars and fats. If using milk, warm it to the same lukewarm temperature as water.
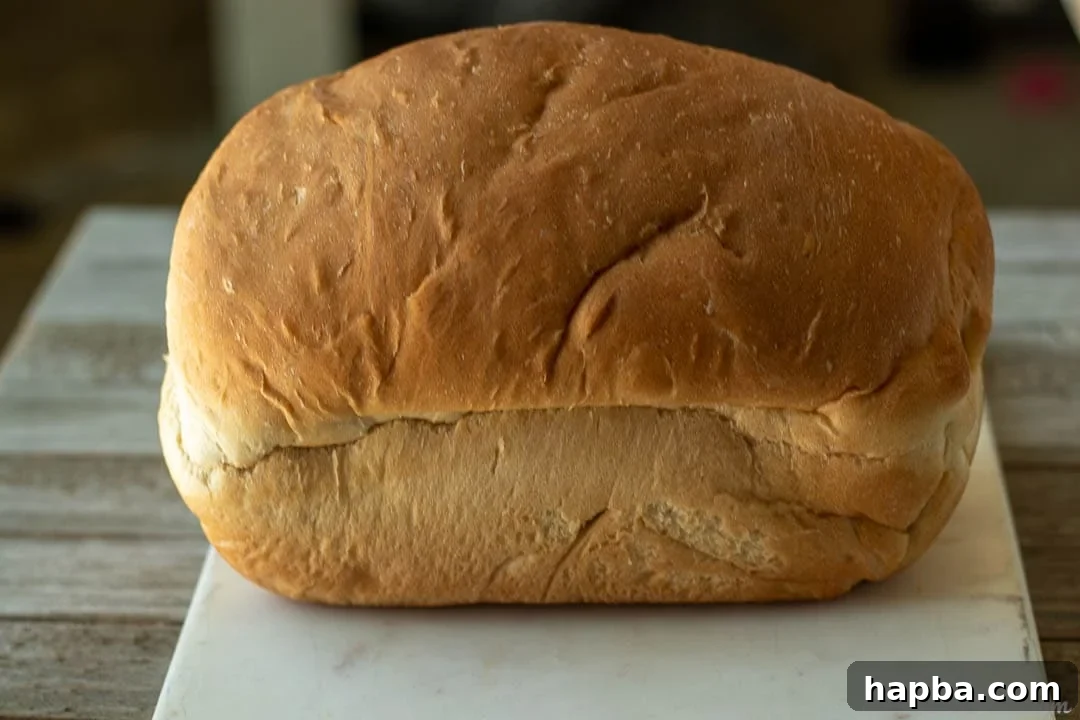
How to Make This Easy Sandwich Bread Recipe: A Detailed Guide
Follow these simple steps to bake your perfect loaf of easy sandwich bread. Baking bread is a rewarding process, and these detailed instructions will guide you every step of the way.
Step 1: Activate the Yeast. In a large mixing bowl, pour the lukewarm water. Sprinkle the active dry yeast over the water. Let this mixture sit for 5 to 10 minutes. During this time, the yeast will “bloom” – it will become foamy and creamy on the surface, indicating it’s alive and active. If it doesn’t foam, your yeast might be old or the water temperature was incorrect, and you should start again with new yeast and correctly tempered water.
Step 2: Combine Wet and Dry Ingredients. Once your yeast is proofed, add the rest of the ingredients to the bowl: the granulated sugar, oil, all-purpose or bread flour, salt, and optional nutmeg. Using a sturdy wooden spoon, mix everything until a shaggy, cohesive dough forms and no dry patches of flour remain. Don’t worry if it looks a bit rough at this stage.
Step 3: Knead the Dough. Transfer the dough onto a clean, lightly floured surface. Begin kneading for 5 minutes. The goal is to develop the gluten, which gives the bread its structure and elasticity. If the dough is too stiff, add a tiny bit of water (half a teaspoon at a time). If it’s too sticky to handle, sprinkle a little more flour (a tablespoon at a time) onto your work surface, being careful not to add too much flour, as this can make the bread tough. Knead until the dough is soft, smooth, and elastic. A softer dough generally yields softer bread.
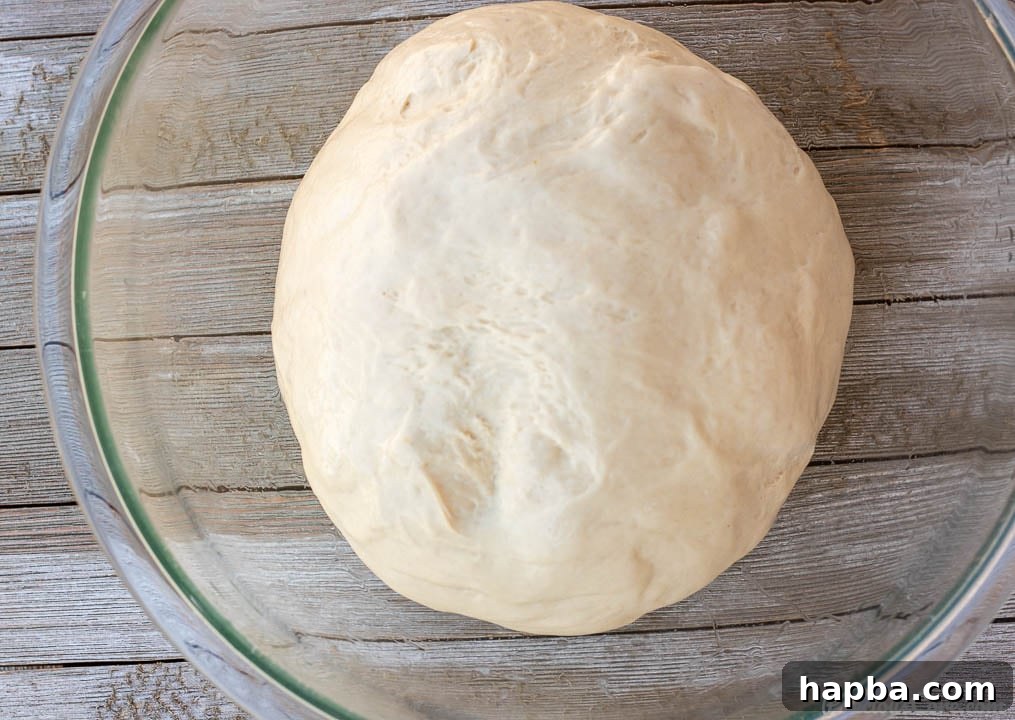
Step 4: First Rise (Bulk Fermentation). Lightly grease a large bowl with oil, ensuring all sides are coated to prevent sticking. Place the kneaded dough into the bowl, turning it once to coat the entire surface with oil. Cover the bowl tightly with a large plastic bag or plastic wrap. This cover prevents the dough from drying out and forming a crust. Place the covered bowl in a warm place to rise until it has doubled in size. This can take anywhere from 1 to 2 hours, depending on the warmth of your environment. A trick for a warm spot is to turn your oven on for just 1 minute, then turn it off, and place the dough inside.
Step 5: Divide and Shape the Dough. Once the dough has doubled, gently punch it down to deflate the air. Transfer the dough to your work surface (you shouldn’t need additional flour at this stage, as the dough should no longer be sticky). Divide the dough into two equal portions. Now, you will shape each portion into a loaf. For a classic sandwich loaf, gently flatten each portion into a rectangle, then roll it tightly into a log, pinching the seam closed at the bottom. Tuck the ends under to create a neat loaf shape. Generously grease two standard 9×5-inch loaf pans.
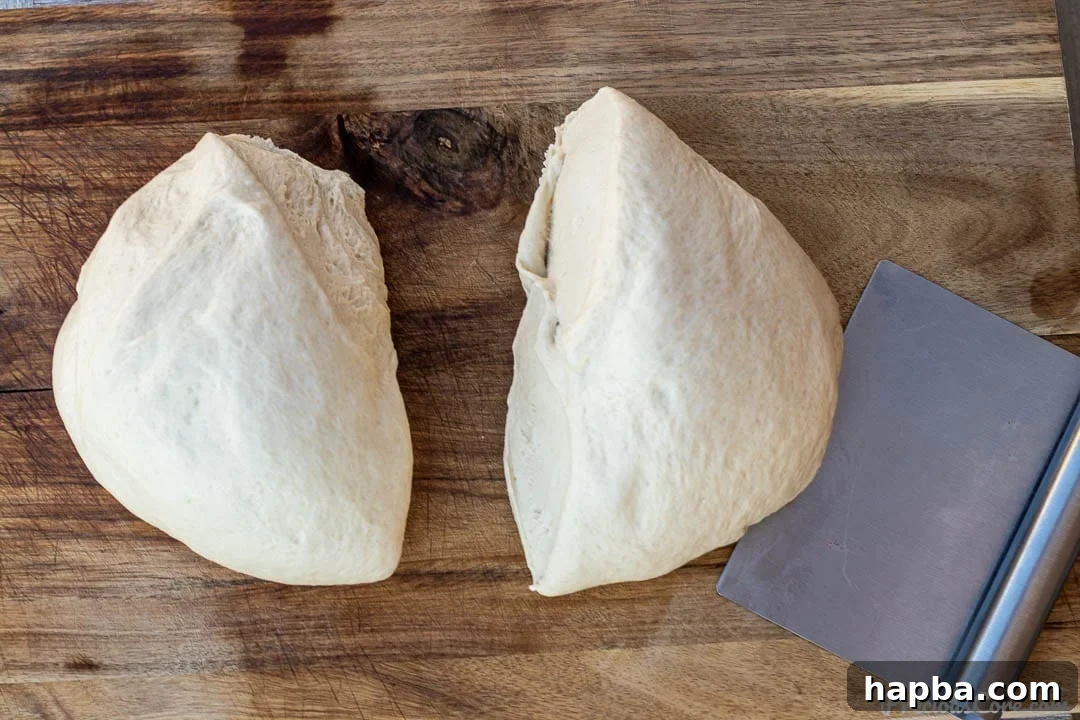
Step 6: Second Rise (Proofing). Place the shaped dough logs, seam-side down, into the prepared loaf pans. Cover the pans loosely with plastic wrap or a clean kitchen towel. Allow the dough to rise a second time in a warm place for another 20 minutes, or until the dough has nearly reached the top edges of the loaf pans. This second rise contributes to a lighter, airier crumb.
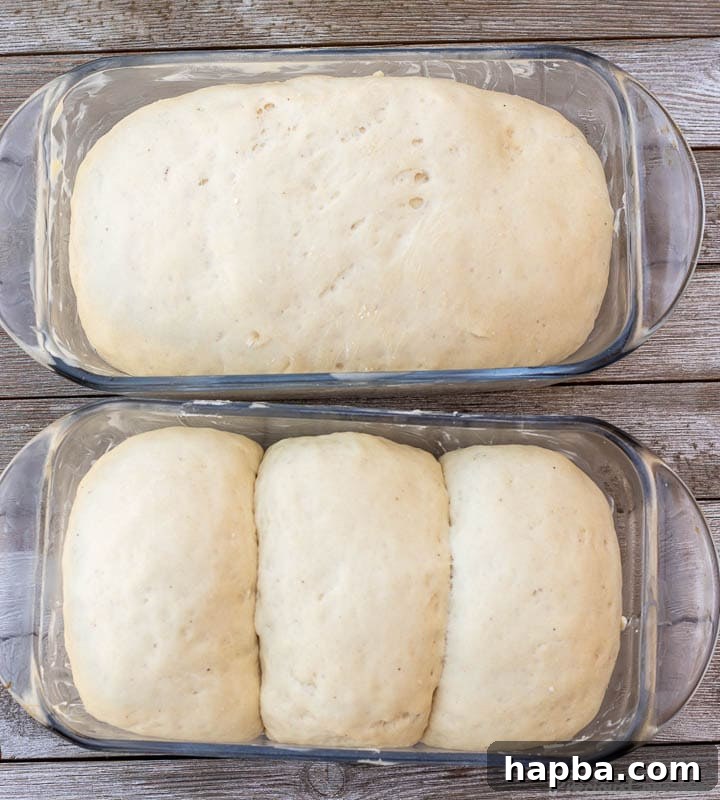
Step 7: Bake to Golden Perfection. While the dough is on its second rise, preheat your oven to 350°F (175°C). If you desire a golden, shiny crust, you can brush the tops of the loaves with an egg wash (1 egg beaten with 1 tablespoon of water) just before baking. Bake the bread for 30-35 minutes, or until the crust is a beautiful golden brown. To confirm doneness, you can check the internal temperature with a digital thermometer; it should register at least 195°F (90°C). If the bread is browning too quickly during baking, loosely tent it with aluminum foil.
Step 8: Cool and Enjoy. Once baked, remove the loaf pans from the oven and transfer them to a wire cooling rack. Allow the bread to cool in the pans for about 5-10 minutes before carefully removing the loaves from the pans. This initial cooling helps set the crust and prevents the bread from collapsing. Continue cooling the loaves completely on the wire rack. Cooling on a rack is crucial for air circulation, preventing the bottom of the bread from becoming soggy. Slice and enjoy your delicious, homemade sandwich bread!
Expert Tips for Perfect Homemade Bread Every Time
Achieving consistently perfect homemade bread is easier than you think, especially with a few expert tips. These insights will help you avoid common pitfalls and ensure your easy sandwich bread turns out beautifully soft and delicious every time.
- Verify Yeast Activity: Always ensure your yeast is active. When proofing, if your yeast mixture doesn’t become foamy within 5-10 minutes, your yeast might be old or the water temperature was off. Discard it and start with fresh yeast and correctly tempered water (105-115°F or 40-46°C).
- Accurate Water Temperature is Key: Lukewarm water is crucial for activating yeast without killing it. Use a thermometer for precision, aiming for 105-115°F (40-46°C). Water that’s too hot will kill the yeast, preventing rise, and water that’s too cold won’t activate it sufficiently.
- Don’t Over-Flour: While a lightly floured surface is needed for kneading, resist the temptation to add too much extra flour to the dough. Too much flour will result in a dry, dense, and tough loaf. Aim for a dough that is soft and slightly sticky, not dry.
- Master the Windowpane Test: Once you finish kneading the dough, you can perform a windowpane test to check for sufficient gluten development. Take a small piece of dough and gently stretch it with your fingers. If you can stretch it thin enough to see light through it without it tearing, your dough is adequately kneaded.
- Create a Warm Rising Environment: Yeast loves warmth. If your kitchen is cool, you can create a warm spot for rising. A common trick is to turn your oven on to its lowest setting for just one minute, then turn it off, and place the covered dough inside. This creates a cozy, draft-free environment ideal for rising. You can also cover the bowl with a damp kitchen towel during the first rise; the slight moisture will prevent a dry crust from forming on the dough.
- Proper Loaf Shaping: How you shape your dough significantly impacts the final texture and appearance of your loaf. A tight, well-formed log helps create an even crumb and prevents large air pockets. Ensure the seam is tightly pinched and placed at the bottom of the pan.
- Cool Completely: It’s tempting to slice into a hot loaf, but resist! Cooling the bread completely on a wire rack is essential. As bread cools, the internal starches set, and moisture redistributes, improving texture and flavor. Slicing too early can result in a gummy texture.
- Storage for Freshness: If you plan to eat the bread within a day or two, you can store it in a bread bag at room temperature. For longer storage, wrap the cooled loaf tightly in plastic wrap, then place it in an airtight container. Do not refrigerate homemade bread, as the cool temperatures can quickly dry it out, making it stale faster. For extended storage (up to 3 months), slice the cooled bread, wrap individual slices or portions, and freeze.
- Use a Serrated Knife: For the best, most even slices, always use a sharp serrated knife. This type of knife glides through the soft crust and tender crumb without squishing or tearing the loaf.
- Stand Mixer Considerations: If you prefer using a stand mixer, ensure you use a dough hook attachment. Be cautious not to overwork the dough in a stand mixer, as this can lead to a tough loaf. I suggest using a low speed just to bring the dough together, then finish with a brief hand knead to develop the perfect texture and feel.
Watch: Easy Sandwich Bread Tutorial
Seeing the process in action can be incredibly helpful, especially for beginner bakers! Watch me make this Easy Sandwich Bread Recipe step-by-step in the video below. It offers visual cues for kneading, shaping, and judging the rise of the dough.
If you enjoy my baking tutorials, consider subscribing to my YouTube channel (SUBSCRIBE HERE) so you don’t miss out on any of my new videos!
Explore More Homemade Bread Recipes
If you loved baking this easy sandwich bread, you’ll undoubtedly enjoy these other fantastic homemade bread recipes:
Easy Dinner Rolls
Easy Homemade French Bread
Cinnamon Rolls With Cream Cheese Frosting
Homemade Milk Bread
Shawarma Bread
Banana Bread Rolls
If you make this recipe, please leave a star rating below. Your feedback helps others discover and enjoy this recipe, and I always love hearing from you! Thank you!
Want to save this recipe?
Enter your email below and we’ll send the recipe straight to your inbox!
Easy Sandwich Bread Recipe
This Easy Sandwich Bread Recipe is a basic bread recipe that is perfect for beginners. This recipe yields bread that is so fluffy and effortlessly vegan. This is the perfect homemade bread for sandwiches or serving alongside dinner.
Pin Recipe
Rate
Print Recipe
Ingredients
- 6 cups bread or all-purpose (plain) flour (750 grams)
- 2 cups lukewarm water (110 degrees F / 43 degrees C)
- 1 tablespoon active dry yeast
- 1/4 cup vegetable oil (canola oil, corn oil, peanut oil would work)
- 1/4 cup granulated sugar (or cane sugar)
- 2 teaspoons salt
- 1/4 teaspoon freshly grated nutmeg
Instructions
Proof the yeast.
-
Pour the lukewarm water into a large mixing bowl. Add the yeast and let it sit for 5 minutes. It is going to look creamy and foamy.
-
To the mixing bowl add the sugar, oil, flour and salt. Mix with a wooden spoon to combine until a shaggy dough forms.
-
Transfer the mixture onto a clean working surface. Knead to form a smooth, elastic dough for 5 minutes. If it is too hard, sprinkle on a little water (½ tsp at a time). You need the dough to be soft and slightly sticky. Softer dough yields softer bread.
-
On the flip side, if the dough is too sticky and difficult to handle, sprinkle a little flour (1 tbsp at a time) on the dough and knead, until the dough can be handled without being overly sticky.
-
Rub oil all over a large mixing bowl. Place the dough into the bowl and move the dough around so the oil gets all over it. Cover with plastic wrap and keep in a warm place to rise.
-
To create a warm place, I usually turn my oven on for about 1 minute then I turn it off. This creates the perfect atmosphere for yeasted dough to rise.
-
Let the dough rise for 1-2 hours until about doubled in size.
Shape the dough and put into prepared loaf pans.
-
Punch the dough to remove the excess air then divide the dough into two equal portions.
-
Generously grease two 9 by 5 inch loaf pans.
-
Take one portion of dough, flatten it into a rectangle, then roll it tightly into a log, pinching the seam closed at the bottom. Tuck the ends under. Place the shaped dough into one loaf pan. Repeat with the second portion of dough for the second loaf pan. (You can also divide one portion into 3 equal ovals and place them side by side in the pan as shown in the video).
-
Let the loaves rise in a warm place for another 20 minutes, or until nearly reaching the top of the loaf pan.
-
Preheat oven to 350 degrees Fahrenheit or 180 degrees Celsius.
-
Place the loaves into the preheated oven and bake for 30-35 minutes until golden brown. Check around 30 minutes – if the bread is browning fast, loosely cover with aluminum foil.
-
Remove loaves from oven and let them rest for about 5 minutes on a cooling rack in their pans. Then, remove loaves from pans and continue cooling completely on the wire rack before slicing and enjoying!
Notes
1. I used glass loaf pans, but metal loaf pans work perfectly too.
2. The nutmeg in this recipe is optional but highly recommended. It really elevates the flavor of the bread without being overpowering.
3. I tested this recipe with both bread and all-purpose flour, and both work perfectly!
4. Number of calories is per slice of bread, considering that one loaf is cut into 10 slices.
Nutrition
Calories: 1684 kcal | Carbohydrates: 298g | Protein: 46g | Fat: 32g | Saturated Fat: 7g | Polyunsaturated Fat: 10g | Monounsaturated Fat: 11g | Trans Fat: 3g | Sodium: 2347mg | Potassium: 396mg | Fiber: 10g | Sugar: 26g | Vitamin A: 8 IU | Vitamin C: 0.01mg | Calcium: 66mg | Iron: 3mg
Additional Info
Tried this recipe?
Mention @preciouscore or tag #PreciousCore!