
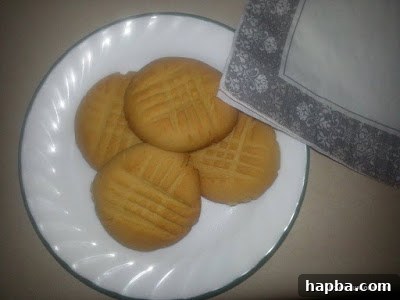
The Ultimate Guide to Baking Irresistible Peanut Butter Cookies
Do you ever find yourself with a jar of peanut butter (or groundnut paste, as it’s known in some parts of the world) sitting patiently in your pantry, gathering dust? For many of us, peanut butter is a breakfast staple or a quick sandwich filler, but its culinary potential stretches far beyond these conventional uses. I recently faced this delightful dilemma – a generous supply of rich, creamy peanut butter and a yearning to transform it into something truly special. It had been lounging in my cabinet for a while, waiting for its moment to shine, and I knew it was time for a creative kitchen adventure.
The turning point for my peanut butter revelation came, as many great culinary inspirations do, from watching MasterChef. Yes, I’m an avid fan! In a particularly captivating episode, contestants faced a high-pressure challenge: to create a stunning dessert using peanut butter and jelly. Witnessing the incredible array of innovative and visually spectacular dishes they crafted using these humble ingredients ignited a spark. It was a powerful reminder that with a little imagination, even the simplest ingredients can be elevated to gourmet status. My dormant jar of peanut butter suddenly felt like a treasure chest awaiting discovery. I was ready to put my peanut butter to work and embark on my own baking journey.
Inspired and eager, I dove into the vast ocean of the internet, scanning through countless recipes for the perfect peanut butter creation. I sifted through endless variations, seeking a recipe that promised both simplicity and unparalleled deliciousness. After careful consideration and a touch of experimentation, I am thrilled to share that I successfully developed what I believe are the most delightful and irresistible peanut butter cookies. The result exceeded all my expectations, delivering a treat that is rich, chewy, and bursting with that classic nutty flavor. Honestly, I’m quite proud of this accomplishment, and I can’t wait for you to experience the joy of baking and tasting them!
Why Peanut Butter Cookies Are a Must-Bake Treat
Peanut butter cookies hold a special place in the hearts of dessert lovers worldwide, and for good reason. They offer a unique combination of qualities that make them incredibly popular and satisfying. Their signature rich, nutty flavor is instantly comforting and familiar, evoking feelings of nostalgia. The texture is often a perfect balance: crispy edges yielding to a soft, chewy center that practically melts in your mouth. Unlike some more complex cookie recipes, peanut butter cookies are famously straightforward to make, requiring basic ingredients and minimal fuss, making them ideal for both novice and experienced bakers.
Beyond their ease and deliciousness, peanut butter cookies are incredibly versatile. They are a fantastic addition to any cookie platter, perfect for school lunchboxes, a comforting treat with a cup of coffee or tea, or a crowd-pleaser at any gathering. Their distinct criss-cross pattern, pressed with a fork, is instantly recognizable and adds to their homemade charm. This recipe aims to capture all these beloved attributes, delivering a cookie that is not just good, but truly exceptional.
A Visual Journey: Baking Peanut Butter Cookies Step-by-Step
To help you confidently recreate these amazing cookies in your own kitchen, I’ve compiled a series of photos illustrating each crucial step of the process. Visual guides can make all the difference, especially in baking, ensuring you achieve the perfect consistency and technique at every stage. Follow along with these images as we transform simple ingredients into golden, chewy masterpieces. Each picture is a mini-lesson, designed to demystify the baking process and guide you towards success.
The journey begins with creaming together the softened butter and sugar until light and fluffy – a fundamental step for achieving tender cookies. This process incorporates air, which contributes to the cookies’ texture.
Next, a large egg is added, providing moisture and binding the ingredients together. Ensure it’s well incorporated for a smooth batter.
A splash of vanilla extract goes in, enhancing the overall flavor profile and adding a beautiful aromatic note to the cookies.
Now for the star ingredient: a generous cup of smooth peanut butter, mixed in until fully combined, creating a rich and fragrant paste.
The dry ingredients – flour, baking powder, and baking soda – are gently folded into the wet mixture, careful not to overmix, which can lead to tough cookies.
Once the dough is smooth and cohesive, it’s time to roll it into small, uniform balls, slightly smaller than a golf ball. Consistency in size ensures even baking.
Each dough ball is then lightly pressed between your palms to flatten slightly before being placed on a prepared baking tray, leaving enough space for them to spread.
The iconic criss-cross pattern is created by gently pressing a fork onto each cookie ball, first in one direction, then perpendicular. This not only adds visual appeal but also helps the cookies bake evenly.
Ensure the fork marks are clear and distinct, giving the cookies their classic, rustic look before they go into the oven.
Into the preheated oven they go! Watch them closely as they transform, filling your kitchen with an irresistible aroma.
Once baked to a perfect golden brown, remove them from the oven. They’ll be slightly soft but will firm up as they cool.
Allow the cookies to cool on the baking sheet for a few minutes before transferring them to a wire rack to cool completely. This prevents them from breaking.
Behold! A stack of perfectly baked peanut butter cookies, ready to be devoured.
A closer look reveals the delightful texture and inviting golden hue of these homemade treats.
And finally, a full platter, showcasing the bounty of your baking efforts. They’re almost too pretty to eat, but trust me, you’ll want to!
Classic Peanut Butter Cookies: The Recipe
This recipe is designed for simplicity and maximum flavor, ensuring you get wonderfully chewy and delicious peanut butter cookies every time. It’s incredibly forgiving and adaptable, making it a fantastic addition to any baker’s repertoire.
Prep Time: 30 minutes
Cook Time: 10-15 minutes
Total Time: Approximately 45 minutes
Ingredients for Your Perfect Batch:
- 1 ¾ to 2 cups all-purpose flour (use the lower amount for softer cookies, more if your dough feels too sticky)
- ¾ cup granulated sugar (adjust to taste, see notes below)
- ½ teaspoon baking soda (for spread and chewiness)
- ½ teaspoon baking powder (for lift and tenderness)
- 1 stick (½ cup or 113g) unsalted butter, softened to room temperature
- 1 large egg, at room temperature
- ½ teaspoon fine sea salt (enhances flavor and balances sweetness)
- 1 teaspoon pure vanilla extract
- 1 cup smooth peanut butter (creamy and not overly oily works best)
Instructions for Irresistible Peanut Butter Cookies:
- Cream Butter and Sugar: In a large mixing bowl, using an electric mixer or a sturdy whisk, cream together the softened butter and granulated sugar until the mixture is light, fluffy, and pale in color. This process takes about 2-3 minutes and is crucial for a tender cookie texture.
- Add Egg: Beat the large egg into the creamed butter and sugar mixture until fully incorporated. Scrape down the sides of the bowl to ensure everything is well combined.
- Incorporate Flavorings: Stir in the vanilla extract and the smooth peanut butter. Continue mixing until a completely smooth and uniform paste forms. The mixture should be fragrant and well-blended.
- Combine Dry Ingredients: In a separate bowl, whisk together the flour, baking soda, baking powder, and salt. This ensures the leavening agents and salt are evenly distributed throughout the dough.
- Form the Dough: Gradually add the dry ingredients to the wet mixture, mixing on low speed until just combined. Be careful not to overmix the dough, as this can develop the gluten too much, leading to tough cookies. Mix only until no streaks of flour remain. The dough should be soft but manageable.
- Preheat and Prepare: Preheat your oven to 350°F (175°C). Line a baking sheet with parchment paper or a silicone baking mat.
- Shape the Cookies: Take small portions of dough, about a tablespoon each, and roll them into small balls. Each ball should be slightly smaller than a golf ball. For an extra touch of sweetness and sparkle, you can roll these balls in extra granulated sugar at this stage (see notes).
- Arrange on Tray: Gently press each dough ball between your palms to slightly flatten it, then place it onto the prepared baking tray, ensuring you leave about 2 inches of space between each cookie to allow for spreading.
- Create Criss-Cross Pattern: Using the tines of a fork, gently press down on each cookie ball to create a criss-cross pattern. This is the classic peanut butter cookie look and also helps the cookies bake more evenly.
- Bake to Perfection: Bake in the preheated oven for approximately 10-15 minutes. Cookies are done when their edges are lightly golden brown, but their centers still look slightly soft. Remember, cookies will continue to cook slightly from residual heat after being removed from the oven.
- Cool and Enjoy: Remove the baking sheet from the oven and let the cookies cool on the tray for about 5 minutes before carefully transferring them to a wire rack to cool completely. This prevents them from breaking.
Expert Tips for Peanut Butter Cookie Perfection:
- Sugar Adjustment: I opted for less sugar in my batch as I’m mindful of my sugar intake. However, for a sweeter, more traditional peanut butter cookie, feel free to increase the sugar to up to 1 cup. You can also roll the dough balls in extra granulated sugar before baking for a lovely sparkle and a slight crunchy coating.
- Don’t Overbake: For soft, chewy cookies, it’s crucial not to overbake them. They should still look slightly underdone in the center when you pull them out of the oven. They will firm up as they cool. Overbaking leads to dry, crumbly cookies.
- Room Temperature Ingredients: Ensure your butter and egg are at room temperature. This helps them emulsify better with other ingredients, creating a smoother, more uniform dough.
- Peanut Butter Choice: While this recipe uses smooth peanut butter, you can experiment with crunchy peanut butter for added texture. Just be aware that the dough might be slightly firmer. Avoid using natural peanut butter that separates, as it can affect the texture and consistency of the cookies.
- Storage: Store your cooled peanut butter cookies in an airtight container at room temperature for up to a week. They also freeze beautifully for up to 3 months; just thaw them at room temperature before serving.
- Get Creative: Want to take these cookies to the next level? Add chocolate chips, mini peanut butter cups, or chopped nuts (like pecans or walnuts) to the dough for delightful variations!
This truly is one of the easiest and most rewarding cookie recipes you’ll ever try. The resulting cookies are utterly irresistible – my kids absolutely adored them, and I’m sure yours will too! I encourage you to give this recipe a try and experience the sheer joy of biting into a perfectly homemade peanut butter cookie. Don’t forget to share your baking adventures and tell me how it goes in the comments section below!
Happy Baking!