
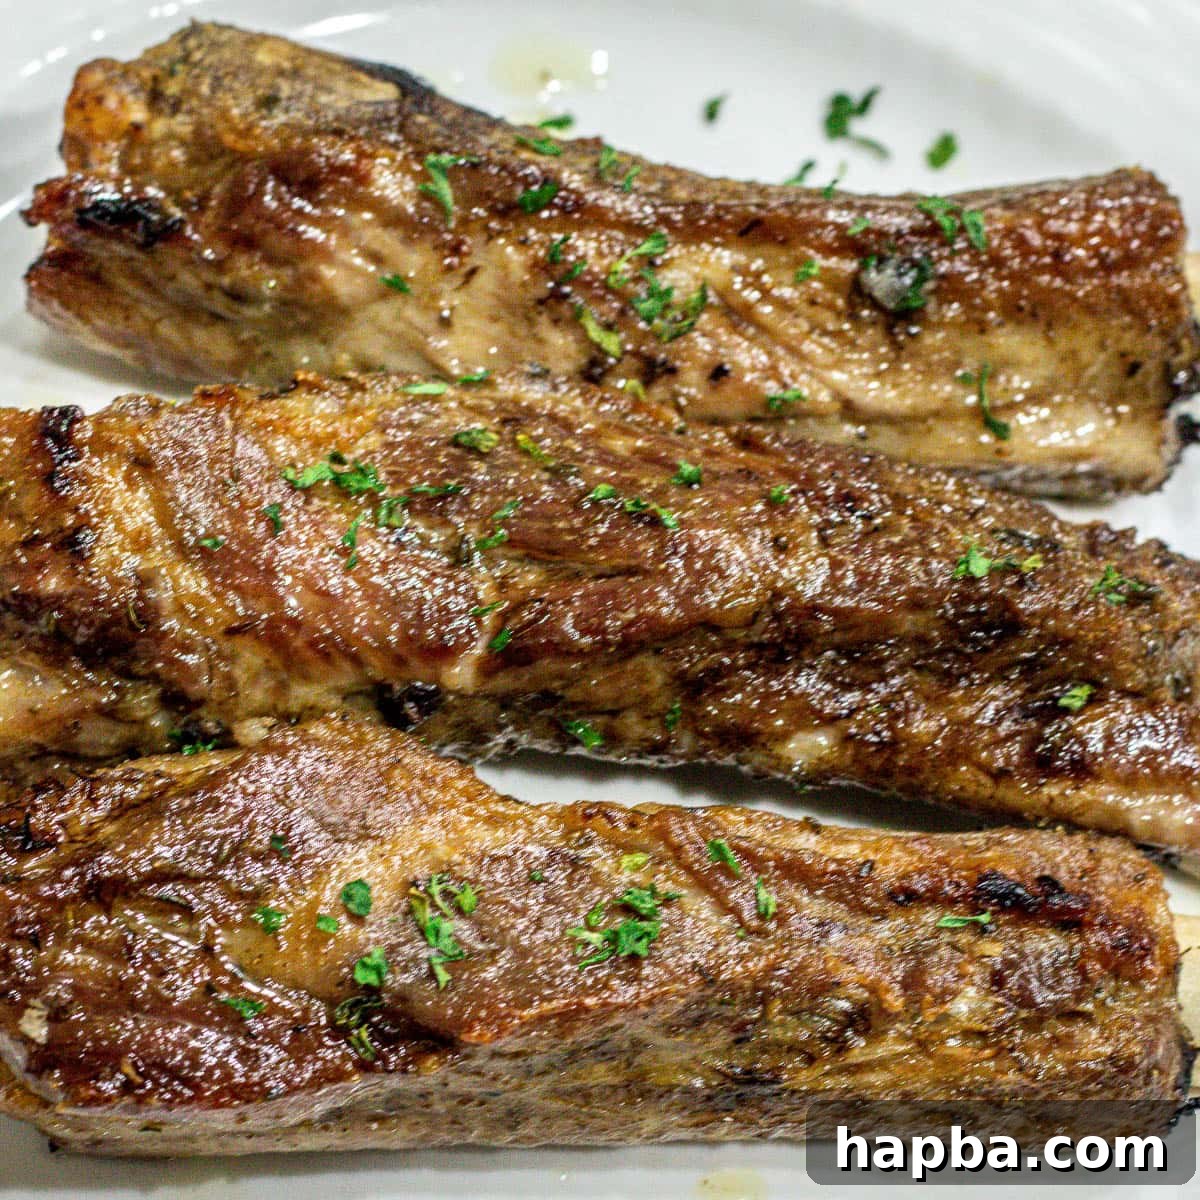
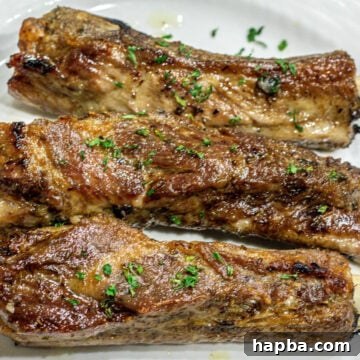
Prepare to savor the most delicious and effortlessly prepared Baked Dry Rub Ribs you’ll ever experience! This recipe transforms a simple homemade dry rub into a culinary masterpiece, yielding incredibly juicy, tender ribs that practically melt in your mouth. Whether you’re planning a quick weeknight dinner or a lavish spread for holidays and special gatherings, these oven-baked ribs are consistently a showstopper.
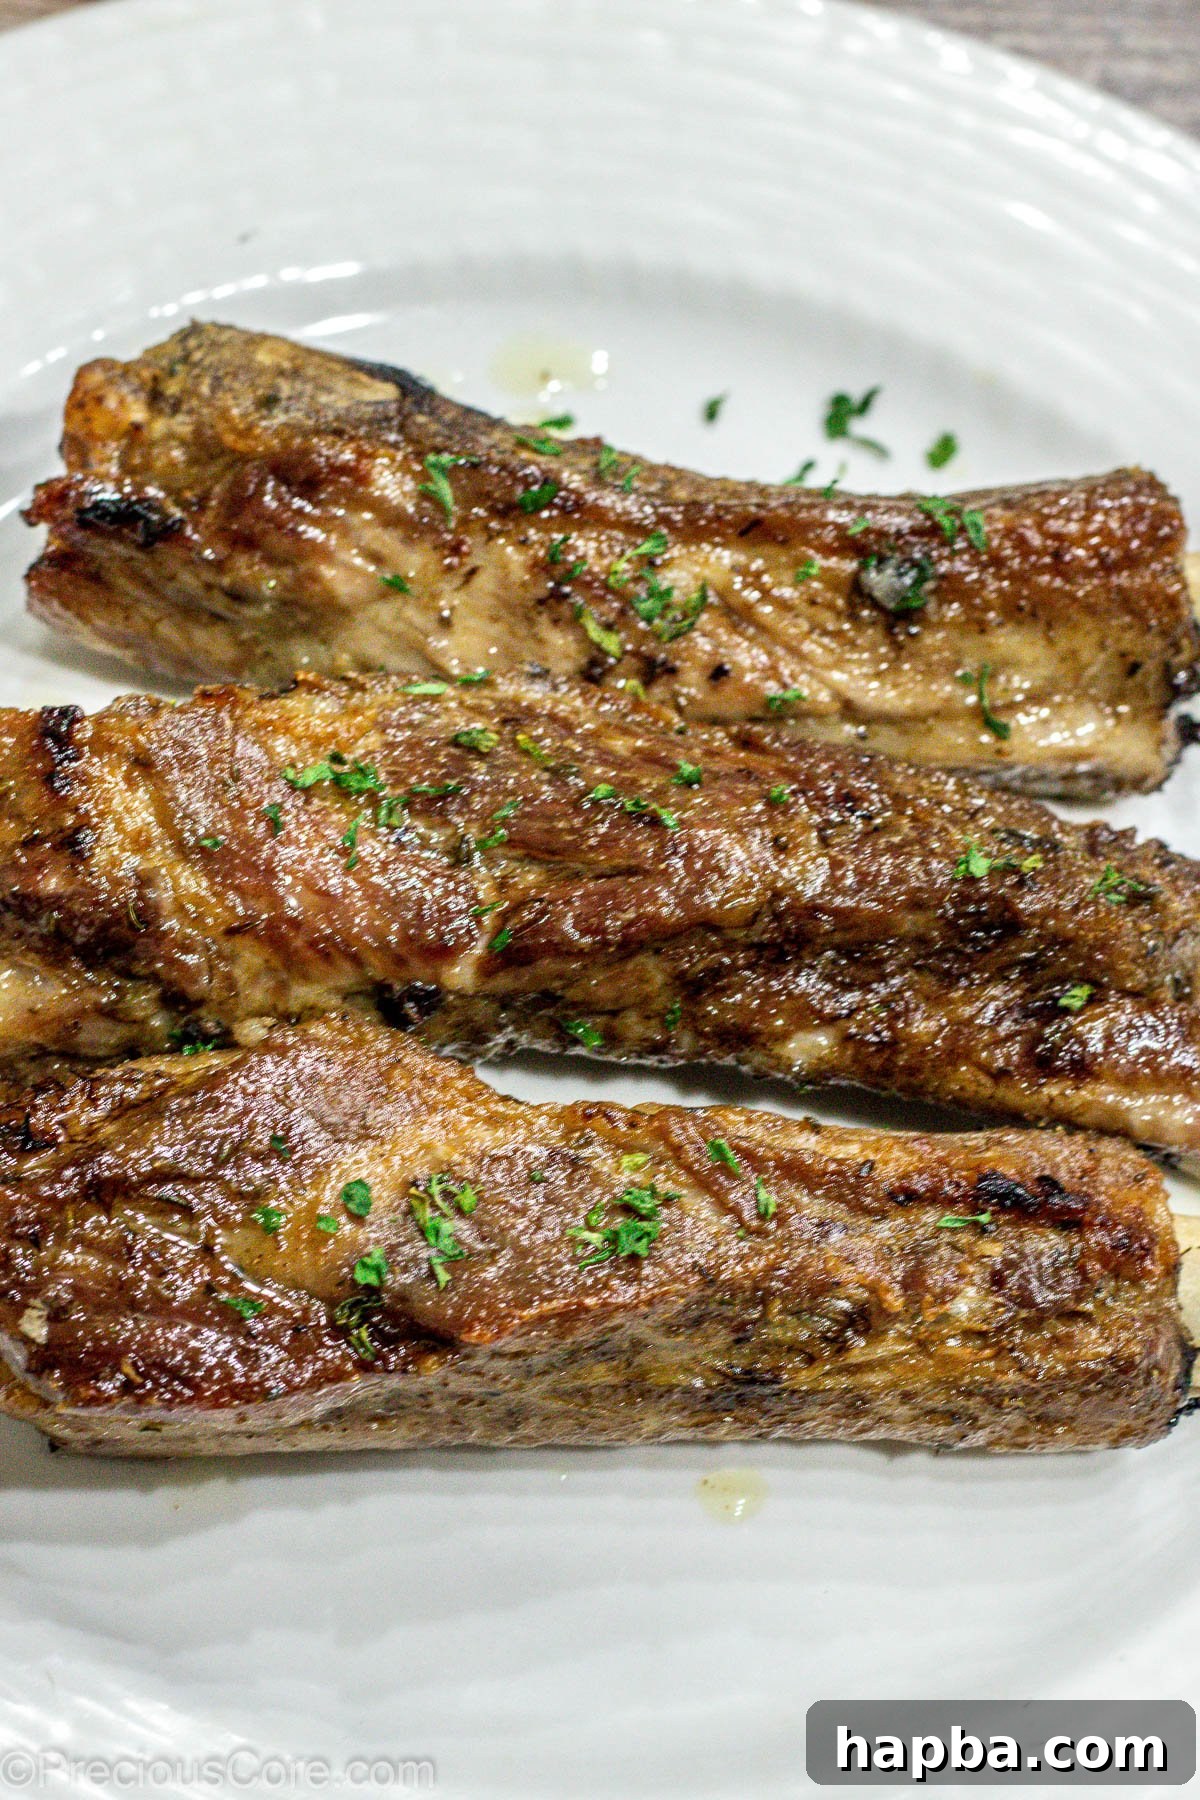
There’s an undeniable magic that happens when racks of ribs slowly cook in the oven, filling your home with an irresistible aroma. My family, especially the kids, absolutely adores this recipe. The pork ribs emerge beautifully browned, wonderfully savory, and so tender they literally fall off the bone with the slightest touch. Pair these perfect ribs with hearty sides like creamy 3 Cheese Mac and Cheese, golden Roasted Baby Potatoes, and vibrant Sauteed Vegetables, and you’ve got a complete, unforgettable meal that will have everyone asking for more.
Every time I prepare these Baked Dry Rub Ribs, it elevates the meal into a truly special occasion. They are, without exaggeration, the best ribs I’ve ever made or tasted. I even proudly served them as the centerpiece of our Christmas dinner two years ago, and our visiting friends couldn’t stop raving about them. The overwhelmingly positive feedback from everyone who has tried this recipe confirms its phenomenal taste and ease of preparation.
Table of Contents
- Why These Baked Dry Rub Ribs Are a Must-Try
- Essential Ingredients for Your Flavorful Dry Rub Ribs
- Step-by-Step Guide to Baking Perfect Dry Rub Ribs
- Expert Tips for Irresistible Oven-Baked Ribs
- Delicious Variations and Substitutions to Customize Your Ribs
- Frequently Asked Questions About Baked Ribs
- What To Serve With Your Succulent Ribs
- More Mouthwatering Easy Dinner Recipes
- Baked Dry Rub Ribs Recipe Card
Why These Baked Dry Rub Ribs Are a Must-Try
These baked dry rub ribs aren’t just a meal; they’re an experience waiting to happen. Here’s why this recipe deserves a permanent spot in your culinary repertoire:
- Unbelievably Easy Preparation: Don’t be intimidated by ribs! This recipe is incredibly straightforward, requiring minimal hands-on time – about 15 minutes of prep is all you need before the oven does the rest of the magic. It’s truly a “set it and forget it” kind of dish for most of the cooking process.
- Harnessing the Power of Dried Seasonings: Forget about chopping fresh herbs and garlic. Our brilliant dry rub relies entirely on readily available dried spices, making this recipe convenient and perfect for those days when you need maximum flavor with minimum effort.
- Explosively Delicious Flavor Profile: These ribs are a testament to how simple ingredients, when combined thoughtfully, can create an extraordinarily delicious meal. The secret lies in our perfectly balanced dry rub, crafted from common pantry staples. Each bite delivers a harmonious blend of savory, aromatic, and subtly piquant notes that will tantalize your taste buds.
- Remarkably Versatile: Whether you prefer them as a flavorful appetizer, perhaps with a side of homemade hot sauce or a sweet BBQ glaze for saucy ribs, or as the star of a hearty main course alongside a crisp lettuce salad or aromatic easy coconut rice, these tender baked ribs adapt beautifully. Their rich flavor and melt-in-your-mouth texture make them a perfect fit for any menu.
- Perfect for Any Season, Any Time: Unlike grilling, which can be weather-dependent, or slow-cooker methods that require all-day attention, these oven-baked ribs offer year-round convenience. Your oven transforms into a flavor powerhouse, delivering succulent ribs without the fuss of outdoor cooking or prolonged appliance use.
We are confident that you and your loved ones will fall in love with these delicious ribs as much as we have. They’ve received the ultimate seal of approval from even the pickiest eaters in our household!
Essential Ingredients for Your Flavorful Dry Rub Ribs
Crafting truly exceptional dry rub ribs begins with selecting quality ingredients. For this recipe, you’ll need a good rack of ribs, a touch of oil, and a carefully balanced blend of spices to create the signature dry rub that delivers incredible depth of flavor.
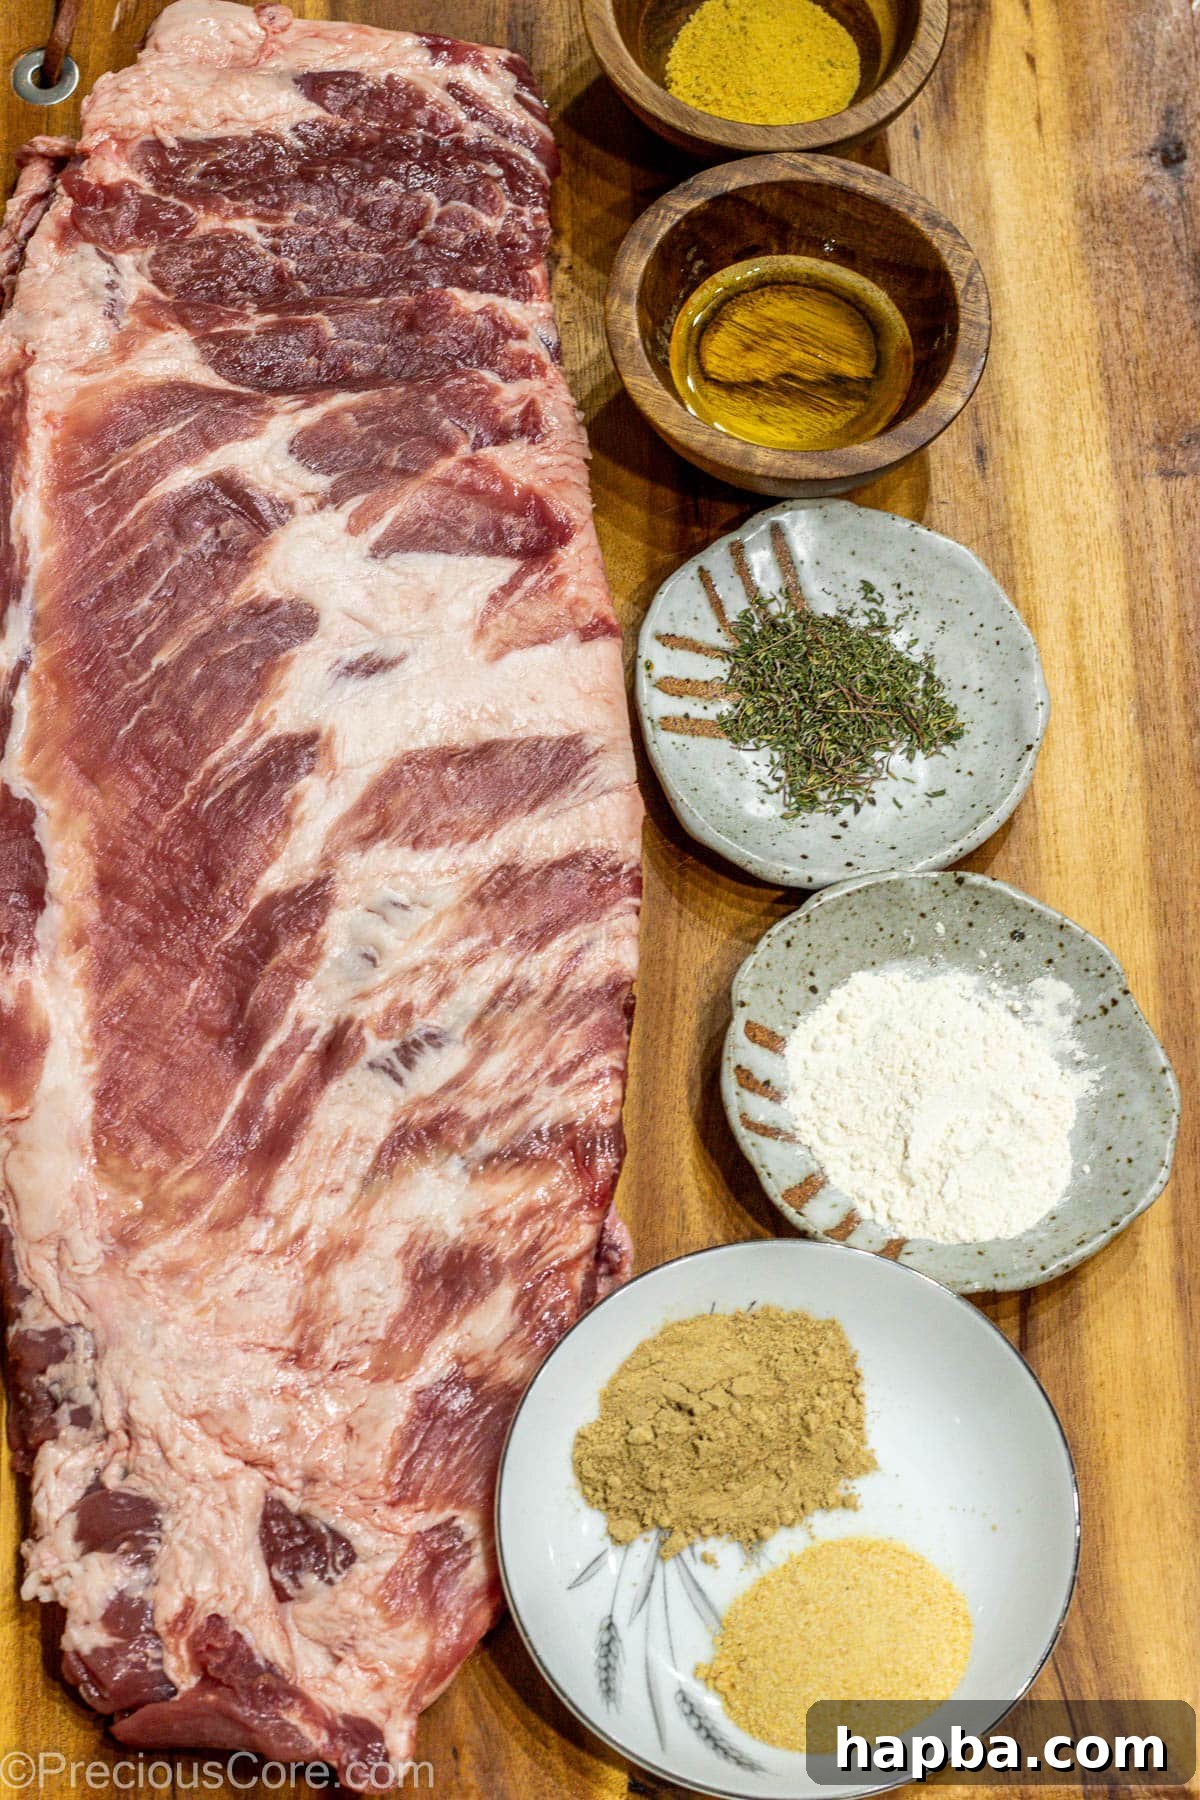
- Spare Ribs (St. Louis Style Ribs): For optimal results, we recommend a 4-pound rack of spare ribs, preferably St. Louis style, known for their meatiness and uniform shape. You can also opt for 4 pounds of ribs already pre-cut into individual portions for added convenience. Look for ribs with good marbling for extra juiciness.
- Olive Oil: A couple of tablespoons of olive oil act as a binder for the dry rub, helping the spices adhere evenly to the ribs and promoting a beautiful crust during baking.
- Salt and Chicken Bouillon Powder: These two ingredients are crucial for seasoning. Salt enhances the natural flavors of the pork, while chicken bouillon powder adds a wonderful layer of umami, creating a richer, more savory profile. You can use standard table salt or kosher salt; just remember to adjust quantities, as kosher salt is less dense and therefore less salty by volume.
- Signature Rib Rub Spices and Herbs: Our powerful dry rub blends common pantry spices to achieve a robust flavor. You’ll need:
- Garlic Powder: Provides an aromatic, savory base.
- Ginger Powder: Adds a subtle warmth and unique depth that complements pork exceptionally well.
- Onion Powder: Contributes a sweet, savory onion flavor without the moisture of fresh onions.
- Dried Thyme: Offers an earthy, slightly minty note that pairs wonderfully with rich meats.
- Black Pepper: Essential for a touch of pungent heat and overall seasoning.
Step-by-Step Guide to Baking Perfect Dry Rub Ribs
Achieving fall-off-the-bone tender ribs with a crisp, flavorful crust is simpler than you think. Follow these detailed steps to create a showstopping meal:
Step 1: Prepare the Ribs and Oven
- Preheat your oven: Set your oven to a precise 300 degrees Fahrenheit (150 degrees Celsius). This low, slow temperature is key to tenderizing the meat without drying it out.
- Pat ribs dry: Start by patting the entire rack of ribs thoroughly dry with paper towels. This step is vital as it helps the rub adhere better and promotes a superior crust.
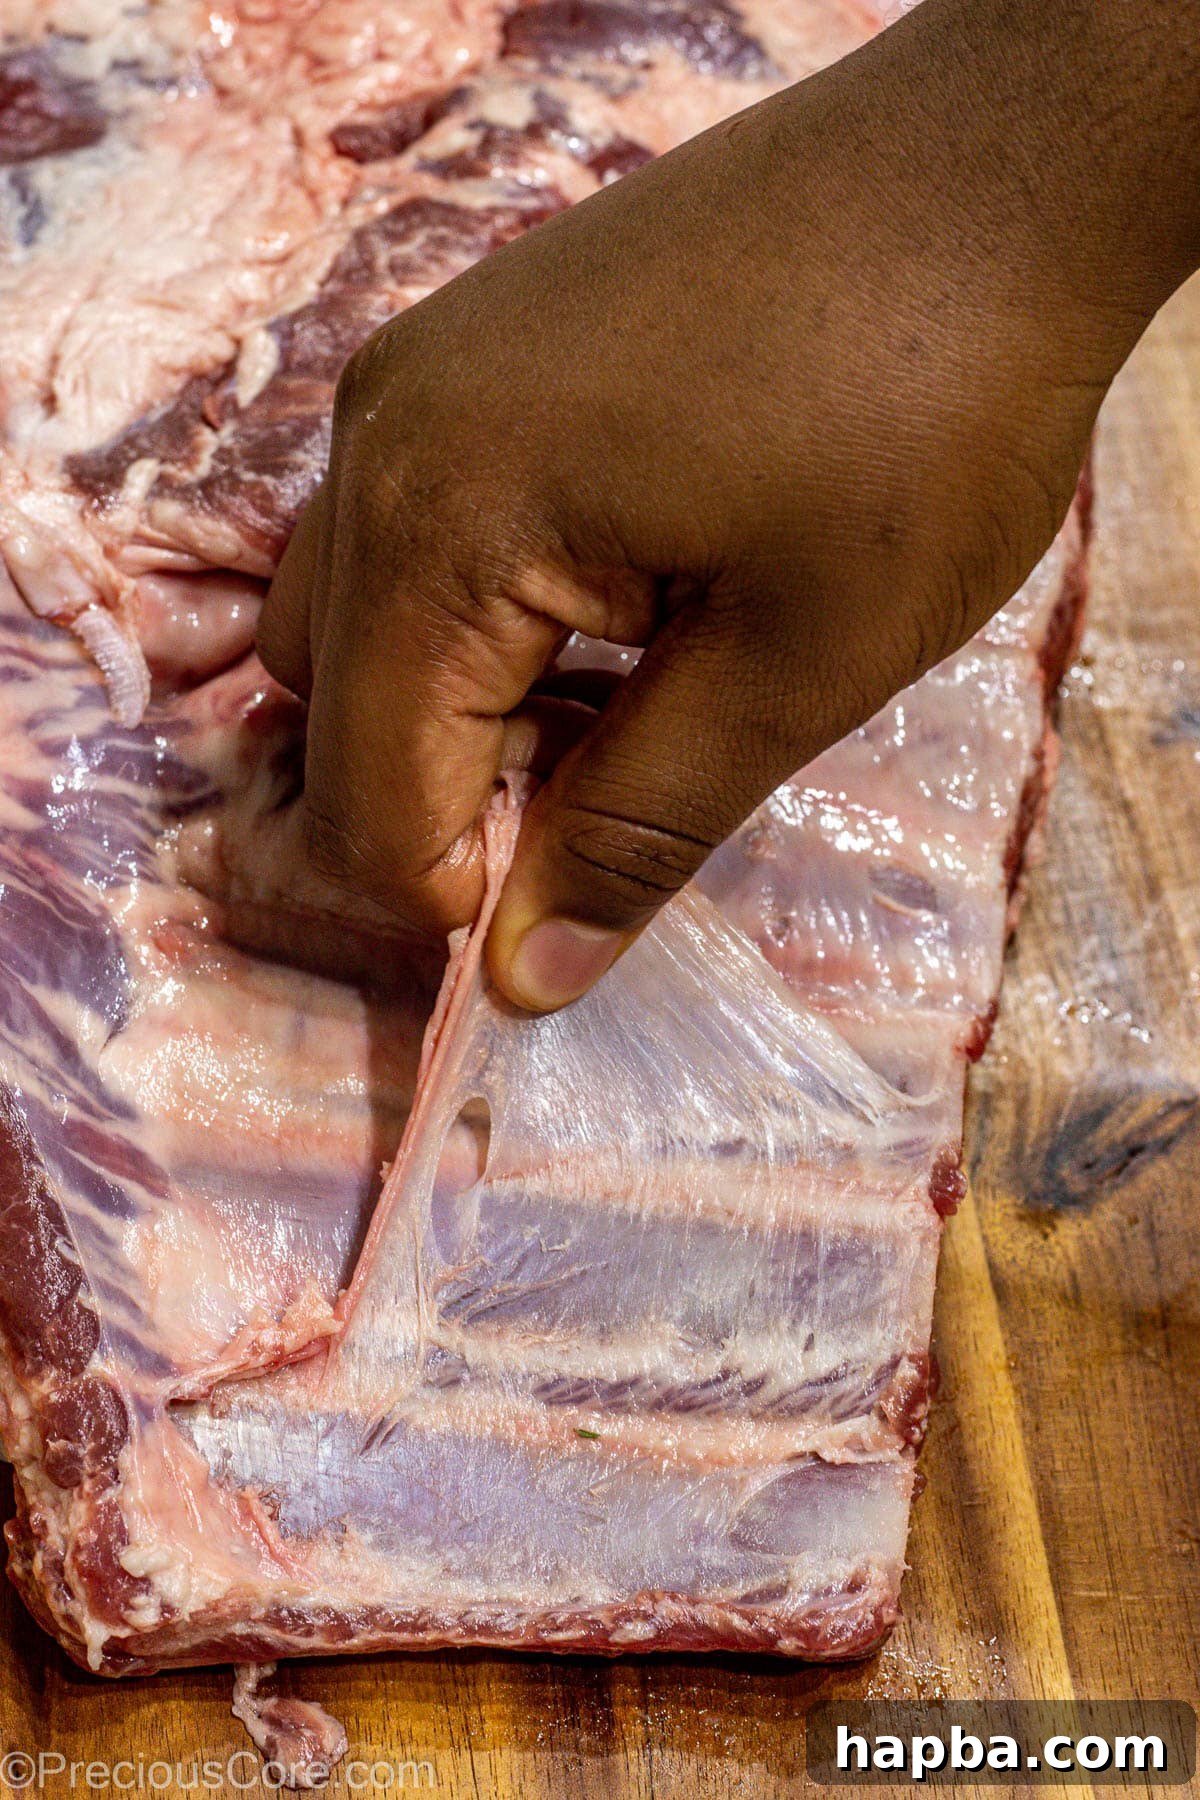
- Remove the membrane: Locate the thin, silvery membrane (or “silver skin”) on the bone side of the rack. This membrane, if left on, can make the ribs tough and chewy. Use a knife to gently lift an edge of the membrane, then grasp it firmly with a paper towel and pull it away. It should peel off in one piece. If you’re working with pre-cut individual ribs, this step may already be done, but always check.
- Mix the dry rub: In a small bowl, combine all the dry rub ingredients: salt, chicken bouillon powder, black pepper, garlic powder, ginger powder, onion powder, and dried thyme. Stir them well to ensure an even distribution of spices.
Step 2: Section and Season the Ribs
- Divide the rack into individual portions: Carefully cut the full rack of ribs into individual or two-bone portions. This crucial step allows the dry rub to penetrate all sides of the meat more effectively, resulting in deeper flavor and more tender results. To make cutting easier, place the rack bone-side up and use the bones as a guide for precise, even cuts.
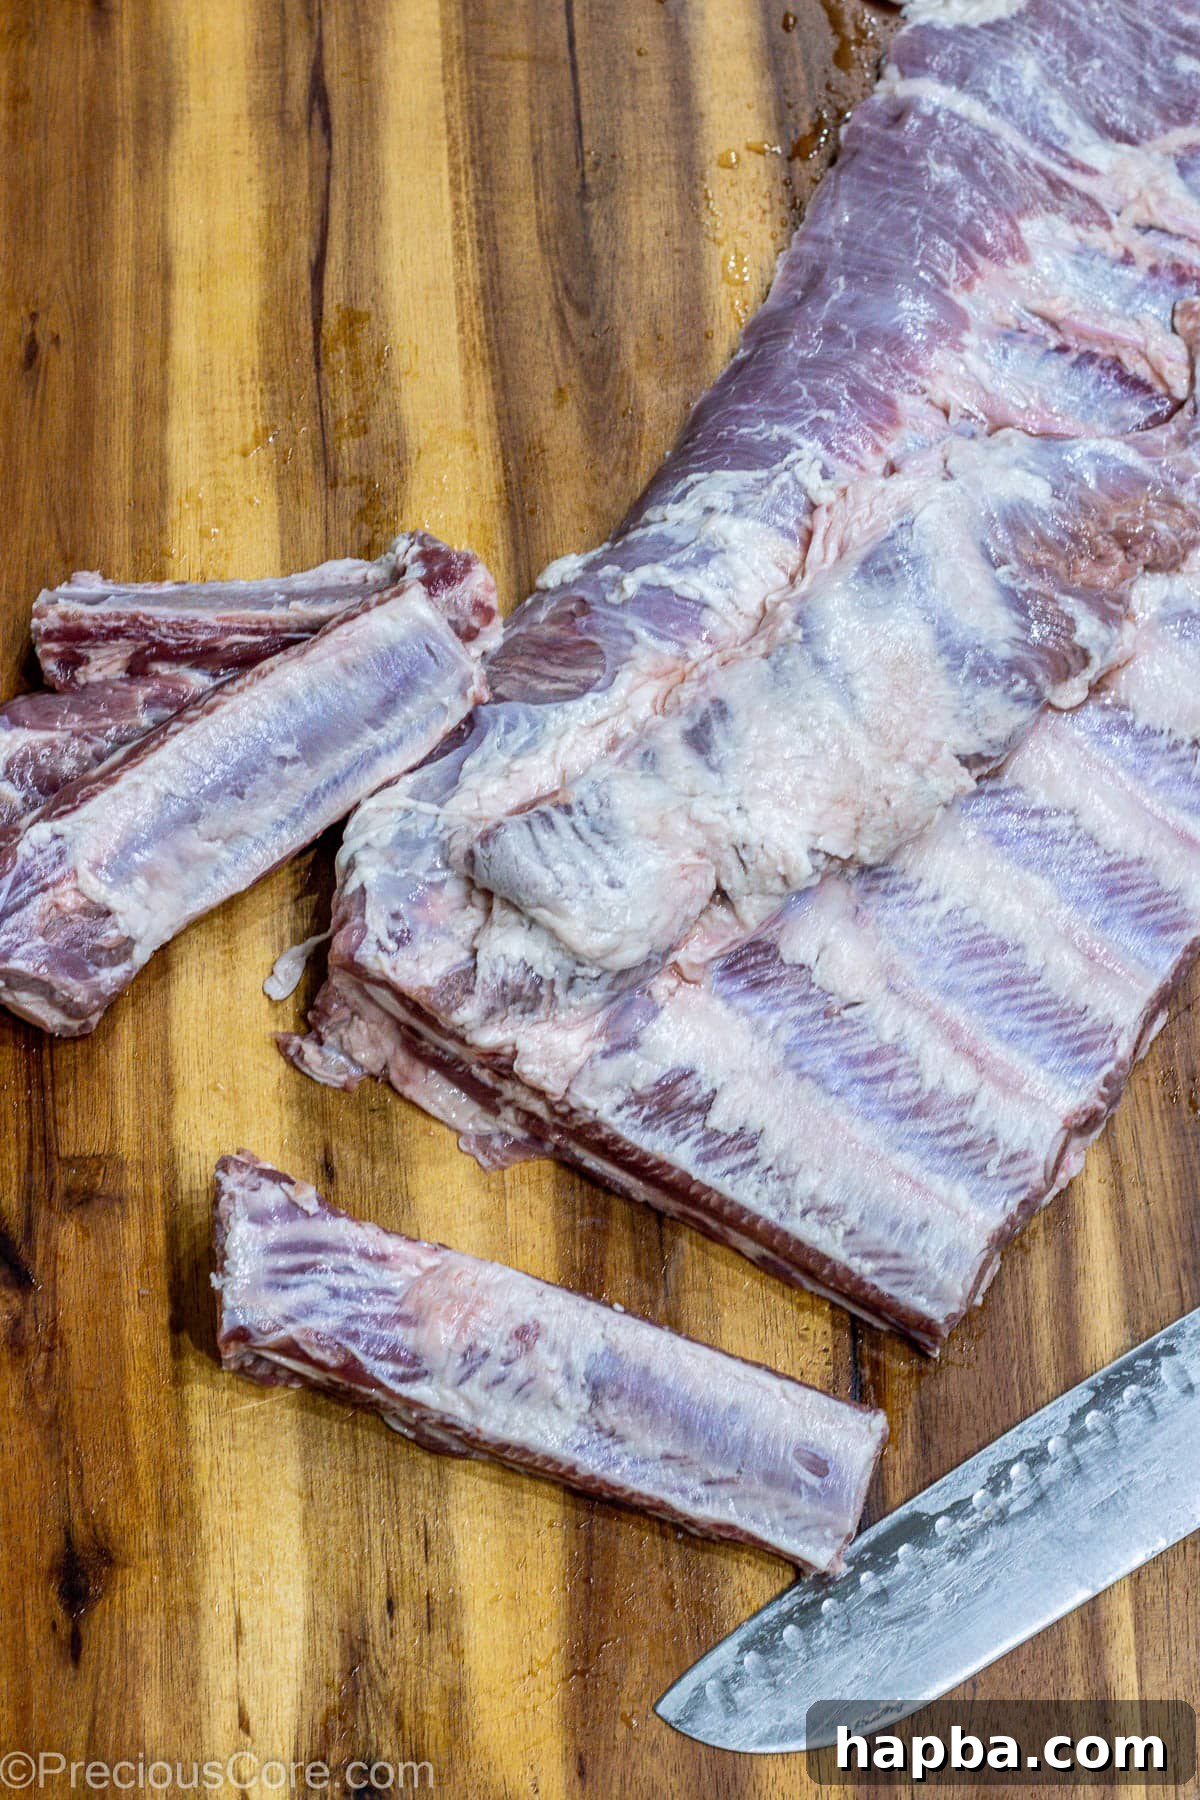
- Apply the dry rub: Place the individual rib portions in a large mixing bowl. Drizzle them with olive oil and toss to lightly coat. Then, sprinkle the prepared spice rub generously over the ribs. Using clean hands, mix thoroughly, ensuring every piece of meat, including all sides and the back, is completely coated with the flavorful spice mixture. This ensures maximum flavor penetration.
- Arrange in baking dish: Transfer the seasoned ribs to a large baking dish (a 9×13 inch dish works perfectly), arranging them meaty side up in a single layer if possible.
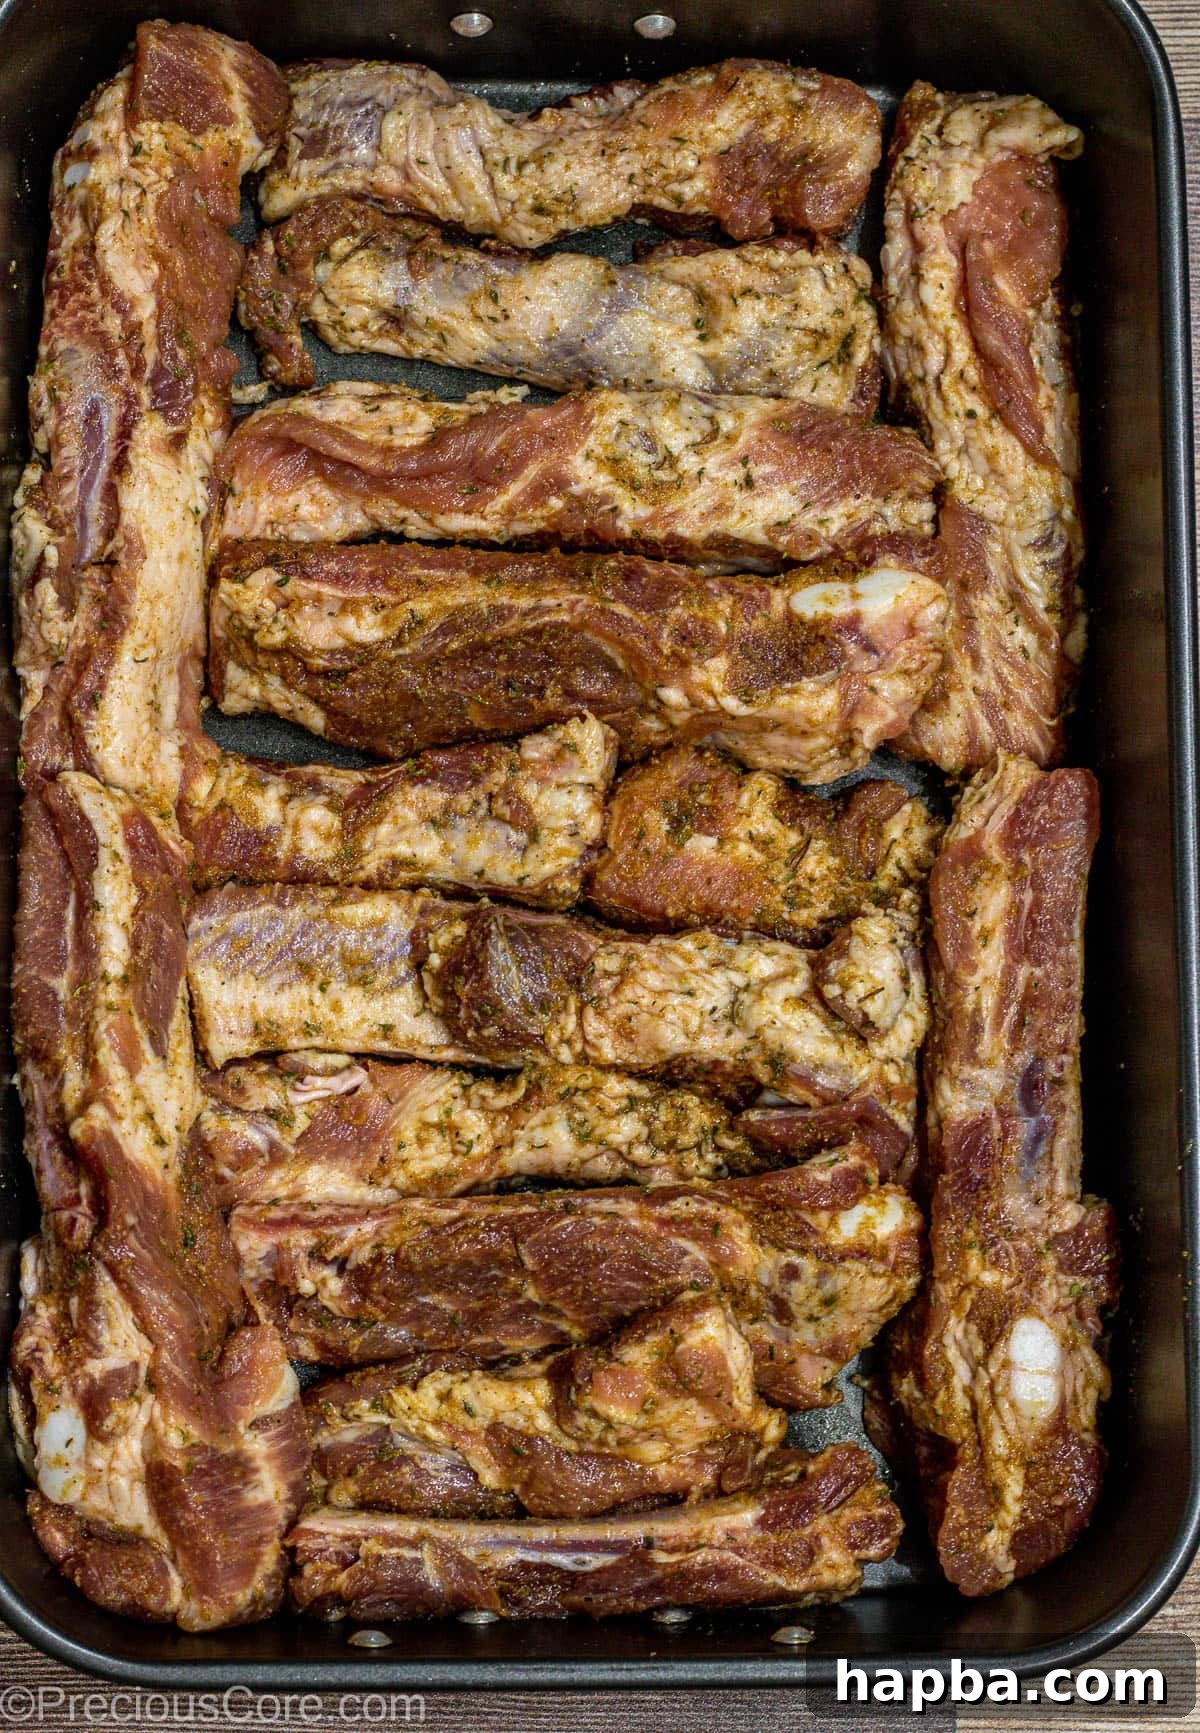
Step 3: Bake Low and Slow
- Cover and bake: Tightly cover the baking dish with heavy-duty aluminum foil. This creates a moist, steamy environment inside the dish, allowing the ribs to slow-cook and become incredibly tender without drying out. Place the covered dish in your preheated 300°F oven and bake for 1 hour and 30 minutes. Resist the urge to peek during this stage; maintaining a consistent low temperature is essential for achieving that sought-after fall-off-the-bone texture. Higher temperatures can cause the meat to seize up and become tough.
Step 4: The Finishing Broil for Perfection
- Prepare for broiling: While the ribs are baking, line a large baking sheet (an 18×13 inch size is ideal) with aluminum foil. If you have a baking rack, place it on the foil-lined sheet. This setup allows air circulation and prevents the ribs from sitting in rendered fat, promoting a crisper finish. If you don’t have a rack, lightly brush or spray the foil with oil to prevent sticking.
- Drain and transfer: After 90 minutes, carefully remove the baking dish from the oven. The ribs will have released a significant amount of liquid. Drain this liquid, as it’s no longer needed for tenderness. Gently transfer the tender ribs from the baking dish to the prepared baking rack or directly onto the oiled foil-lined baking sheet.
- Broil for a crispy finish: Set your oven to a high broil setting. Place the baking sheet with the ribs back into the oven. Broil for 5 minutes, carefully watching to prevent burning. The goal is a beautiful caramelization, not charring.
- Flip and broil again: Remove the baking sheet, flip each rib to expose the other side, and return to the oven for another 5 minutes of broiling. This ensures an even, delicious crust on both sides, deepening the flavor of the dry rub.
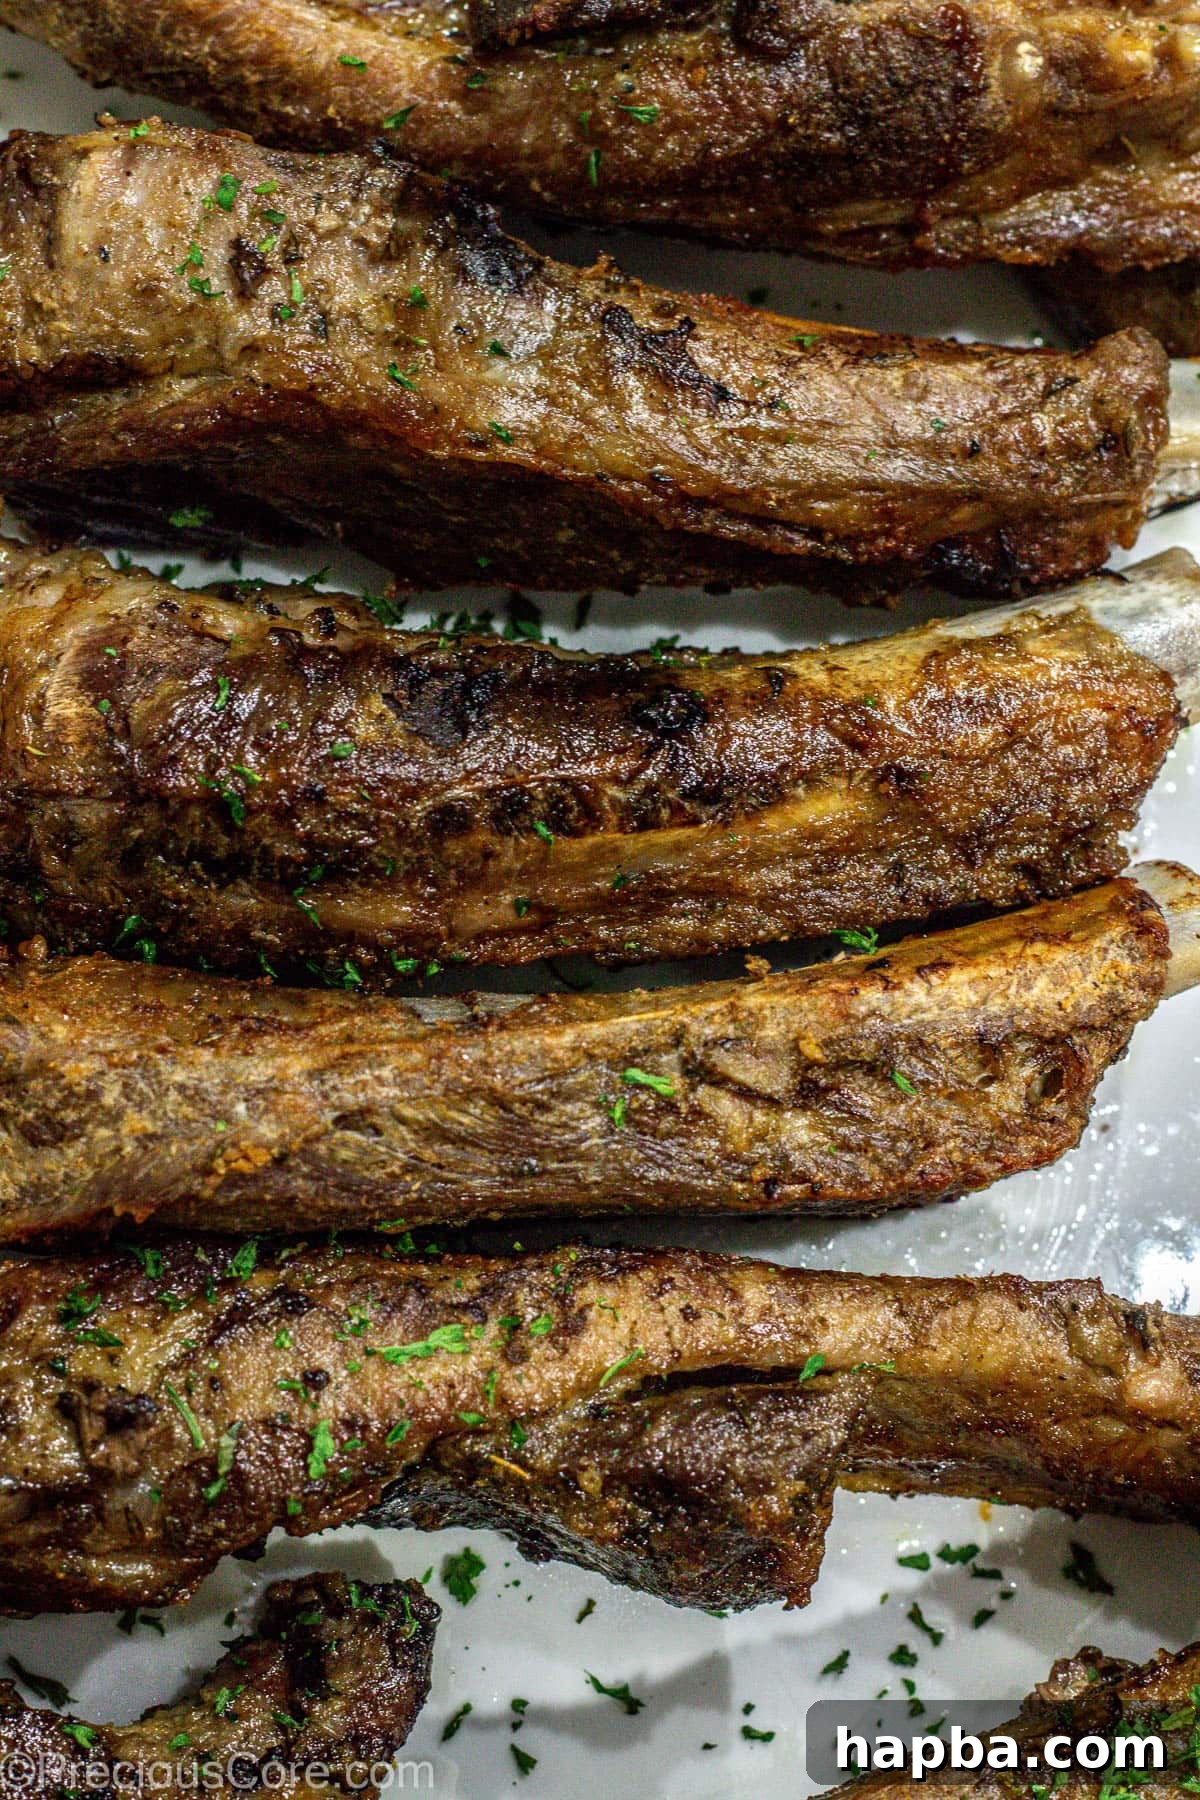
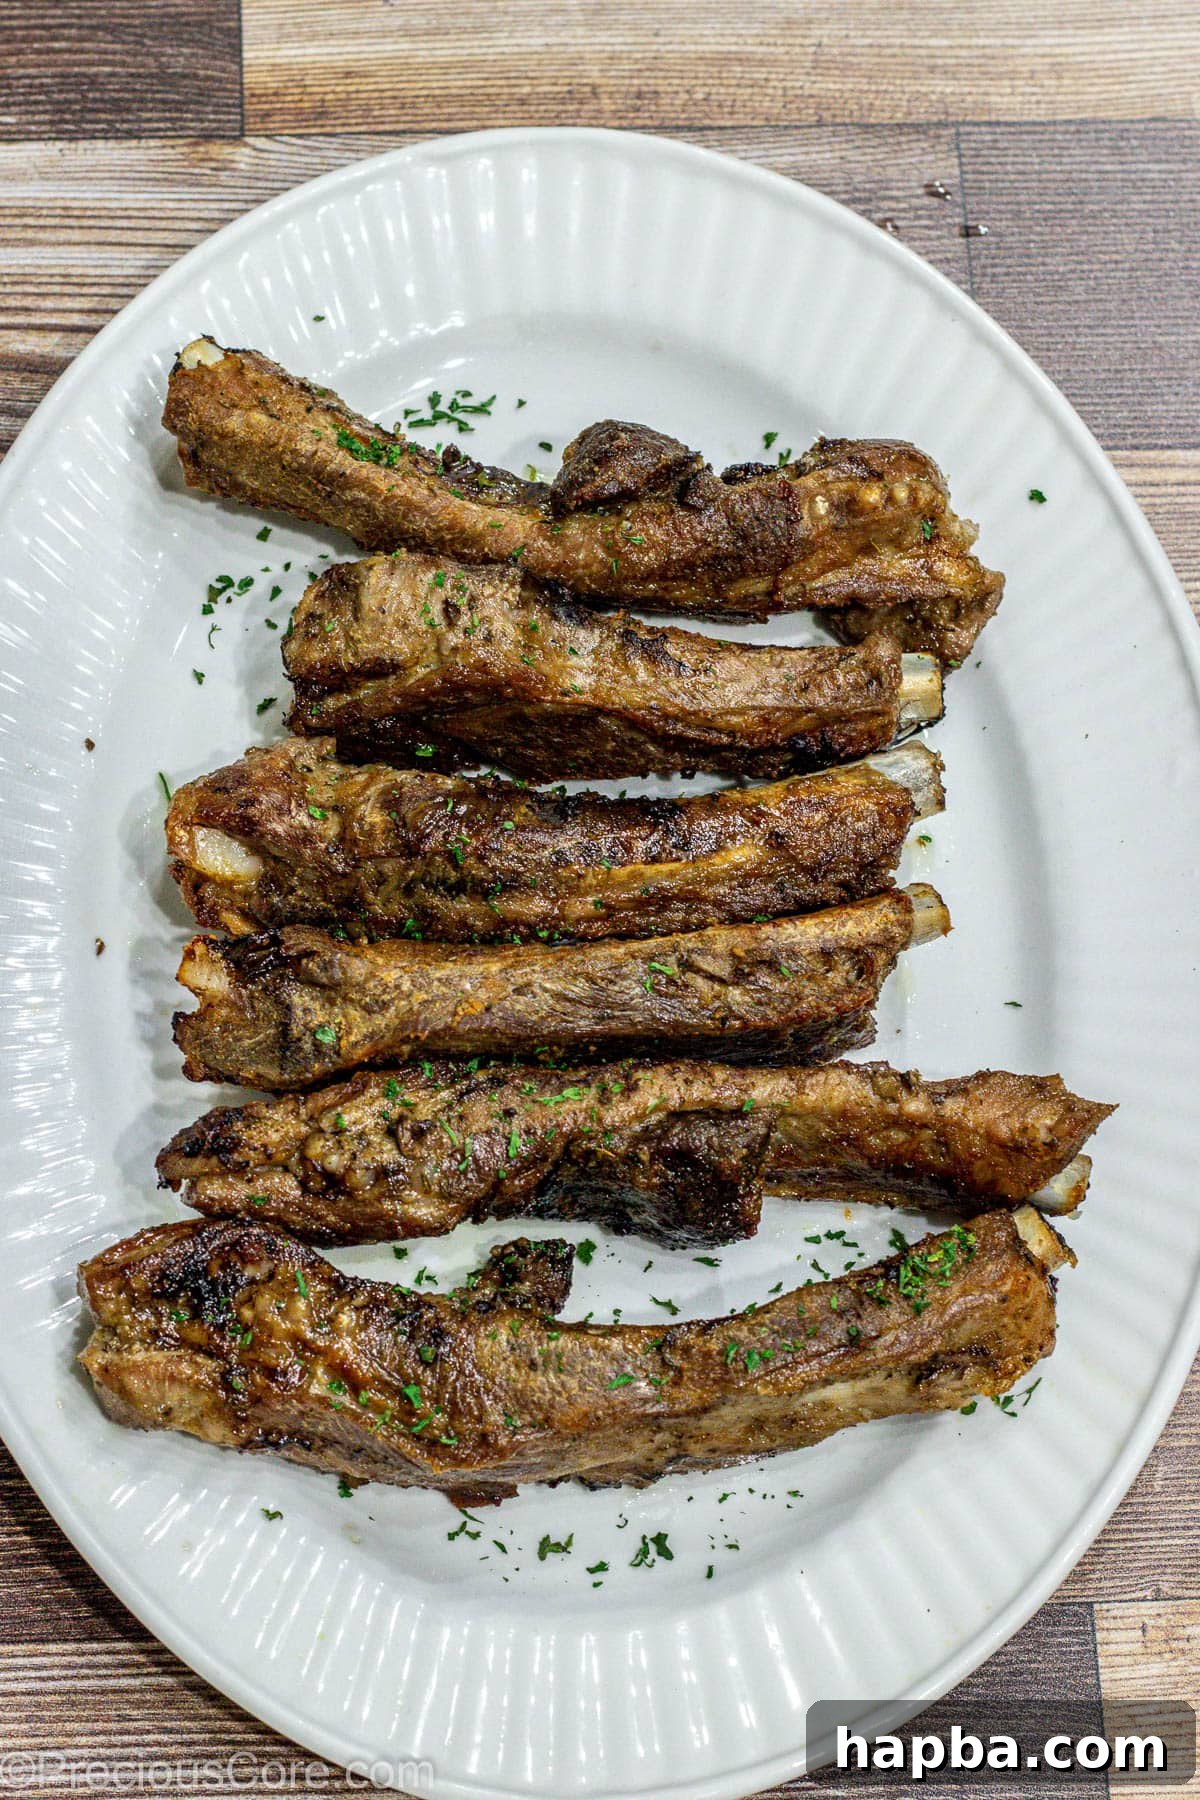
Once both sides are perfectly caramelized, remove the ribs from the oven and serve them warm with your favorite side dishes. Get ready for rave reviews!
Expert Tips for Irresistible Oven-Baked Ribs
Achieve truly restaurant-quality baked dry rub ribs with these professional insights and clever tricks:
- The Membrane Removal Made Easy: Removing the thin membrane (silver skin) from the back of the ribs is a game-changer for tenderness. It’s easiest to do this on a sturdy cutting board with a good grip. Use a sharp paring knife or chef’s knife to carefully loosen one edge of the membrane. Once you have a loose flap, grab it firmly with a paper towel (this provides extra grip) and steadily pull it off the rack in one smooth motion. Don’t be afraid to apply a little force; it should peel away cleanly.
- Don’t Skimp on the Dry Rub: When applying the dry rub, be generous! Ensure every surface of each rib, including the sides and ends, is thoroughly coated. This comprehensive coverage is what builds that deep, complex flavor profile.
- The Importance of Low and Slow: The 300°F baking temperature is not arbitrary. It allows the collagen and connective tissues in the ribs to slowly break down, resulting in incredibly tender meat that easily pulls from the bone. A higher temperature would cook the exterior too quickly, making the meat tough and dry before it has a chance to tenderize.
- The Broiling Stage is Non-Negotiable: While the baking makes the ribs tender, the final broil is what elevates them to perfection. It creates a beautiful, caramelized crust that deepens the flavor of the rub and adds an irresistible texture contrast. This charred outer coating is where much of the deliciousness lies, so don’t skip this critical step! Keep a close eye on them during broiling to prevent burning.
- Checking for Doneness and Tenderness: While the USDA recommends pork to reach an internal temperature of 145°F for safety, for truly fall-off-the-bone ribs, you’re aiming for higher. Once the internal temperature reaches approximately 195-205°F, the collagen will have completely broken down, guaranteeing maximum tenderness. The meat should easily pull away from the bone.
- Storing Leftovers: Should you be lucky enough to have leftover ribs, allow them to cool completely before storing. Wrap them tightly in plastic wrap or aluminum foil, then place them in an airtight container. Refrigerate promptly, ideally within two hours of cooking, to maintain freshness and safety. Reheat gently in the oven or microwave until warmed through.
Delicious Variations and Substitutions to Customize Your Ribs
While our signature dry rub recipe is a winner, feel free to get creative and personalize your baked ribs with these delightful variations and substitutions:
- Add a Spicy Kick: If you love a bit of heat, easily transform these into spicy dry rub ribs. Simply add ½ to 1 teaspoon of cayenne pepper or chili powder to the spice blend. Adjust the amount to your preferred level of spiciness.
- Explore Different Meats: This versatile dry rub isn’t just for pork! Feel free to prepare this recipe with beef ribs instead. Cooking times might vary slightly depending on the thickness and type of beef ribs, but the low-and-slow baking method will still yield incredible results.
- Finish with Barbecue Sauce: For those who love saucy ribs, brush the baked and broiled ribs with your favorite barbecue sauce before serving. You can either make a homemade barbecue sauce or use a high-quality store-bought option. For easy application and less mess, pour your chosen BBQ sauce into a small bowl, dip a basting brush into it, and apply generously to the hot ribs.
- Flavor Boosters: For an even deeper flavor profile, consider incorporating a few “secret ingredients” into your dry rub or cooking process:
- Liquid Smoke: A few drops can impart a subtle smoky flavor reminiscent of grilled ribs, even when baked in the oven.
- Garlic Salt: Can replace some of the regular salt and garlic powder for a slightly different balance.
- Dry Mustard: Adds a tangy, pungent note that enhances the savory elements of the rub.
- Brown Sugar: A tablespoon or two of brown sugar in the dry rub can help create a fantastic caramelization during broiling, adding sweetness and a beautiful crust.
- Herbaceous Notes: If you enjoy the aroma of fresh herbs, a sprig or two of fresh rosemary or sage added to the baking dish during the initial covered bake can infuse the ribs with lovely, fragrant notes.
If this is your inaugural attempt at making ribs, we highly recommend sticking to the base dry rub recipe first to truly appreciate its balanced flavors. Once you’re confident, then let your culinary imagination run wild with these exciting variations!
Are you a fan of pork dishes? Don’t miss out on my other fantastic recipes like Pan Seared Boneless Pork Chops and Pork Tenderloin In Creamy Mushroom Sauce.
Frequently Asked Questions About Baked Ribs
How long should dry rub be on ribs before cooking?
For this recipe, you can cook the ribs as soon as they are rubbed with the dry seasoning. The individual rib portions allow for quick flavor penetration. However, for an even deeper flavor, you can rub the ribs and refrigerate them for at least 30 minutes, or even up to 24 hours, before baking. Just ensure they are tightly covered in the refrigerator.
How long to bake ribs with dry rub?
For tender, juicy ribs, bake them at a consistent 300 degrees Fahrenheit (150 degrees Celsius) for about 1 hour and 30 minutes, covered tightly with foil. This low and slow method ensures the meat becomes incredibly tender. After baking, finish them under the oven’s broiler for 5 minutes per side to create a delicious caramelized crust.
Should I cover my ribs when I bake them in the oven?
Yes, absolutely! It is crucial to cover the ribs tightly with aluminum foil during the initial baking phase. This traps moisture and creates a steamy environment, preventing the ribs from drying out and ensuring they become incredibly tender. After this covered bake, you will uncover them for a final broil to achieve a beautiful, crispy, and caramelized exterior.
What type of ribs are best for baking?
St. Louis style spare ribs are an excellent choice for baking due to their uniform shape, meatiness, and ideal fat content which renders beautifully. Baby back ribs also work well and tend to cook a bit faster due to being smaller. For this recipe, we specifically use spare ribs (St. Louis style) for their hearty nature.
What To Serve It With
These incredibly versatile Baked Dry Rub Ribs pair perfectly with a wide array of side dishes. Here are some of our favorite recommendations to complete your meal:
- Creamy Buttermilk Mashed Potatoes: A classic comfort food that’s perfect for soaking up any delicious drippings.
- Crisp Garlic Butter Green Beans: A vibrant, healthy side that adds a lovely pop of color and freshness.
- Warm Garlic Butter Rolls: Ideal for sopping up any remaining juices and a delightful addition to any meal.
- Easy Roasted Potatoes: Simple yet satisfying, these complement the ribs without overpowering them.
- Sweet Fried Plantains: For a touch of sweet and savory, these offer a delightful contrast.
- Indulgent 3 Cheese Mac and Cheese: The ultimate cheesy companion for rich, flavorful ribs.
- Classic Deviled Eggs: A light, creamy appetizer or side that adds a touch of elegance.
- Coleslaw or Potato Salad: Refreshing, tangy salads are fantastic for cutting through the richness of the pork.
- Corn on the Cob: Sweet and juicy, it’s a quintessential BBQ side that pairs wonderfully with ribs.
More Mouthwatering Easy Dinner Recipes
If you loved the simplicity and flavor of these baked ribs, be sure to explore our other easy and delicious dinner recipes:
- Pan Seared Boneless Pork Chops: Quick, flavorful, and incredibly tender.
- Pan Seared Lamb Chops: An elegant yet simple dish that impresses every time.
- Pan Grilled Salmon: A healthy and fast option bursting with flavor.
- Pan Seared Ribeye Steak: Achieve a perfect crust and juicy interior every time.
- Pan Seared Tilapia: A light and flaky fish that’s ready in minutes.
- Pork Tenderloin In Creamy Mushroom Sauce: A comforting and rich dish perfect for cooler evenings.
We truly hope you enjoy preparing and devouring this Baked Dry Rub Ribs recipe as much as our family does. Your feedback is invaluable, so if you love this recipe, please consider leaving a star rating below to share your experience with other home cooks!
Baked Dry Rub Ribs Recipe
The Ultimate Baked Dry Rub Ribs
The tastiest Baked Dry Rub Ribs you will ever have! Made with a simple dry rub, these pork ribs are easy enough to make for weeknights and fancy enough to make for the holidays or special occasions.
Prep Time: 10 mins
Cook Time: 1 hr 40 mins
Total Time: 1 hr 50 mins
Servings: 6 servings
Ingredients
- 4 pounds spare ribs (St. Louis Style, or individual ribs)
- 2 Tablespoons olive oil
- 1 teaspoon salt (adjust if using kosher salt)
- 2 teaspoons chicken bouillon powder
- ¼ teaspoon ground black pepper
- 1 Tablespoon garlic powder
- 1 Tablespoon ginger powder
- 1 Tablespoon onion powder
- ½ Tablespoon dried thyme
Instructions
- Preheat your oven to 300 degrees F (150 degrees C).
- Prepare the ribs: Pat the ribs dry thoroughly with paper towels. Place them in a large mixing bowl. If the ribs are not separated, remove the thin membrane (silver skin) from the back of the ribs first, then cut the rack into individual portions (1-2 bones per portion).
- Add the olive oil to the rib portions in the bowl and toss to ensure each rib is lightly coated.
- To the ribs, add the salt, chicken bouillon powder, black pepper, garlic powder, ginger powder, onion powder, and dried thyme.
- Mix everything together well with clean hands, ensuring that the seasoning completely covers all surfaces of the ribs.
- Place the seasoned ribs in a 9×13 inch baking dish, arranging them meaty side up. Cover the baking dish tightly with aluminum foil.
- Place the covered baking dish in the preheated oven and cook for 90 minutes.
- Meanwhile, line a large baking sheet (approximately 18×13 inches) with aluminum foil. If you have a baking rack, place it on top of the foil-lined sheet. If not, lightly grease the foil with oil or cooking spray.
- After 90 minutes, remove the ribs from the oven. Carefully drain off any accumulated cooking liquid. Transfer the tender ribs to the prepared baking rack or directly onto the oiled foil-lined baking sheet.
- Set your oven to a high broil setting. Return the ribs to the oven and broil for 5 minutes, watching them closely to prevent burning. Remove them, flip each rib to the other side, and broil for another 5 minutes to achieve a beautiful crisp and caramelization.
- Remove the perfectly broiled ribs from the oven and serve warm with your favorite side dishes. Enjoy!
Notes
- Rib Selection: You can use either a 4-pound full rack of spare ribs (St. Louis style) or 4 pounds of pre-cut individual ribs. Both will yield excellent results with this method. Beef ribs can also be substituted.
- Rosemary: Fresh or dried rosemary pairs wonderfully with pork. Consider adding ½ teaspoon of dried rosemary to the rub, or a few sprigs of fresh rosemary to the baking dish during the covered bake.
- For Extra Spice: If you enjoy a bit of heat, mix in ½ to 1 teaspoon of cayenne pepper or chili powder to the dry rub mixture for a spicy kick.
Nutrition Facts (per serving)
Calories: 640kcal | Carbohydrates: 4g | Protein: 33g | Fat: 54g | Saturated Fat: 17g | Polyunsaturated Fat: 9g | Monounsaturated Fat: 21g | Trans Fat: 0.5g | Cholesterol: 169mg | Sodium: 725mg | Potassium: 563mg | Fiber: 1g | Sugar: 0.3g | Vitamin A: 7IU | Vitamin C: 1mg | Calcium: 44mg | Iron: 2mg
Additional Info
Course: Dinner
Cuisine: American, Western