

Mastering the Art of Homemade Milk Bread: Your Guide to “Pain au Lait” Perfection
There’s an undeniable magic that happens when you bake from scratch. The simple act of combining flour, yeast, and a few other staples can transform your kitchen into a comforting haven, filled with the promise of warm, delicious treats. While my initial plans for yesterday’s recipe post were derailed by an unexpected internet outage, this fortunate twist of fate led me down a different, equally rewarding path: a dedicated baking day. Instead of dwelling on technological hiccups, I embraced the opportunity to bring the delightful experience of a professional bakery right into my home, focusing my energy on crafting something truly special. The result? An exquisite batch of homemade milk bread, known affectionately as ‘Pain au Lait’ in many bakeries, particularly those in Cameroon.
This isn’t just any bread; it’s a testament to simple ingredients yielding extraordinary results. The moment these loaves emerged from the oven, their golden-brown crust promising a tender interior, the air became thick with an irresistible aroma. It’s a smell that speaks of comfort, tradition, and pure indulgence. What truly sets this milk bread apart is its unparalleled softness – a delicate, cloud-like texture that practically melts in your mouth. Coupled with its heavenly scent, it quickly became the star of our evening, so much so that our planned dinner was happily (and without hesitation!) replaced by these warm, freshly baked loaves. If you’ve ever dreamt of recreating that bakery-quality experience in your own kitchen, yearning for bread that is both incredibly soft and profoundly flavorful, then you’ve come to the right place. Join me as we embark on this delightful baking journey to create your very own batch of irresistible Pain au Lait.
Why Homemade Milk Bread is a Must-Try for Every Baker
For many, bread is a staple, but milk bread elevates this everyday necessity into a culinary delight. Often referred to as “Pain au Lait” (French for “milk bread”), this style of bread is celebrated globally for its unique characteristics. Originating from Asian baking traditions and widely adopted in places like Cameroon, it uses milk and sometimes eggs to create a dough that’s exceptionally rich and tender. The milk proteins contribute to a finer crumb structure, while the fats from butter and egg yolks add to its incredible softness and extended shelf life, preventing it from drying out quickly. This bread isn’t just about sustenance; it’s about savoring each bite of its delicate texture and subtle sweetness.
Making milk bread at home offers several advantages over store-bought alternatives. You have complete control over the quality of ingredients, ensuring no unwanted preservatives or artificial flavors make their way into your family’s diet. The process itself is therapeutic, a meditative dance between ingredients and technique that culminates in a truly rewarding product. There’s an immense sense of satisfaction that comes from pulling a perfectly golden loaf from your oven, knowing you’ve created something so delicious from scratch. Beyond the sensory pleasure, sharing warm, homemade bread with family and friends creates lasting memories and fosters a sense of togetherness. This comprehensive recipe is designed to guide you through each step, making the process accessible and enjoyable, even for those new to bread baking. Prepare to impress your taste buds and those of your loved ones with this truly irresistible treat that promises to become a beloved staple in your home.
Essential Ingredients for Your Perfect Pain au Lait
Crafting the perfect Pain au Lait begins with selecting the right ingredients. Each component plays a vital role in achieving that signature soft texture and delightful flavor. Here’s a detailed look at what you’ll need, along with a brief explanation of its function:
- 3 cups of Bread Flour or All-Purpose Flour (approximately 375 grams): While all-purpose flour will work for a decent loaf, bread flour is highly recommended for optimal results. It has a higher protein content, which is crucial for developing strong gluten networks. This gluten structure is what gives the bread its desirable chewiness, elasticity, and helps it rise beautifully, trapping gas and creating that coveted soft crumb that is characteristic of milk bread.
- 1 teaspoonful of Active Dry Yeast: Yeast is the living organism responsible for leavening your bread. When activated with warm water and fed by sugar, it produces carbon dioxide gas, causing the dough to rise and giving the bread its airy texture. Using active dry yeast typically requires activation, ensuring it’s alive and ready to work its magic before being combined with other ingredients.
- 3 tablespoons of Unsalted Butter: Butter adds incredible richness, a lovely flavor, and contributes significantly to the bread’s tender texture. The fats in butter help to short the gluten strands, making the bread softer, more luxurious, and melt-in-your-mouth. Using unsalted butter allows you to control the overall salt content in the recipe to your preference.
- 4 tablespoons of Granulated Sugar: Sugar serves multiple purposes in bread baking. It feeds the yeast, helping it activate and thrive, which aids in a good rise and fermentation. It also adds a subtle sweetness to the bread, balancing the savory notes, and contributes to the beautiful golden-brown crust through caramelization during baking, giving it an appealing finish.
- Half teaspoon of Fine Sea Salt: Salt is more than just a seasoning; it’s a critical ingredient in bread making. It enhances the flavor of the bread, provides balance to the sweetness, and also plays a crucial role in controlling yeast activity, preventing it from over-fermenting too quickly. Without salt, bread can taste bland and flat.
- A quarter cup of Evaporated Milk: Evaporated milk, being a concentrated form of milk, adds intense milky flavor and richness without adding too much liquid, which can make the dough too wet. The milk proteins and fats contribute significantly to the bread’s tender crumb and help keep it moist for longer, enhancing its shelf life and overall deliciousness.
- 1 cup of Warm Water (approximately 105-115°F or 40-46°C): Warm water is absolutely essential for activating the yeast. Water that is too hot can kill the delicate yeast organisms, while water that is too cold will inhibit its activity, leading to a poor rise. This specific temperature range is ideal for waking up the yeast and encouraging it to start fermenting effectively.
- 1 Large Egg: An egg adds richness, helps with emulsification (binding ingredients), and contributes to the bread’s structure, color, and texture. The protein in the egg strengthens the dough, while the yolk adds moisture and tenderness. It also provides a beautiful golden hue to the interior and exterior of the baked bread.
Essential Tools for Your Milk Bread Baking Adventure
Having the right tools can make your bread-making experience smoother, more efficient, and ultimately more enjoyable. While you don’t need a professional bakery setup, these basic items will be incredibly helpful in achieving perfect Pain au Lait:
- Large Mixing Bowl: Essential for combining and kneading your dough, especially for the initial wet ingredients. Choose one with enough space for the dough to expand during its first rise.
- Measuring Cups and Spoons: For accurately portioning your dry and liquid ingredients. Precision is key in baking!
- Whisk or Spatula: To mix wet ingredients thoroughly and to help incorporate flour into the dough.
- Microwave-Safe Bowl: Handy for quickly melting butter without burning it.
- Clean Work Surface or Rolling Board: A large, clean, and lightly floured surface is crucial for kneading and shaping your dough without sticking.
- Rolling Pin: For evenly rolling out the dough pieces before shaping, ensuring consistent thickness and size.
- Sharp Knife or Dough Scraper: To divide the dough into equal portions and to make the decorative slashes on top of the loaves. A dough scraper is also great for handling sticky dough.
- Greased Baking Tray or Loaf Pan(s): To hold your shaped loaves during the second rise and baking. Greasing prevents sticking and aids in easy removal.
- Kitchen Scale (Highly Recommended): For the most precise measurement of flour and other dry ingredients. Weight measurements are far more accurate than volume for baking.
- Plastic Wrap or a Clean Kitchen Towel: To cover the dough during rising, preventing it from drying out and forming a crust.
- Pastry Brush: For applying the egg wash to the loaves before baking, which gives them a beautiful shine and golden color.
- Wire Rack: For cooling the baked bread, allowing air to circulate and preventing a soggy bottom.
Step-by-Step Guide to Baking Irresistible Milk Bread
Follow these detailed instructions carefully to achieve perfectly soft, aromatic, and truly irresistible homemade milk bread:
Step 1: Activating the Yeast and Preparing the Wet Ingredients
Begin by combining 1 cup of warm water (ensure it’s around 105-115°F or 40-46°C – warm to the touch but not hot to prevent killing the yeast) with 1 teaspoonful of active dry yeast in a large mixing bowl. Gently stir the mixture to help dissolve the yeast granules. Allow this mixture to sit undisturbed for about 5-10 minutes. During this time, you should observe the yeast becoming foamy and bubbly on the surface; this is a clear indication that your yeast is active and alive, ready to work its magic in your bread. If no foam or bubbles appear, your yeast might be old or the water temperature was incorrect, and it’s best to start over with fresh yeast to ensure a good rise.
Once the yeast is visibly active, add the 4 tablespoons of granulated sugar, the quarter cup of evaporated milk, and the half teaspoon of fine sea salt to the bowl. Stir everything together thoroughly with a whisk or spatula until the sugar and salt are completely dissolved into the liquid. This creates a rich, flavorful, and sweet base for your dough.
Step 2: Incorporating Butter and Egg for Richness
In a separate microwave-safe bowl, melt the 3 tablespoons of unsalted butter until it’s just liquid. Be careful not to let it get excessively hot; if it’s steaming, allow it to cool slightly before adding to the yeast mixture. Once cooled to a warm temperature, add the melted butter to the wet ingredient mixture in your large bowl. Stir vigorously to ensure all the ingredients are fully combined and emulsified. Finally, crack in the 1 large egg and whisk it into the mixture until it’s smoothly and evenly incorporated. This combination of milk, butter, and egg is a cornerstone of the Pain au Lait recipe, contributing significantly to the bread’s luxurious richness and incredibly soft texture.
Step 3: Gradually Creating the Dough
Gradually add the 3 cups of bread flour (or all-purpose flour) to the wet mixture in your large bowl. Add it one cup at a time, mixing with a sturdy wooden spoon or a spatula after each addition. Once all the flour has been added, continue to mix until a shaggy, somewhat sticky dough begins to form. At this point, turn the dough out onto a lightly floured, clean work surface or rolling board. It will initially be quite sticky and perhaps a little messy, which is perfectly normal for a rich dough like this. This is the stage where the dough starts to come together, preparing for the crucial kneading process.
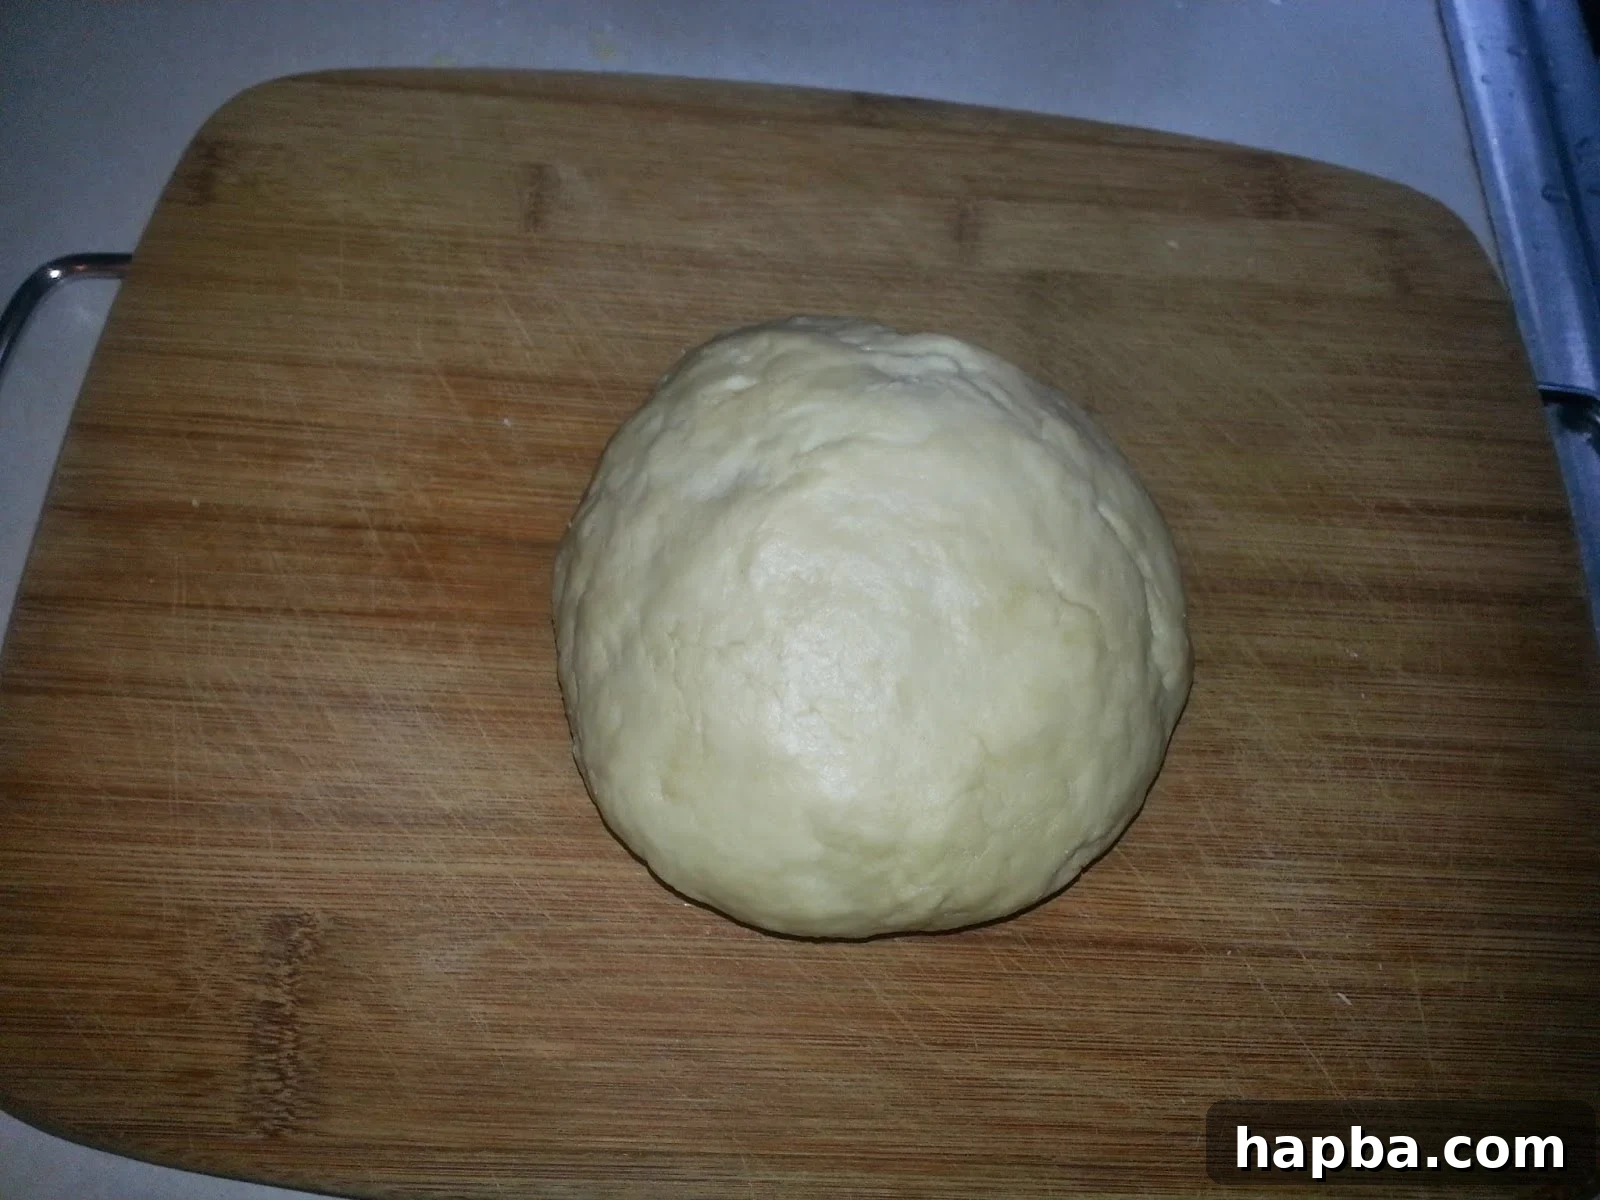
Step 4: Kneading the Dough to Develop Gluten and Elasticity
Kneading is perhaps the most crucial step for developing gluten and achieving that signature soft, chewy, and airy texture of milk bread. Knead the dough vigorously for approximately 10-15 minutes by hand. If you have a stand mixer fitted with a dough hook, you can knead it on medium-low speed for 8-10 minutes. The dough should gradually transform from a sticky, shaggy mass into a smooth, elastic, and supple ball that springs back when gently poked. You’ll know it’s properly kneaded when it passes the “windowpane test”: carefully stretch a small piece of dough very thinly between your fingers; if you can see light through it without it tearing, your gluten has developed sufficiently. This extensive kneading is vital for Pain au Lait’s signature softness and fine crumb structure.
Step 5: First Rise (Bulk Fermentation) for Flavor Development
Lightly grease your large mixing bowl with a little neutral oil (like vegetable or canola oil). Place the thoroughly kneaded dough into the bowl, turning it over once to ensure the entire surface is coated with a thin layer of oil. This prevents the dough from sticking and drying out. Cover the bowl tightly with plastic wrap or a clean damp kitchen towel to create a warm, moist environment. Place the covered bowl in a warm, draft-free spot (such as a slightly warm oven that’s turned off, or near a sunny window) for about 1 to 1.5 hours, or until the dough has visibly doubled in size. This first rise, known as bulk fermentation, allows the yeast to work its magic, developing deeper flavors and crucial volume. The exact rising time will depend on the ambient temperature of your kitchen.
Step 6: Dividing the Dough Evenly
Once the dough has impressively doubled in size, gently punch it down to release the accumulated air. Transfer the dough back to your lightly floured work surface. Using a sharp knife or a dough scraper, carefully divide the dough into four equal pieces. Aim for as much consistency in size as possible, as this will ensure even baking and a uniform appearance for your loaves. For absolute precision, especially if you’re aiming for bakery-perfect results, you can use a kitchen scale to weigh each portion of dough.
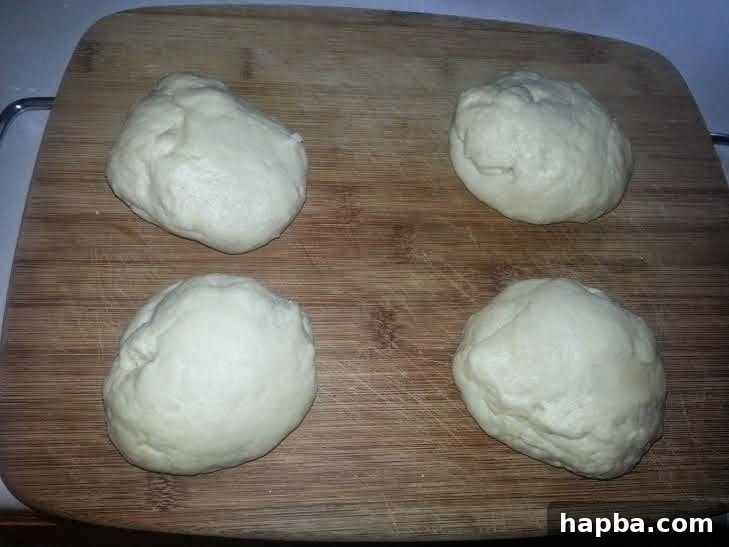
Step 7: Shaping the Loaves – Crafting Individual Rolls
Take one piece of the divided dough and roll it out on your board using a rolling pin. Aim to create an oval or rectangular shape, approximately 6-8 inches long and about 4-5 inches wide. Try to get it to an even thickness across the entire surface. This evenness is key for uniform rising and baking.
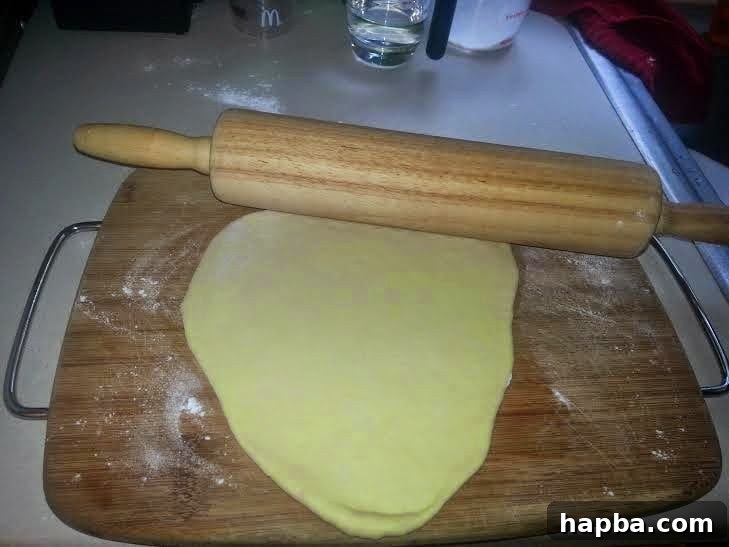
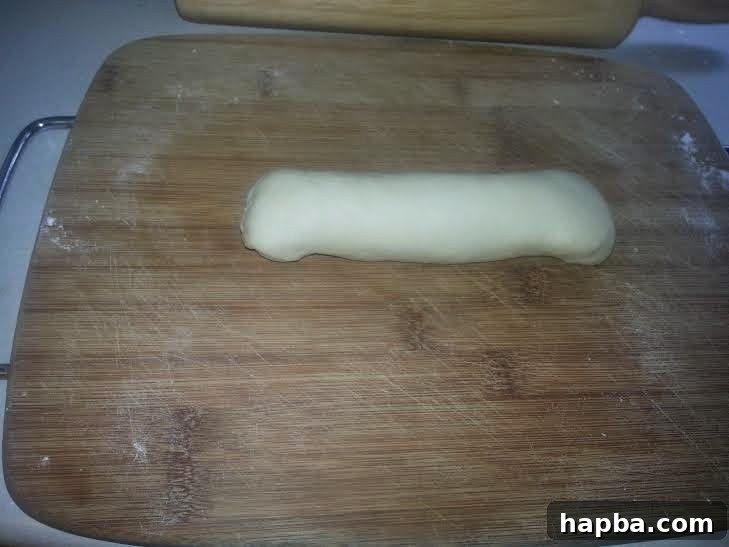
Now, using your fingers, take one of the shorter ends of the rolled dough and tightly roll it towards the other end. Apply gentle but firm pressure as you roll, creating tension in the dough. This rolling technique helps create layers within the bread and contributes to its soft, shreddable texture.
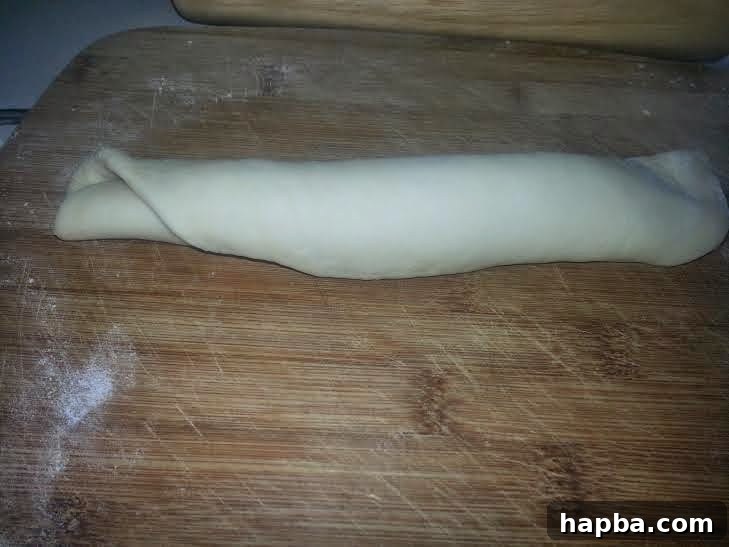
Once fully rolled, gently fold in the raw edges of the rolled dough towards the bottom and pinch the seam closed firmly at the bottom. This creates a neat, sealed loaf shape, ensuring the layers stay intact during baking and the loaf maintains its form.
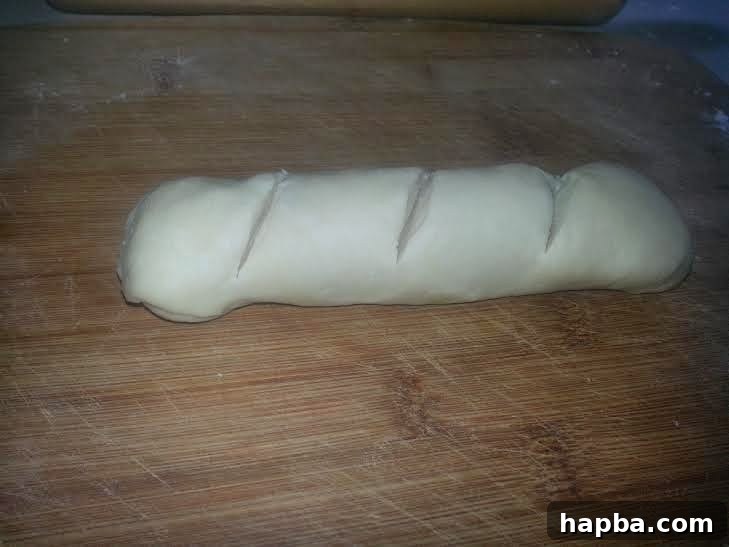
Using a sharp knife or a clean razor blade, make three shallow diagonal lines (slashes) on the top surface of each shaped dough piece. These slashes are not just for aesthetics; they serve a functional purpose by allowing the bread to expand without tearing unevenly during baking, promoting a better rise and a more uniform crumb structure. Be careful not to cut too deep.
Step 8: Second Rise (Proofing) and Preparing for Baking
Carefully place the shaped dough pieces onto a greased baking tray, ensuring you leave enough space between them for expansion as they rise further. Repeat the shaping and slashing process with the remaining three pieces of dough and arrange all four on the tray. If your tray isn’t large enough, you might need two trays or consider making larger loaves (see variation below).
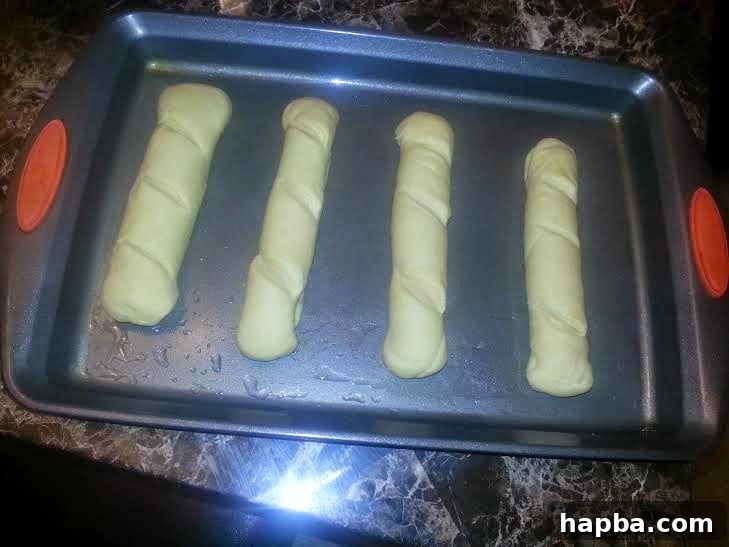
Cover the tray loosely with plastic wrap or a clean kitchen towel and place it in a warm, draft-free place to rise for another hour, or until the loaves have significantly increased in size and look visibly puffy and airy. They should feel light and airy when gently touched – a slight indentation should remain when pressed, but the dough should not collapse. This second rise, known as proofing, is absolutely crucial for the final light and tender texture of your bread.

Step 9: Egg Wash and Baking to Golden Perfection
Preheat your oven to 300 Degrees Fahrenheit (or 148 Degrees Celsius). It’s important to give your oven ample time to reach and stabilize at the correct temperature. While the oven is preheating, whisk one additional large egg in a small bowl with a tablespoon of water or milk to create an egg wash. Gently brush the tops of the risen loaves with this egg wash. The egg wash will give your Pain au Lait a beautiful, shiny, golden-brown crust and enhance its visual appeal, making it look professionally baked.
Bake the loaves in the preheated oven for approximately 40 minutes, or until they are a rich golden brown on top and sound hollow when tapped gently on the bottom. Baking times can vary depending on the calibration of your oven, so it’s always wise to keep a close eye on them. If they start to brown too quickly, you can loosely tent them with aluminum foil to prevent over-browning while allowing the inside to cook thoroughly.

Step 10: Cooling for Optimal Texture and Flavor
Once baked to perfection, remove the loaves from the oven immediately. Carefully transfer them from the hot baking tray to a wire rack to cool completely. Allowing them to cool gradually on a rack helps set the crumb structure, prevents the bottom from becoming soggy, and allows any residual steam to escape. While it’s incredibly tempting to tear into a hot loaf right away, a little patience will be rewarded with the best texture and flavor. Serve warm or at room temperature, ideally after at least 30 minutes of cooling.
Variation: Making Larger Loaves
If you prefer making larger, more substantial loaves instead of smaller individual ones, you can easily adjust the shaping process. After the first rise (Step 5), simply divide the dough into two equal portions instead of four. Shape each portion into a larger loaf using the same rolling and sealing technique as described in Step 7, or get creative and braid them for a decorative touch. Place these larger loaves in greased loaf pans or on a larger baking sheet, ensuring adequate space for them to rise and expand. The baking time for larger loaves might need to be slightly extended by 5-10 minutes, so always bake until they are beautifully golden brown and a thermometer inserted into the center reads around 190-200°F (88-93°C).
Tips for Milk Bread Baking Success: Achieve Bakery-Quality Results
To ensure your homemade Pain au Lait turns out perfectly every time, keep these essential tips in mind:
- Accurate Measurements Are Key: For baking, especially bread, precision is paramount. Investing in a kitchen scale for flour and other dry ingredients will yield far more consistent and reliable results than volumetric cup measurements.
- Always Check Your Yeast: Don’t skip the yeast activation step. If it doesn’t foam and bubble after 5-10 minutes in warm water with sugar, your yeast is likely inactive (dead), and you should use a fresh packet. Dead yeast means dense, unleavened bread.
- Kneading is Crucial: Do not skimp on kneading time. Proper gluten development through thorough kneading is absolutely essential for the soft, airy, and shreddable texture that milk bread is famous for.
- Maintain a Warm Environment for Rising: Yeast thrives in warmth. A slightly warm, draft-free spot will ensure your dough rises beautifully. You can create a makeshift proofing box in your oven by placing a tray of hot water on the bottom rack and placing your covered dough bowl on a higher rack (oven off!).
- Don’t Over-Flour Your Work Surface: While shaping, use minimal flour on your work surface and hands to prevent the dough from becoming dry, stiff, and tough. A little oil can also help with stickiness.
- Patience with Proofing: Allow the dough to complete both its first and second rises fully. Under-proofed bread will be dense and heavy, while over-proofed bread might collapse in the oven, leading to a poor texture.
- Verify Oven Temperature: Many home ovens run hot or cold compared to their dial settings. Invest in an oven thermometer to ensure your oven is consistently at the correct temperature for even baking.
- Allow Adequate Cooling Time: Resist the urge to cut into hot bread immediately. Letting it cool on a wire rack allows the starches to set, the moisture to redistribute, and the flavors to fully develop, significantly improving texture and flavor.
Serving Suggestions for Your Homemade Pain au Lait
The beauty of homemade Pain au Lait lies in its incredible versatility. Its delicate sweetness and irresistibly soft texture make it perfect for a wide variety of pairings, from simple to decadent:
- Classic Breakfast Delight: Enjoy thick slices with your favorite fruit jam, marmalade, a generous dollop of cream cheese, or a golden drizzle of honey. It pairs wonderfully with a freshly brewed cup of coffee or a comforting mug of tea.
- Sweet Spreads & Fillings: Spread with rich chocolate-hazelnut spread, creamy peanut butter, or a flavorful fruit butter for a delightful and energy-boosting snack. Its soft texture is ideal for absorbing these delicious toppings.
- Light Savory Sandwiches: While inherently sweet, its mild flavor makes it an excellent base for light, delicate sandwiches. Consider fillings like fluffy egg salad, savory tuna salad, thinly sliced deli meat (such as ham or turkey), or a simple cheese slice.
- Toasted Perfection: Lightly toast slices of milk bread and serve immediately with a pat of butter, allowing the butter to melt into the warm, crispy-soft interior for a simple yet incredibly satisfying treat.
- The Best French Toast: Day-old milk bread is truly a revelation when transformed into French toast. Its soft, slightly dense crumb soaks up the custard perfectly, resulting in an exceptionally custardy and flavorful breakfast dish.
- Versatile Accompaniment: Serve it alongside a light soup, a fresh salad, or simply as a comforting side bread for any meal. Its subtle sweetness complements both sweet and savory dishes beautifully.
Bon Appetit! There’s truly nothing quite like the immense satisfaction of pulling a fresh, warm loaf of bread from your own oven, filling your home with an aroma that speaks of pure comfort and homemade goodness. This homemade milk bread, or Pain au Lait, is more than just a recipe; it’s an invitation to experience the profound joy of baking and to share a piece of culinary comfort and love with those dearest to you. I hope this detailed guide empowers you to confidently create your most delicious batch yet, bringing the taste of a Cameroonian bakery straight to your kitchen. Enjoy every soft, aromatic, and absolutely irresistible bite!