
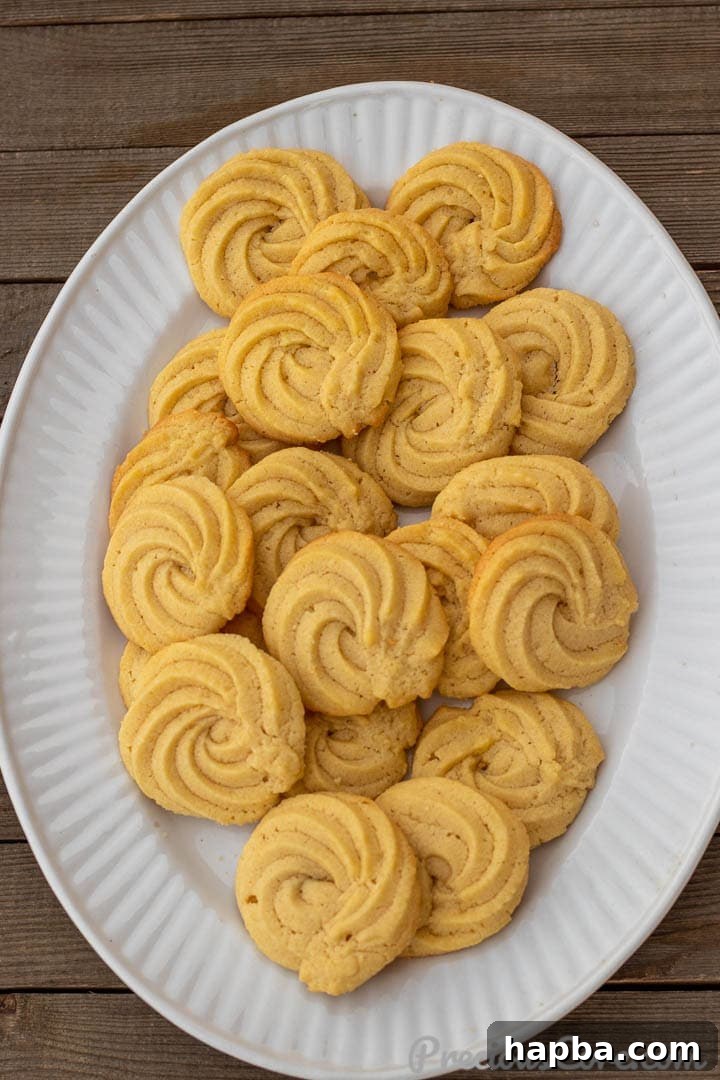
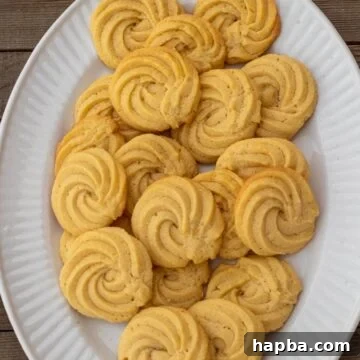
There’s an undeniable charm to a classic butter cookie, and this Danish Butter Cookies Recipe delivers an experience far surpassing the nostalgia of the iconic blue tin. Prepare to bake exceptionally buttery, wonderfully crisp cookies that melt in your mouth, all from scratch with just four basic ingredients. This isn’t just a recipe; it’s an invitation to create edible perfection that will quickly become a cherished family favorite.
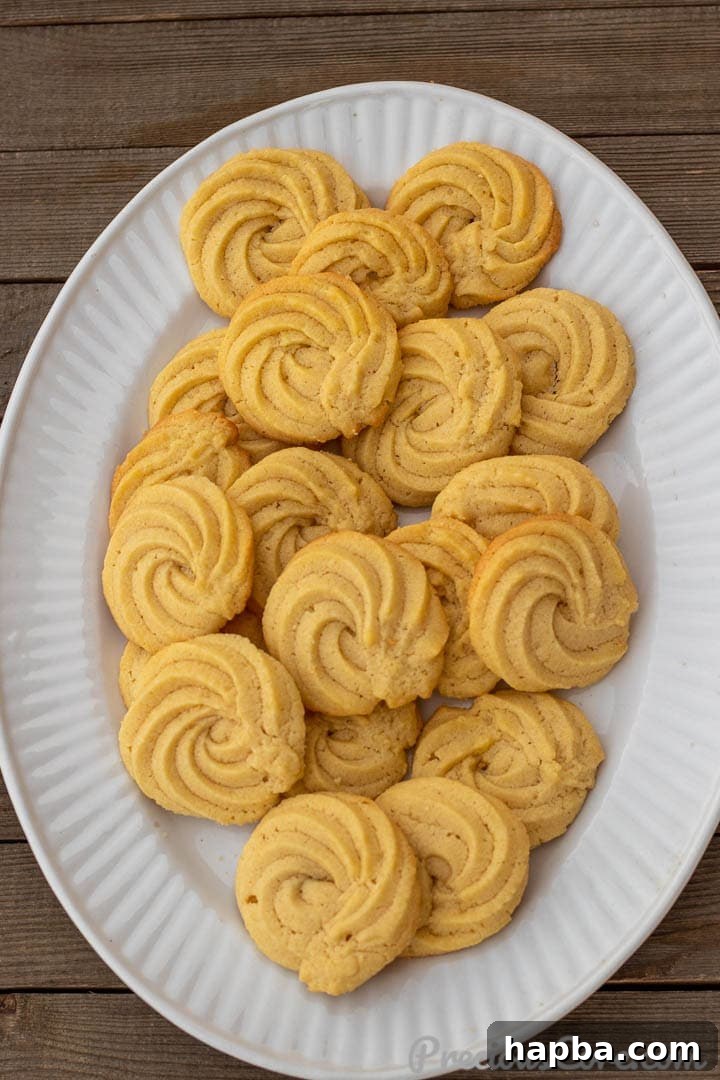
These traditional delights are synonymous with the festive holiday season, making them ideal for sharing with loved ones or packaging as thoughtful homemade gifts. Their simple elegance means they require no elaborate frosting or extravagant decorations; their rich, pure buttery flavor truly speaks for itself. Imagine savoring one of these delicate cookies with a warm cup of tea, a glass of milk, or your favorite coffee – it’s the ultimate pick-me-up to conquer any afternoon slump.
While their inherent deliciousness needs no embellishment, feel free to personalize your Danish butter cookies. A quick dip in melted chocolate and a sprinkle of festive decorations can add an extra touch of glamour and flair, perfect for special occasions. My family and I adore these cookies, and I find myself baking batches regularly. Soon, my freezer will be stocked with these irresistible homemade treats, ready for any craving!
If you’re captivated by the simplicity and deliciousness of butter cookies, you’ll also love exploring other classic baked goods. Be sure to try our classic shortbread cookies, vibrant lemon shortbread cookies, and our universally loved easiest chocolate chip cookies.
Table of Contents
- Why You’ll Love This Recipe
- What Are Danish Butter Cookies?
- Essential Ingredients for Danish Butter Cookies
- How To Make Danish Butter Cookies
- Creative Variations and Serving Suggestions
- Important Tools For This Recipe
- Expert Tips for Perfect Butter Cookies
- Mastering Piping for Butter Cookies
- Danish Butter Cookies: Frequently Asked Questions
- More Irresistible Cookie Recipes You’ll Love
- Watch How To Make Butter Cookies
- Danish Butter Cookies Recipe Card
Why You’ll Love This Homemade Danish Butter Cookie Recipe
There are countless reasons to fall in love with baking and enjoying these exquisite Danish butter cookies:
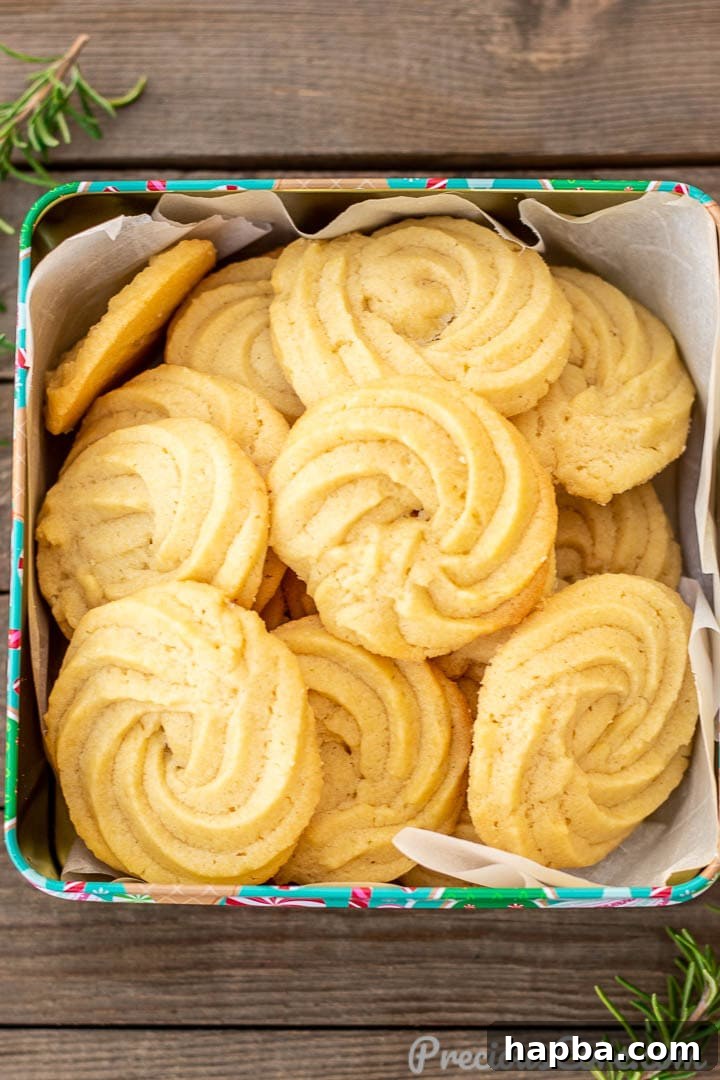
- The Ultimate Christmas and Holiday Gift: These cookies are more than just a treat; they’re a gesture of warmth and affection. Their elegant appearance and rich flavor make them the quintessential homemade gift for neighbors, friends, and family during the Christmas season or any holiday celebration. Imagine the delight on someone’s face receiving a tin of these delectable cookies, baked with love, perhaps paired with a steaming cup of tea or cocoa!
- Remarkably Similar to Shortbread Cookies: This easy recipe is a close cousin to our beloved homemade shortbread cookies, with a few subtle yet impactful adjustments. We’ve incorporated an egg for added richness and structure, and a touch of vanilla extract for a deeper aroma. Instead of powdered sugar, granulated sugar is used here to lend a delightful, subtle texture that enhances each bite. If you love shortbread, you’re guaranteed to adore these!
- A Fun and Engaging Baking Project for Kids: This recipe is incredibly versatile and forgiving, making it perfect for a baking session with children. The process of creaming butter and sugar, mixing the dough, and especially piping the intricate shapes can be a wonderfully creative and enjoyable activity for the whole family. It’s an excellent way to introduce young ones to the joys of baking and create lasting memories together.
- Stunning Presentation That Impresses: Danish butter cookies are renowned for their beautiful, intricate swirls and elegant shapes. When arranged on a holiday platter or in a cookie tin, they instantly elevate any dessert spread. I personally made these for Thanksgiving last year (2022), and they were an absolute sensation, admired by everyone for their aesthetic appeal and irresistible taste. Their charming appearance makes them a showstopper at any gathering.
What Exactly Are Danish Butter Cookies?
Danish Butter Cookies are a universally adored delicacy, celebrated for their distinct rich, buttery flavor and delicate, crisp texture. Often associated with the iconic round blue tin from brands like Royal Dansk, these cookies hold a special place in many hearts, particularly during the holiday season. Our recipe allows you to replicate and even enhance that delicious store-bought experience right in your own kitchen.
As their name strongly implies, the star ingredient in any Danish Butter Cookie recipe is butter. High-quality butter isn’t just an ingredient; it’s the foundation of their exquisite taste and characteristic mouthfeel. These cookies are notably buttery, offering a melt-in-your-mouth sensation that few other cookies can rival.
The term “Danish” proudly points to their origins in Denmark, a country renowned for its rich baking traditions. While enjoyed globally, these buttery delights are particularly popular in North America and Europe, where they grace tables during Christmas festivities and countless other special occasions, symbolizing comfort and indulgence.
Essential Ingredients for Perfect Danish Butter Cookies
Crafting these heavenly Danish Butter Cookies requires only a handful of common pantry staples. The magic truly happens when these simple ingredients are combined with care. Here’s a detailed look at the fundamental components, along with a couple of flavor boosters that elevate them from good to truly exceptional:
The core of this recipe relies on just four basic ingredients: butter, sugar, egg, and flour. However, adding high-quality vanilla extract for a delightful aroma and a pinch of salt to perfectly balance the sweetness and deepen the flavors will truly take your cookies to the next level!
- 1. Butter: This is non-negotiable for authentic Danish butter cookies. Use the highest quality butter you can find. It makes an enormous difference in both flavor and texture. European-style, grass-fed butter, like Kerrygold, is my top recommendation due to its higher fat content and rich flavor profile. Since butter constitutes such a significant portion of these cookies, its quality directly impacts the final taste. You’ll need 1 cup (2 sticks or 230g) of softened butter for the full recipe.
- 2. Granulated Sugar: Unlike many shortbread recipes that use powdered sugar for a softer crumb, we opt for granulated sugar here. This choice imparts a lovely, subtle texture to the cookies, giving them that characteristic slight crunch while maintaining their delicate structure.
- 3. Large Egg: A single large egg plays a crucial role. It adds a wonderful richness to the cookie dough and, perhaps more importantly, makes the dough supple and perfectly pipeable. Without the egg, the dough would be much stiffer and significantly harder to pipe through a pastry bag, making it challenging to achieve those signature intricate shapes.
- 4. Vanilla Extract: To truly enhance the already exquisite buttery flavor, a good quality vanilla extract is essential. Its warm, aromatic notes complement the butter beautifully. If you have it on hand, vanilla bean paste can be used as a fantastic substitute, offering even more concentrated vanilla flavor and charming specks of vanilla bean. A little goes a long way!
- 5. All-Purpose Flour: Also known as plain flour, this is the ideal choice for these cookies. Ensure it’s good quality and measured correctly (spooned and leveled, not scooped directly from the bag) to prevent tough cookies. Avoid using cake flour, as its lower protein content will result in a different, less desirable texture.
- 6. Salt: A small amount of salt is vital, especially if you’re using unsalted butter. It acts as a flavor enhancer, balancing the sweetness and bringing out the depth of the butter. Salt truly makes all baked goods taste better and more complex.
For a precise list of ingredients and their exact measurements, please refer to the detailed recipe card at the bottom of this article.
How To Master the Art of Making Danish Butter Cookies
Creating these delightful cookies is a straightforward process, but a few key steps ensure perfect results every time. Follow these instructions carefully to achieve buttery, crisp perfection:
- Cream Butter and Sugar: Begin by placing your room-temperature softened butter and granulated sugar into a large mixing bowl. You can use an electric mixer with a paddle attachment for convenience, a hand mixer, or even tackle it by hand for a good arm workout! Start mixing on low speed, gradually increasing to medium-high. Beat the mixture until it becomes light, fluffy, and noticeably pale in color, usually about 2-3 minutes. This step is crucial for incorporating air and achieving a tender crumb.
- Incorporate Egg and Vanilla: Add the large egg and vanilla extract to the creamed butter and sugar. Continue to beat on medium speed until all ingredients are well combined and the mixture is smooth. Scrape down the sides of the bowl with a rubber spatula to ensure everything is evenly incorporated.
- Gradually Add Dry Ingredients: With the mixer on a low-medium speed, slowly add the all-purpose flour and salt to the wet ingredients. Mix just until a cohesive dough forms. It might seem crumbly at first, but keep mixing until it comes together into a soft, pliable dough. Overmixing at this stage can develop too much gluten, resulting in tougher cookies, so stop as soon as it’s combined. Remember to scrape down the sides of the bowl as needed.
- Prepare for Piping: Transfer the soft cookie dough into a sturdy pastry bag fitted with your chosen large piping tip. For those classic Danish butter cookie swirls, an open star tip (like Ateco #826 or Wilton 1M) or a closed large star tip (like Ateco #849) will yield the best and most beautiful results.
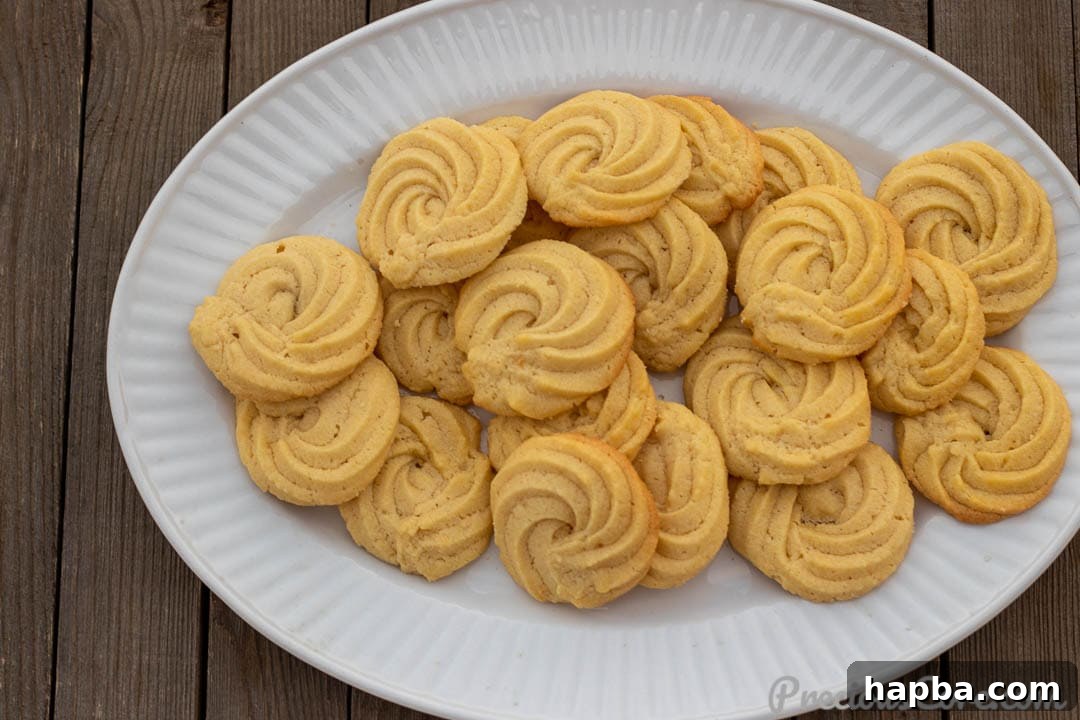
- Pipe the Cookies: Line your baking sheets with parchment paper – this is essential for preventing sticking and ensuring even baking; avoid aluminum foil. Pipe the dough into intricate 1-2 inch swirl circles or decorative rosettes, leaving at least one inch of space between each cookie to allow for slight spreading. Aim for a single layer of uniform shapes for consistent baking.
- Bake to Golden Perfection: Place the baking sheet with your unbaked cookies into a preheated 350°F (180°C) oven. Bake for approximately 12 to 15 minutes, or until the edges are lightly golden brown. It’s crucial not to use a higher oven temperature, as this can cause the edges to burn before the centers are fully baked, leading to an unevenly cooked cookie. Keep a close eye on them, especially after 10 minutes.
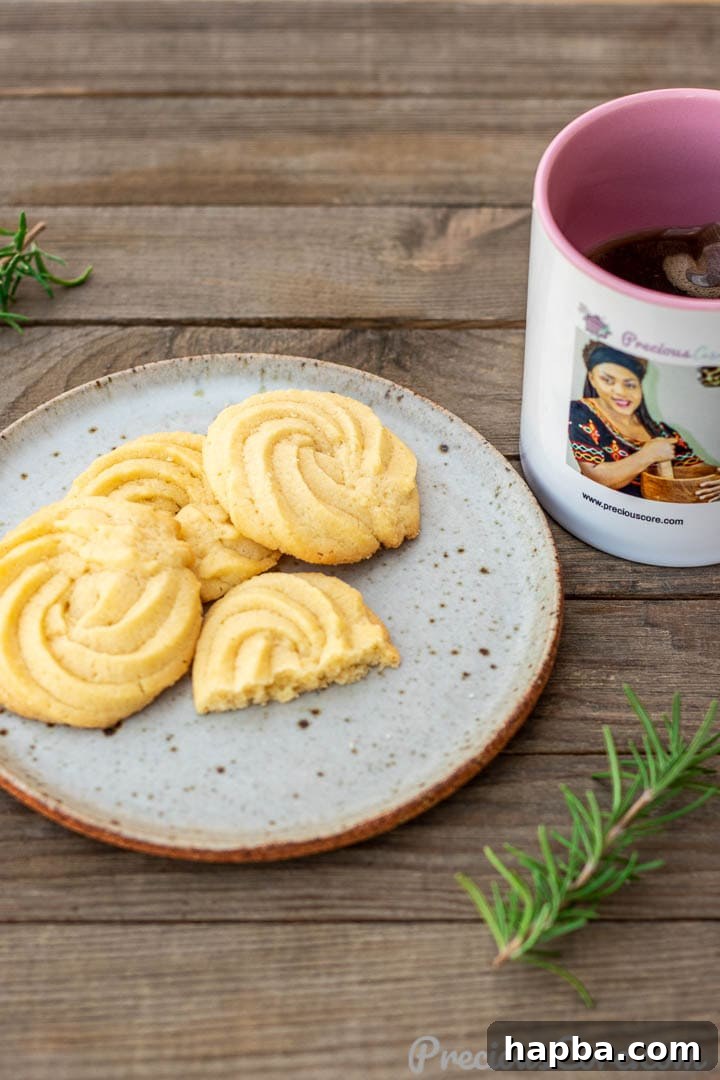
- Cool and Serve: Once baked, allow the cookies to cool on the baking sheet for a few minutes. This allows them to firm up slightly. Then, carefully transfer them to a wire cooling rack to cool completely. Serve warm for a truly irresistible experience, or at room temperature.
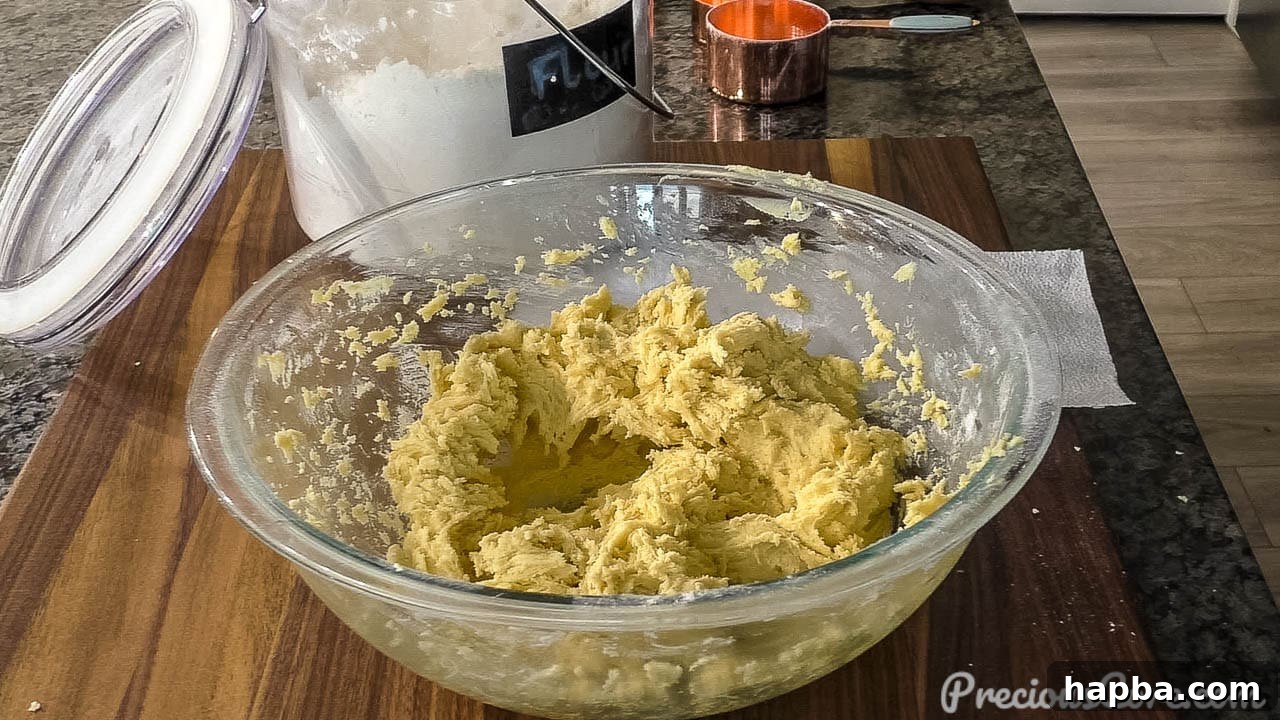
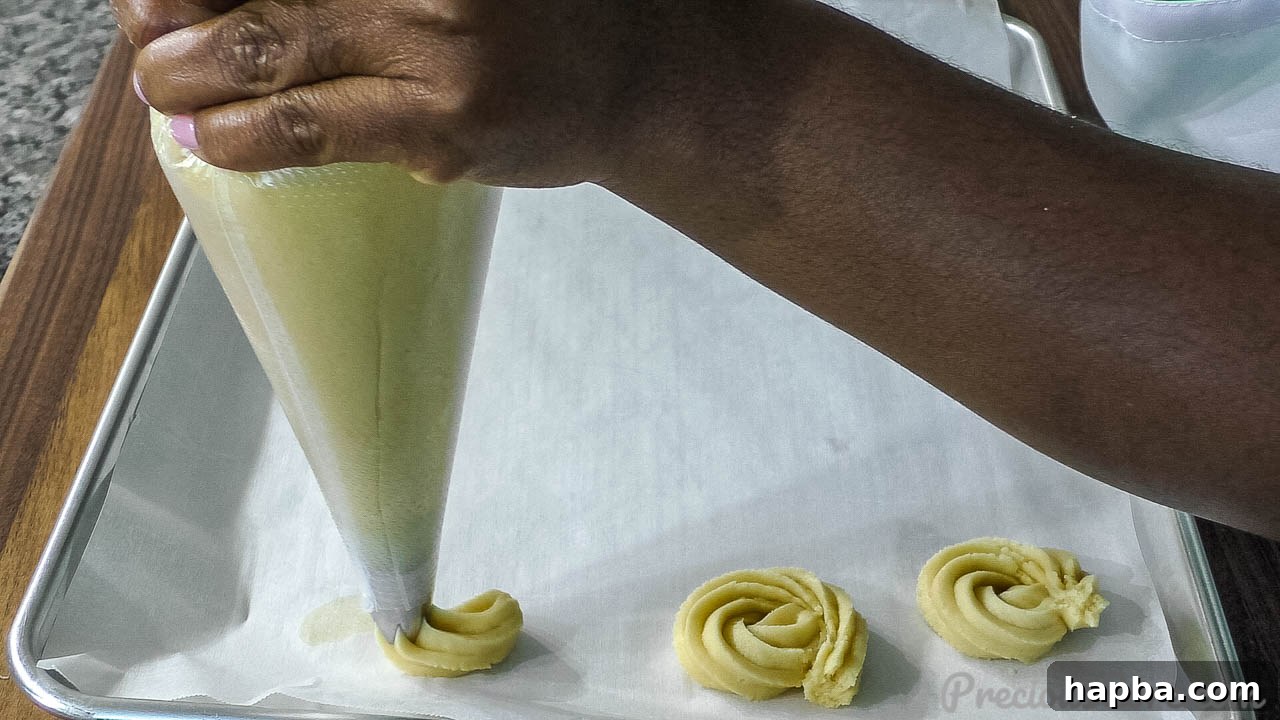
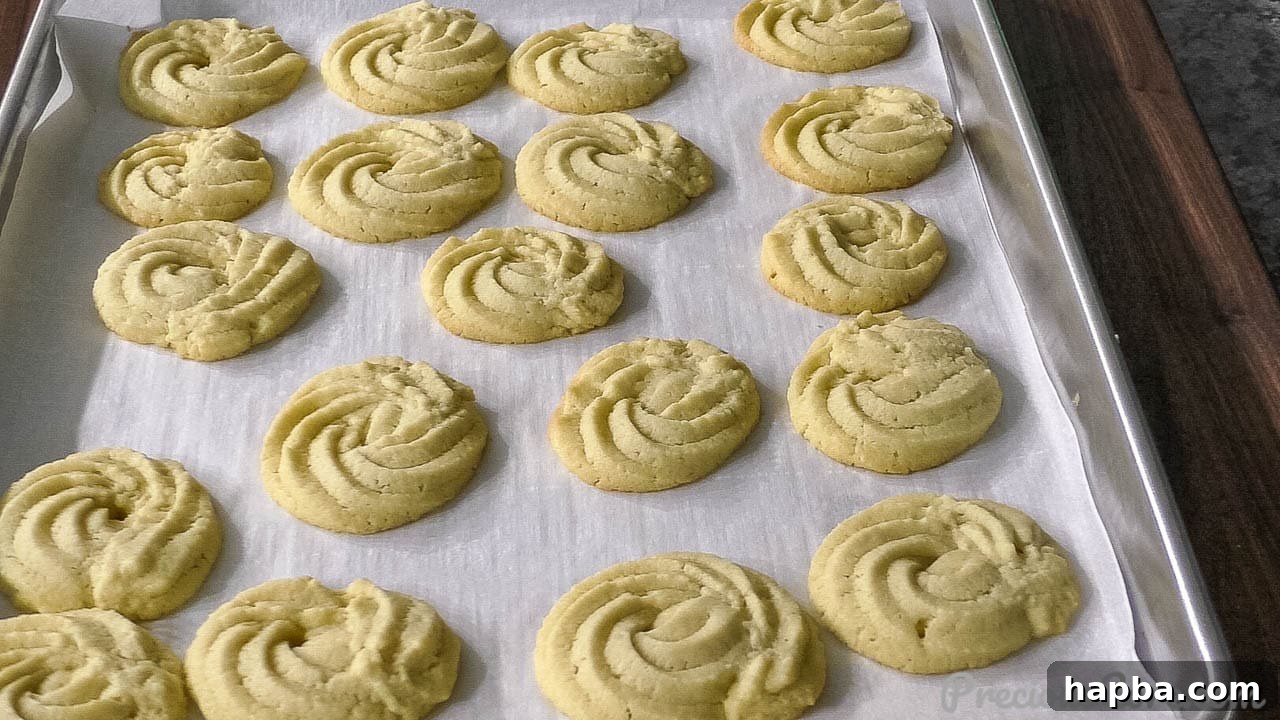
Chef’s Tip for Success: The consistency of your butter is paramount. Ensure your butter is truly softened to room temperature, but not melted. Softened butter will cream beautifully and yield a dough that is perfectly pliable for easy piping. If it’s too cold, it will be hard to cream and pipe; if it’s melted, the cookies may spread too much.
Creative Variations and Serving Suggestions
While classic Danish butter cookies are perfect on their own, don’t hesitate to experiment with these delightful variations:
- Sweet Sugar Garnish: For an extra layer of sweetness and crunch, lightly sprinkle some coarse sugar (like turbinado or sparkling sugar) over the unbaked cookies just before they go into the oven. As they bake, the sugar will caramelize slightly, creating a beautiful sparkle and a satisfying texture.
- Elegant Decorations: Elevate your cookies for special occasions! Once cooled, you can melt down your favorite chocolate (milk, dark, or white) and drizzle it artfully over the cookies. For an even more festive touch, add a scattering of sprinkles while the chocolate is still wet. Arrange them on a wire rack with parchment paper underneath for easy cleanup.
- Flavorful Baking Extracts: Unleash your creativity by swapping out or adding different baking extracts. A dash of almond extract can introduce a nutty depth, while a hint of lemon extract or fresh lemon zest can provide a bright, zesty contrast to the rich butteriness. Other options include orange zest, peppermint extract (for holidays), or even a touch of rum extract for a sophisticated twist.
- Aromatic Spices: For a warm and inviting flavor profile, consider adding a pinch of ground cinnamon, cardamom, or even a tiny amount of nutmeg to your dough. These spices beautifully complement the butter and vanilla.
If you enjoy exploring new cookie flavors, be sure to try my Cinnamon Chocolate Chip Cookies next!
Important Tools For This Recipe
Having the right tools can make all the difference in achieving perfectly shaped Danish butter cookies. Here are a few recommendations:
- For the signature open star shape, I highly recommend using this open-star piping tip by Ateco (Ateco #826).
- Disposable piping bags make cleanup a breeze, and I find these disposable piping bags to be sturdy and reliable.
- If you prefer a slightly different star pattern, closed star piping tips (Ateco #849) are an excellent alternative.
- The Wilton 1M piping tip is also a popular and effective choice for piping these cookies, widely available and easy to use.
Expert Tips for Perfect Danish Butter Cookies
Achieving the best possible Danish butter cookies is simple with these expert tips:
- Optimal Storage: To maintain their crispness and fresh taste, store any leftover cookies in an airtight container at room temperature for up to 3-4 days. For longer storage, these cookies freeze beautifully. Once completely cooled, place them in a single layer in a freezer-safe airtight container or bag. They can be frozen for up to a month. Thaw at room temperature before serving.
- Make Ahead and Freeze Dough: This recipe is fantastic for meal prep! You can prepare the cookie dough ahead of time, pipe the shapes onto a parchment-lined baking sheet, and then freeze the unbaked cookies. Once firm, transfer the frozen cookie shapes to a freezer-safe bag or container, layered with parchment paper to prevent sticking. When you’re ready to bake, simply place the frozen cookies on a baking sheet and bake directly from frozen, adding an extra 2-5 minutes to the baking time.
- Doubling the Recipe for Crowds: Easily double this recipe if you’re baking for a larger gathering or simply want to stock up. When making multiple batches, consider using different piping tips or even a cookie press to create a variety of shapes and add visual interest to your cookie platter. This makes for a stunning presentation!
- Alternative Shaping Methods: If you don’t own a piping bag and tips, or prefer a less intricate approach, don’t worry! You can use a cookie press for beautifully consistent shapes. Alternatively, a small cookie scoop works wonderfully for uniform round cookies. If using a scoop, gently press down on the dough balls with your hand or the back of a spoon to flatten them slightly before baking for a more traditional butter cookie look.
- Room Temperature Ingredients: Always ensure your butter and egg are at true room temperature. This allows them to emulsify properly, creating a smooth, homogenous dough that bakes evenly and contributes to the cookies’ delicate texture.
- Don’t Overbake: For perfectly crisp yet tender cookies, avoid overbaking. The cookies should be just lightly golden around the edges. They will continue to firm up as they cool on the baking sheet.
Mastering Piping for Beautiful Butter Cookies
Piping butter cookies is a fun and rewarding process that allows you to create beautifully intricate shapes. Here are some key tips to ensure your piped cookies turn out perfectly:
- Softened Butter is Key: This is the most critical factor for successful piping. Your butter must be at true room temperature – soft enough to easily indent with a finger, but not melted or greasy. If your butter is too cold, the dough will be too stiff to pipe. If it’s too warm, the cookies may spread excessively during baking.
- Double Your Piping Bags: If using disposable piping bags, especially with a stiffer dough or for extended piping, it’s wise to double them up. Place one bag inside another before filling. This provides extra strength and helps prevent the bag from tearing or bursting under pressure.
- Simple Swirls: For classic, effortless butter cookies, simply draw small circles with the piping tip, creating a tight swirl. Apply even, consistent pressure as you pipe to ensure uniform cookies.
- Elegant Rosette Shapes: To create beautiful rose-like cookies, start piping at a central point and then move outwards in a continuous spiral, forming a swirl. You can leave a small opening in the middle or close it off for a more rounded rosette. Practice on a piece of parchment paper first to get a feel for the pressure and movement.
- Fill Piping Bag Correctly: Don’t overfill your piping bag. Fill it only about two-thirds full to give you enough room to twist the top and apply pressure comfortably without the dough spilling out.
- Consistent Pressure: Maintaining consistent pressure throughout the piping process is vital for uniform cookie sizes and shapes. If your pressure is uneven, your cookies will vary in thickness and may bake differently.
Danish Butter Cookies: Frequently Asked Questions
While Danish butter cookies and shortbread cookies share many similarities in their rich, buttery flavor and delightful crispness, they are not exactly the same. Both are butter-rich, un-leavened cookies (meaning they contain no baking powder or baking soda). However, traditional shortbread typically has a more crumbly, melt-in-your-mouth texture because it does not contain whole eggs or egg yolks. Danish butter cookies, on the other hand, usually include an egg, which contributes to a slightly softer, more structured, and pipeable dough, resulting in a cookie that is still crisp but less crumbly than classic shortbread.
No special piping tip? No problem! You can still make delicious butter cookies. Simply spoon your cookie dough into one corner of a sturdy Ziploc bag or a similar sealable plastic bag. Push the dough firmly towards that corner. Then, using a pair of scissors, snip off a small amount of the very tip of the corner to create an opening (start small, you can always make it bigger). You can then pipe the dough into simple circular shapes. While they won’t have the fancy swirls, they will taste just as wonderful!
Absolutely, you can use cookie cutters to create beautifully shaped Danish biscuits! If you plan to use cookie cutters, you’ll need to slightly modify the process. First, chill the prepared cookie dough in the refrigerator for at least one hour. This makes the dough firmer and easier to handle. Once chilled, place the dough between two sheets of parchment paper and roll it out to a uniform thickness of about a quarter-inch. Use your favorite cookie cutters to cut out shapes, then carefully transfer them to your prepared baking sheets and proceed with baking as directed.
These beloved cookies are called Danish butter cookies because they are said to have originated in Denmark, a country with a rich heritage of baking and pastry-making. The name pays homage to their historical and cultural roots.
Danish butter cookies are cherished for their incredibly rich, pure butter flavor and delicate, crisp texture that melts in your mouth. Their simple elegance, often intricate piped shapes, and versatility for any occasion – from a casual snack with tea to a festive holiday gift – contribute to their enduring popularity. The use of high-quality butter is truly what sets them apart.
More Irresistible Cookie Recipes You’ll Love
If you’ve enjoyed crafting and tasting these classic Danish butter cookies, you’ll definitely want to explore more delicious cookie recipes from our kitchen. Expand your baking repertoire with these fantastic options:
- Our Easiest Chocolate Chip Cookies: A timeless classic that’s simple to make and always a crowd-pleaser.
- Classic Homemade Shortbread Cookies: Experience the pure, buttery goodness of traditional shortbread.
- Delightful Coconut Chocolate Chip Cookies: A tropical twist on a beloved favorite, combining chewy coconut with rich chocolate.
- My First Attempt at Peanut Butter Cookies: A simple, satisfying recipe for peanut butter lovers.
- Zesty Lemon Shortbread Cookies: Bright and refreshing, these shortbreads are bursting with citrus flavor.
Watch How To Make Danish Butter Cookies
For a visual guide to mastering this recipe, watch our step-by-step video on how to make Danish Butter Cookies. Seeing the process in action can be incredibly helpful, especially for piping techniques. Don’t forget to SUBSCRIBE to our YouTube Channel so you never miss a new video!
Subscribe to my channel
Subscribe
If you try this delightful Danish Butter Cookies Recipe, please consider leaving a comment and a star review below. Your feedback means the world to us, and we love hearing about your baking successes!
Danish Butter Cookies Recipe
Danish Butter Cookies are wonderfully buttery, perfectly crisp, and incredibly easy to make with only 4 basic ingredients! They boast an amazing flavor that will make them an instant favorite.
Pin Recipe
Rate
Print Recipe
Ingredients
- 1 cup butter (16 tablespoons or 230g), softened and at room temperature
- 1/2 cup granulated sugar (100g)
- 1 large egg, at room temperature
- 2 teaspoons vanilla extract
- 2 cups all-purpose flour (250g), spooned and leveled to measure
- 1/4 teaspoon salt
Instructions
- Preheat oven to 350° F (180° C). Line two large baking sheets with parchment paper.
- In a large bowl, using a hand mixer or stand mixer, cream together the softened butter and granulated sugar until light and fluffy, about 2 minutes.
- Add the egg and vanilla extract, then beat until just combined and smooth.
- Gradually add in the all-purpose flour and salt. Beat on low speed until the mixture comes together and a dough forms. Do not overmix.
- Place the cookie dough into a sturdy piping bag fitted with your preferred open star or closed star piping tip.
- Pipe the cookies into 1-2 inch swirl circles or decorative rosettes onto the prepared baking sheets, ensuring at least one inch of space between each cookie.
- Bake one sheet of cookies at a time in the preheated oven for 12-15 minutes, or until the edges are lightly golden brown. Baking time may vary depending on cookie size; start checking at 12 minutes.
- Allow the freshly baked cookies to cool completely on the baking sheet before serving or transferring to a wire rack.
- Serve warm or at room temperature. Store any leftovers in an airtight container to maintain freshness.
Notes
- Store cookies in an airtight container at room temperature for 2-3 days. For longer storage, freeze cooled cookies in a freezer-safe airtight bag for up to a month.
- To prevent parchment paper from shifting on the baking sheet, use a small dot of cookie dough in each corner to “glue” it down.
Nutrition
| Carbohydrates: 36g
| Protein: 4g
| Fat: 24g
| Saturated Fat: 15g
| Polyunsaturated Fat: 1g
| Monounsaturated Fat: 6g
| Trans Fat: 1g
| Cholesterol: 81mg
| Sodium: 264mg
| Potassium: 50mg
| Fiber: 1g
| Sugar: 13g
| Vitamin A: 739IU
| Calcium: 15mg
| Iron: 2mg
Additional Info
Tried this recipe?
Mention @preciouscore or tag #PreciousCore!