

The Ultimate Easy Homemade Milk Bread Recipe: Soft, Fluffy & Beginner-Friendly
The enchanting aroma of freshly baked bread wafting through your home is truly one of life’s simplest yet most profound pleasures. After countless requests and a lot of personal anticipation, the moment has finally arrived! It’s time to share an in-depth video and a comprehensive guide for my highly sought-after homemade milk bread recipe. While I’ve been eager to delve into many other delightful bread creations on my YouTube channel, I firmly believe in starting with a fundamental, universally accessible bread recipe. One that not only simplifies the baking process but also guarantees success for anyone, particularly those embarking on their very first bread-baking adventure. And without a doubt, this easy homemade milk bread recipe is precisely that perfect starting point!
If you’ve ever harbored a secret desire to bake your own bread but found the prospect daunting, let me assure you, this recipe is designed with you in mind. It’s an infallible path to producing beautiful, exquisitely delicious loaves right from your kitchen, free from any unnecessary complications. Gender, prior experience, or perceived baking aptitude are irrelevant – I confidently declare that YOU CAN master this recipe and bake incredible milk bread!

Embrace the Art of Homemade: Why This Milk Bread Recipe is a Must-Try
There’s an unparalleled sense of accomplishment and warmth that accompanies the act of pulling a golden-brown loaf of bread from your oven. The delight isn’t solely in the eventual taste, but also in the immersive journey – from combining a few basic ingredients to witnessing the miraculous transformation of dough as it rises, and finally, savoring that initial, warm, fragrant slice. This particular homemade milk bread recipe encapsulates that entire experience, making it more than just food; it’s an invitation to partake in the comforting magic of baking.
I continue to be genuinely touched and inspired by the incredible feedback received from individuals who have successfully followed this recipe. Testimonies abound, often accompanied by vibrant pictures showcasing their triumphant homemade bread creations. Every single message and photo brings immense joy to my heart! It serves as a powerful affirmation of how achievable and profoundly rewarding this specific recipe truly is for home bakers of all skill levels.
Just a few weeks ago, I introduced this very recipe to a dear friend, and astonishingly, she now bakes it almost every week! She frequently finds herself doubling, tripling, or even quadrupling the ingredient quantities because a single batch of these utterly delightful loaves simply disappears too quickly from her household. I wholeheartedly encourage you to adopt a similar strategy. These loaves are exceptionally soft, possess a rich milky flavor, and are so incredibly moreish – I guarantee they won’t last long in your home!
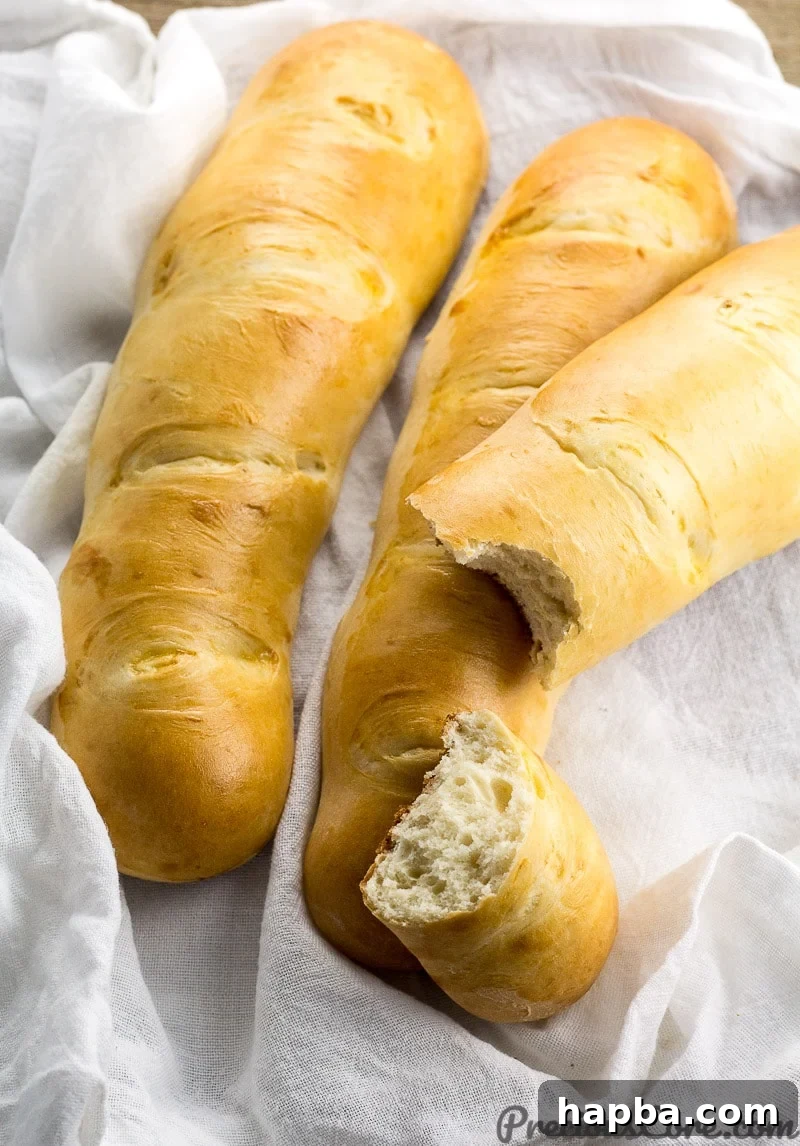
What sets this homemade milk bread apart is its utterly captivating texture: irresistibly soft, delicately milky, and wonderfully fluffy. It’s a versatile delight, perfect for enjoying straight out of the oven, perhaps with a simple spread of butter or your favorite jam. It also serves as an outstanding foundation for creating an extraordinary gourmet sandwich, or can be savored in any manner your heart desires. Its adaptability is limitless, and the profound, comforting taste is simply beyond compare.
Beyond the Bakery Aisle: The Unbeatable Advantages of Baking Your Own Bread
Once you experience the straightforward reality that crafting your own delicious bread at home is genuinely not an intricate scientific endeavor, a whole new and exhilarating realm of culinary exploration becomes accessible. In today’s market, I find it increasingly difficult to bring myself to purchase commercially produced bread. The reason is simple: even those products marketed as “healthy” versions of industrial bread often contain an extensive list of ingredients – frequently exceeding twenty different components – a significant proportion of which are artificial preservatives, various chemicals, and often hidden sugars. In stark contrast, an authentically delicious homemade bread typically requires only about 5 to 10 straightforward, wholesome ingredients that you can easily recognize and pronounce.
This fundamental distinction is precisely where homemade milk bread truly excels! It offers an honest, uncomplicated, and wholesome alternative to the often-opaque and complex ingredient lists found on store-bought products. While I frequently bake a wide variety of breads at home, this particular milk bread recipe remains my indisputable favorite and the one I turn to most often. Its unwavering consistency, delightful texture, and universally loved flavor make it a consistent highlight among all my bread recipes.
Choosing to bake your own bread provides you with absolute and complete control over every single ingredient that goes into your food. This means no unwelcome hidden sugars, no puzzling emulsifiers, and no artificial flavors – just pure, natural components. This level of transparency not only contributes to a healthier diet for you and your family but also profoundly enhances the overall flavor profile and delicate texture of the finished bread. Furthermore, the financial savings achieved by baking at home, especially when compared to purchasing specialty or artisanal loaves, can accumulate significantly over time, making it an intelligent choice for both your nutritional well-being and your household budget.

Essential Tips for Beginner Bread Bakers: Your Path to Perfect Loaves
Embarking on your initial bread-baking journey might seem a little intimidating, but with this incredibly forgiving milk bread recipe, achieving impressive success is genuinely within your grasp. To help ensure your very first loaves emerge from the oven looking and tasting nothing short of perfect, here are a few invaluable tips specifically tailored for novice bakers:
- Mastering Yeast Activation: The cornerstone of any great yeast bread is properly activated yeast. Ensure your warm water is precisely within the optimal temperature range of 105-115°F (40-46°C). Water that is too hot will fatally damage the yeast, rendering it ineffective, while water that is too cold will fail to activate it adequately. A small quantity of sugar added at this stage acts as a vital food source, helping to invigorate the yeast. Look for a discernible foamy layer to form on the surface after 5-10 minutes – this is your clear indicator that your yeast is alive and thriving.
- The Peril of Over-Flouring: It’s a common, yet easily avoidable, mistake to add excessive amounts of flour to a sticky dough in an attempt to make it more manageable. Resist this temptation! Incorporating too much flour is a primary reason why homemade bread can turn out dense, dry, or hard. Instead, use flour sparingly on your work surface and on your hands as needed, aiming for a dough that remains wonderfully soft and slightly tacky to the touch, yet sufficiently pliable for handling.
- The Critical Role of Rising (Proofing): Providing your dough with a warm, undisturbed, and draft-free environment for its second rise (proofing) is absolutely crucial for developing a light and airy texture. A clever and highly effective trick is to preheat your oven to its lowest possible setting for just 1-2 minutes, then turn it off completely. Place your covered dough inside (you can leave the door slightly ajar if you feel it’s too warm initially). This creates an ideal microclimate, allowing the yeast to work its magic efficiently, causing the dough to double in size, typically within about an hour, depending on the ambient temperature of your kitchen.
- Artful Loaf Formation: The accompanying video tutorial is an invaluable resource for visually understanding the precise technique required to roll and tuck the dough into perfectly shaped loaves. Don’t be discouraged if your initial attempts aren’t perfectly symmetrical; practice naturally leads to perfection, and rest assured, the taste will still be utterly fantastic!
- The Magic of an Egg Wash: A generous brushing of beaten egg over the tops of your loaves just before they enter the oven performs wonders. It creates that coveted beautiful, glossy, golden-brown crust that elevates homemade bread to bakery-quality standards. It also subtly enriches the flavor of the bread’s exterior.
By keeping these simple yet powerful guidelines in mind, you will be well-equipped to create truly impressive and delectable milk bread, even on your very first endeavor. The process is remarkably forgiving, and the ultimate reward of a perfectly baked loaf is incredibly satisfying.
Watch How to Make Homemade Milk Bread: Step-by-Step Video Guide
For a comprehensive visual walkthrough and to observe each crucial step in real-time, I highly recommend watching the full video tutorial. It brings the recipe to life and clarifies any questions you might have about the technique:
Don’t forget to click here to subscribe to my YouTube channel for a constant stream of easy, delectable, and inspiring recipes!
Homemade Milk Bread Recipe

This homemade milk bread is renowned for being quick, exceptionally easy, and made with only the most straightforward ingredients. Even a complete baking novice can effortlessly achieve perfect results with this recipe! Prepare to enjoy this simple yet spectacular homemade bread that consistently delivers incredibly soft, fluffy, and richly flavored loaves every single time.
Prep Time: 30 minutes
Cook Time: 20 minutes
Total Time: 50 minutes
Yields: 4 loaves
Pin Recipe |
Print Recipe
Ingredients
- 3 cups all-purpose flour (375g), plus an additional 1/4 cup for dusting and rolling
- 1 teaspoon active dry yeast
- 1 cup warm water (ideally 110 degrees F / 43 degrees C)
- 1/4 cup evaporated milk (60 ml)
- 4 tablespoons granulated sugar
- 1/2 teaspoon salt
- 3 tablespoons unsalted butter (melted and slightly cooled)
- 1 large egg, for egg wash (lightly beaten)
Instructions
- In a generously sized mixing bowl, combine the warm water, active dry yeast, and granulated sugar. Stir these ingredients gently until they are well mixed, then allow the mixture to rest for approximately 5-10 minutes. During this time, the mixture should become visibly foamy and bubbly, which is a clear indication that your yeast is active and ready to use.
- Once the yeast has been successfully activated, proceed to pour in the evaporated milk and the cooled melted butter. Whisk all these wet ingredients together thoroughly until they are uniformly combined.
- Gradually add the measured flour and salt to the wet mixture. Mix everything together meticulously, using either a sturdy spoon, a spatula, or a stand mixer fitted with a dough hook, until a cohesive, slightly sticky dough ball begins to form.
- Generously flour a clean, dry work surface (a spacious cutting board or a clean countertop works perfectly). Carefully transfer the sticky dough onto this floured surface. Sprinkle a little more flour lightly over the top of the dough and begin to knead it gently for about 5-7 minutes. Continue to add small amounts of flour as necessary to prevent the dough from sticking excessively to your hands or the surface, but exercise caution to avoid incorporating too much flour, as this can result in a dense and firm bread texture. The goal is a soft, elastic, and still slightly tacky dough.
- Divide the thoroughly kneaded dough into four roughly equal portions. Take one piece of dough, lightly flour your work surface once more, and roll it out into an oval or rectangular shape that is approximately ten inches wide.
- Starting from one of the shorter ends of the rolled dough, carefully roll it up tightly towards the opposite end, creating a neat log shape. Once rolled, pinch the seams firmly to seal them, and gently tuck in the ends to sculpt a compact and attractive loaf shape.
- Using a sharp knife or a specialized dough scraper, make four shallow, diagonal cuts across the top surface of each formed loaf. These artistic cuts are not just for aesthetics; they allow the bread to expand beautifully and evenly as it bakes.
- Carefully transfer the formed loaves onto a greased baking tray or a tray lined with parchment paper. Ensure that there is adequate space between each loaf to allow for their expansion during the rising and baking processes. Repeat steps 5-7 with the remaining three pieces of dough.
- For the crucial second rise (proofing), place the prepared loaves in a warm, draft-free environment. A highly effective method is to preheat your oven to its absolute lowest temperature setting for just 1-2 minutes, then turn the oven off completely. Place the baking tray with your loaves inside (you can leave the oven door slightly ajar if you feel the internal temperature is too high). Allow the loaves to rise undisturbed for approximately one hour, or until they have noticeably doubled in size.
- While the loaves are undergoing their final rise, preheat your main oven to a temperature of 350 degrees F (180 degrees C).
- Once the loaves have adequately risen and the oven is preheated, take the lightly beaten egg and generously brush the tops and sides of each loaf. This egg wash is vital for achieving that desirable beautiful, shiny, golden-brown crust and a wonderfully soft exterior.
- Carefully place the baking tray with the brushed loaves into the preheated oven. Bake for approximately 15-20 minutes, or until the loaves achieve a rich golden-brown hue and produce a hollow sound when gently tapped on the bottom.
- Upon completion of baking, remove the loaves from the oven and immediately transfer them to a wire rack to cool slightly. Cooling is important for the bread’s internal structure to set properly. Slice and serve your perfectly homemade, incredibly soft, and delightfully fluffy milk bread. Enjoy every wholesome bite!
Notes: The nutritional information provided below is an estimated value calculated per individual loaf of bread.
Nutritional Information (Estimated per loaf)
- Calories: 510 kcal
- Carbohydrates: 86g
- Protein: 13g
- Fat: 12g
- Saturated Fat: 7g
- Polyunsaturated Fat: 1g
- Monounsaturated Fat: 3g
- Trans Fat: 0.3g
- Cholesterol: 68mg
- Sodium: 397mg
- Potassium: 195mg
- Fiber: 3g
- Sugar: 14g
- Vitamin A: 360 IU
- Vitamin C: 0.3mg
- Calcium: 67mg
- Iron: 5mg
Additional Recipe Details
- Course: Breakfast, Snack, Side Dish
- Cuisine: International
Don’t forget to save this incredible recipe for future baking endeavors! Pin it to your favorite board:
Connect and Share Your Baking Success!
We absolutely adore witnessing your culinary achievements! If you decide to try this amazing homemade milk bread recipe, please be sure to share your beautiful photos and delightful experiences with our community on social media. You can easily mention @preciouscore in your posts or use the hashtag #PreciousCore. Your baking success stories and visual inspirations genuinely uplift and motivate us, as well as fellow home bakers around the globe!
The Endless Possibilities: Unlock Your Kitchen’s Potential
There truly is no conceivable limit to the incredible culinary creations you can achieve right within the comfort of your very own kitchen. Whether your passion lies in baking sumptuously soft breads, whipping up your own velvety smooth spreads, or venturing into any other gastronomic desire, the power and creativity are entirely in your hands. All it fundamentally requires is a confident spirit, an unwavering belief in your own abilities, and the simple willingness to gather those ingredients and just begin the process. There is genuinely nothing quite as satisfying, wholesome, and profoundly delicious as food prepared with love, from scratch, right in your own home!