
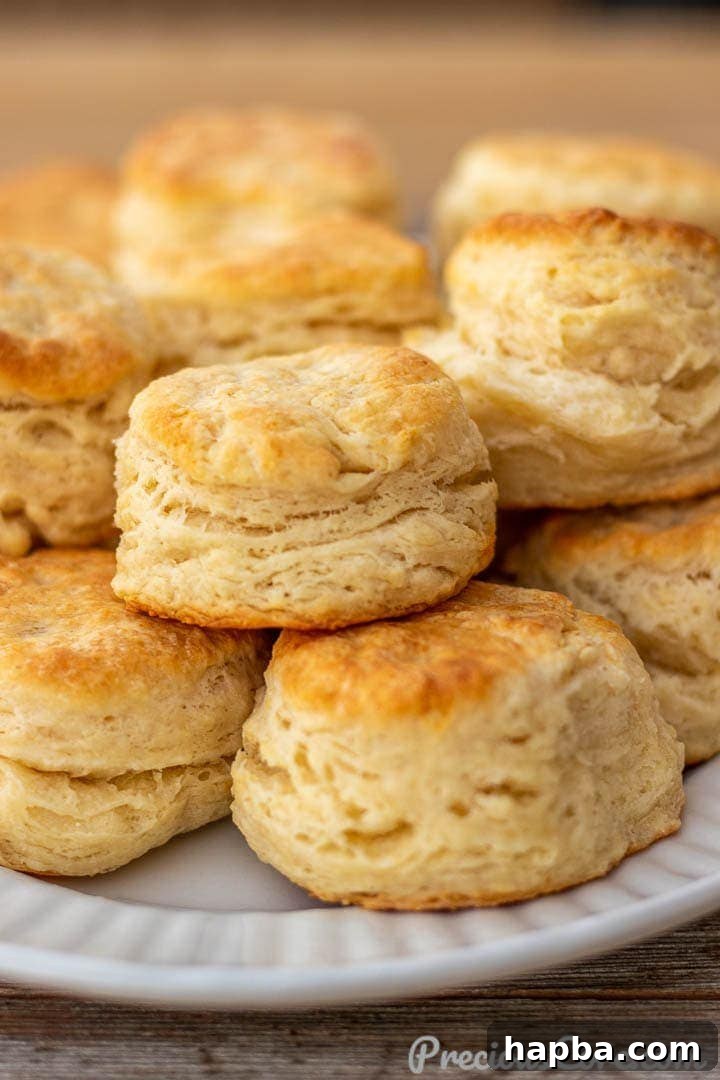
The Ultimate Guide to Flaky, Fluffy, and Buttery Homemade Buttermilk Biscuits
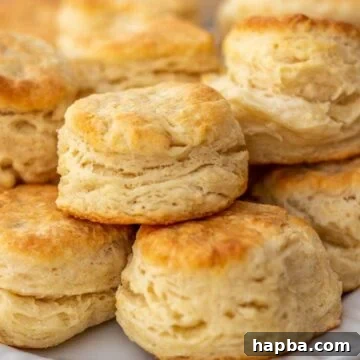
There’s nothing quite like the comforting aroma and incredible taste of a freshly baked batch of homemade buttermilk biscuits. Imagine biting into a biscuit that is wonderfully flaky, unbelievably fluffy, and rich with buttery goodness. Whether you’re looking for the perfect addition to your breakfast spread, a delightful brunch centerpiece, or a versatile side dish to complement any meal, these biscuits are guaranteed to impress.
After years of perfecting, testing, and tweaking, I am thrilled to share my ultimate recipe along with all my insider tips and tricks to help you achieve biscuit perfection. This isn’t just another recipe; it’s a guide to creating biscuits that will truly knock your socks off!
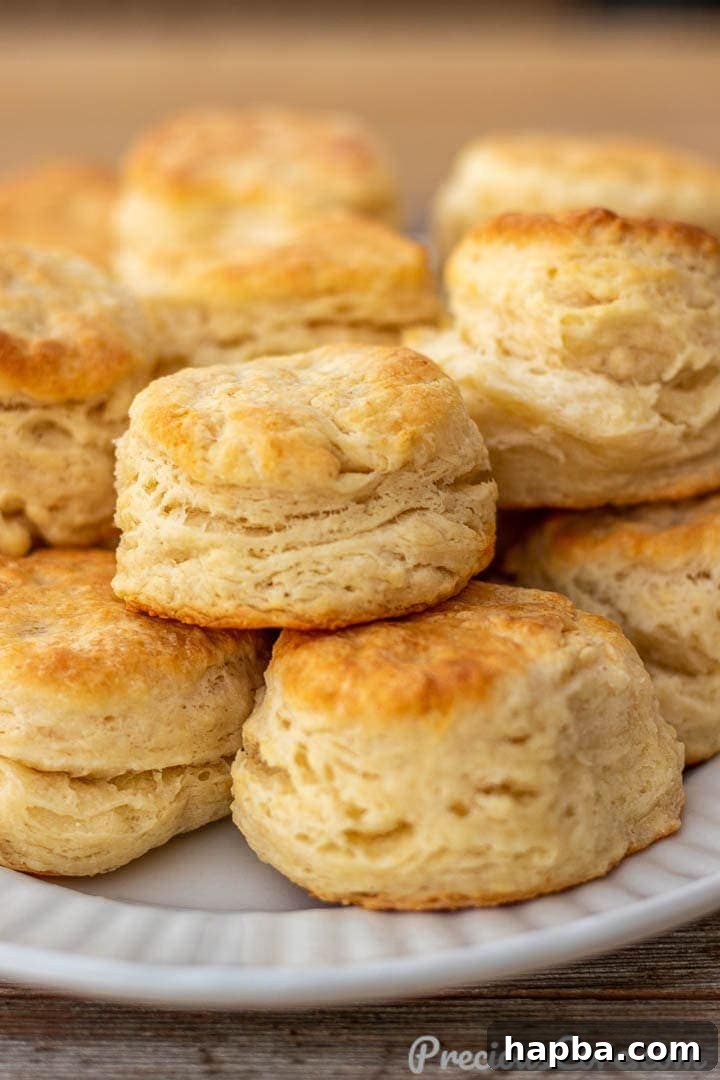
Why You’ll Fall in Love with These Homemade Buttermilk Biscuits
These aren’t just any biscuits; they are the culmination of countless attempts to achieve the ideal balance of flavor and texture. What makes this recipe truly stand out?
- Unrivaled Flakiness: Each biscuit boasts incredible, distinct layers that pull apart effortlessly, a hallmark of a truly great biscuit.
- Pillowy Softness: The interior is wonderfully tender and fluffy, providing a delightful contrast to the crispy, golden exterior.
- Rich Buttery Flavor: Made with generous amounts of cold butter, these biscuits carry a deep, luxurious buttery taste that is simply irresistible.
- Surprisingly Easy to Make: Despite their impressive results, these biscuits are ridiculously simple to prepare. You can go from ingredients to warm, golden biscuits in just about 30 minutes! This makes them perfect for busy mornings or last-minute meal additions.
- Versatile & Delicious: Enjoy them warm on their own, slathered with butter, or topped with your favorite jams and preserves. They also make an excellent accompaniment to savory dishes.
As a busy parent, finding recipes that deliver amazing results without consuming hours in the kitchen is a game-changer. This buttermilk biscuit recipe has become a staple in my home, proving that delicious homemade food doesn’t have to be complicated or time-consuming. You’ll be amazed at how quickly you can whip up a batch of these glorious biscuits, bringing joy to your breakfast table or dinner plate.
These delectable biscuits pair perfectly with a dollop of Apricot Preserves or a spoonful of Healthy Strawberry Jam. For those who can’t get enough of homemade biscuits, be sure to explore my other popular recipes like the incredibly simple 3-Ingredient Biscuits and the rich, tender Cream Cheese Biscuits.
Table of Contents
- Essential Ingredients for Unforgettable Buttermilk Biscuits
- Step-by-Step Guide: Crafting Your Perfect Homemade Buttermilk Biscuits
- Expert Tips for Flawless Flaky Biscuits Every Time
- Recommended Tools for Biscuit Baking Success
- Frequently Asked Questions About Buttermilk Biscuits
- Buttermilk Biscuits Recipe Card
Essential Ingredients for Unforgettable Buttermilk Biscuits
Creating truly exceptional buttermilk biscuits requires just a handful of common pantry staples. The key lies in selecting quality ingredients and preparing them correctly. Here’s a closer look at what you’ll need and why each component is crucial:
- Cold Unsalted Butter: This is arguably the most important ingredient for flaky biscuits. Cold butter creates steam as it bakes, separating the dough into distinct, airy layers. Using unsalted butter allows you to control the overall saltiness of your biscuits.
- All-Purpose Flour: The foundation of our biscuits. All-purpose flour provides the necessary structure. Ensure you measure it correctly – ideally by weight (grams) for accuracy, or by spooning flour into your measuring cup and leveling it off, rather than scooping directly.
- Baking Powder and Baking Soda: These leavening agents are responsible for the incredible rise and fluffy texture. Baking powder reacts with liquid and heat, while baking soda reacts with the acidity of buttermilk, producing carbon dioxide bubbles that make the biscuits light and airy.
- Salt: A pinch of salt is vital for balancing and enhancing all the flavors in the biscuit, preventing them from tasting bland.
- Granulated Sugar: While buttermilk biscuits are generally savory, a small amount of sugar adds a subtle sweetness that rounds out the flavor profile and contributes to that beautiful golden-brown crust without making the biscuits overtly sweet.
- Cold Buttermilk: The star ingredient! Buttermilk provides a tangy flavor and tenderizes the gluten in the flour, resulting in a softer, more delicate biscuit. Its acidity also activates the baking soda, ensuring a good rise. Using cold buttermilk helps keep the butter solid, which is essential for flakiness.
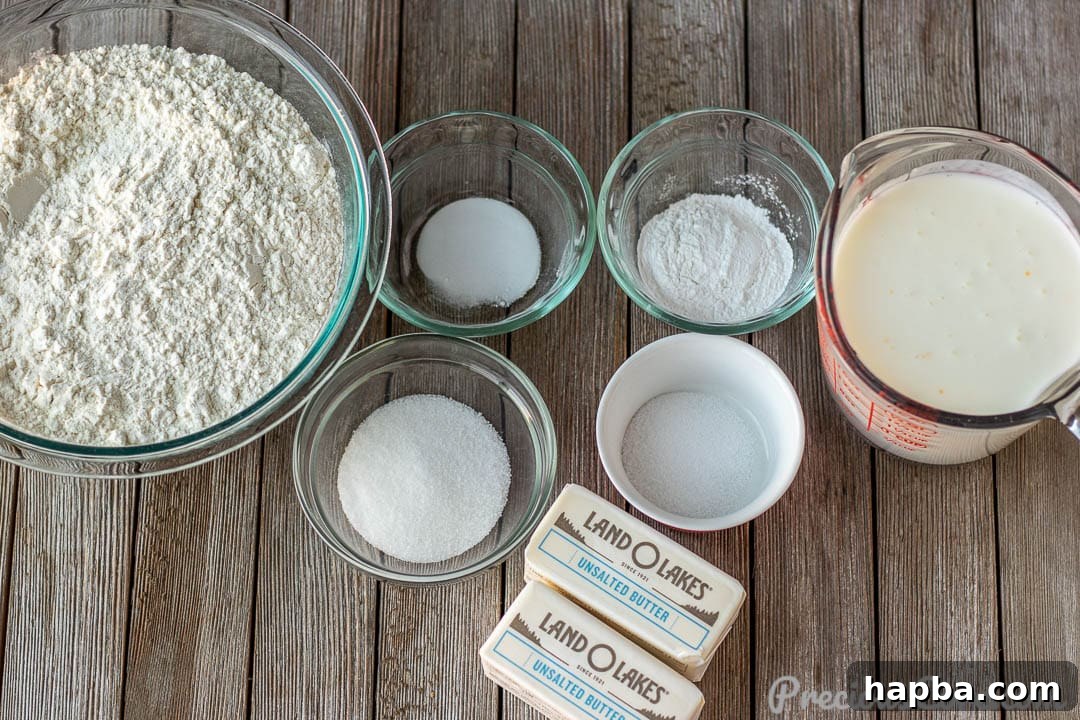
For the precise quantities of each ingredient, please refer to the detailed recipe card at the bottom of this post.
Step-by-Step Guide: Crafting Your Perfect Homemade Buttermilk Biscuits
Making homemade biscuits is a rewarding experience that’s much simpler than you might think. Follow these steps to achieve perfectly flaky, fluffy, and tender buttermilk biscuits:
1. Prepare Your Butter: Begin by grating your cold butter into a large mixing bowl using the coarse side of a box grater. This method ensures that the butter is evenly distributed and remains in small, cold pieces, which is crucial for creating those coveted flaky layers.
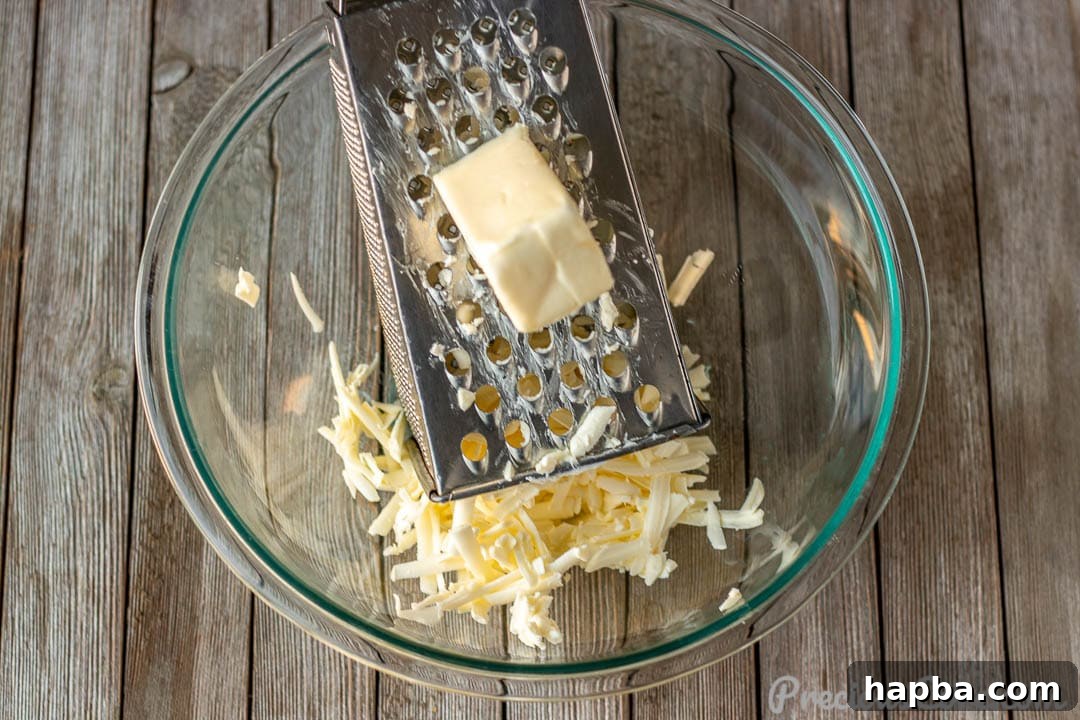
2. Combine Dry Ingredients: To the grated butter, add the flour, baking powder, baking soda, salt, and sugar. Use your fingertips to gently mix these ingredients together until they are just combined. The goal is to work quickly to prevent the butter from warming up. You should still see visible, pea-sized pieces of butter throughout the flour mixture. Alternatively, a pastry blender or pastry cutter can be used to achieve this consistency.
3. Incorporate Buttermilk: Pour in the cold buttermilk and mix just enough to form a shaggy, cohesive dough. Avoid overmixing, as this can develop the gluten too much, leading to tough biscuits.
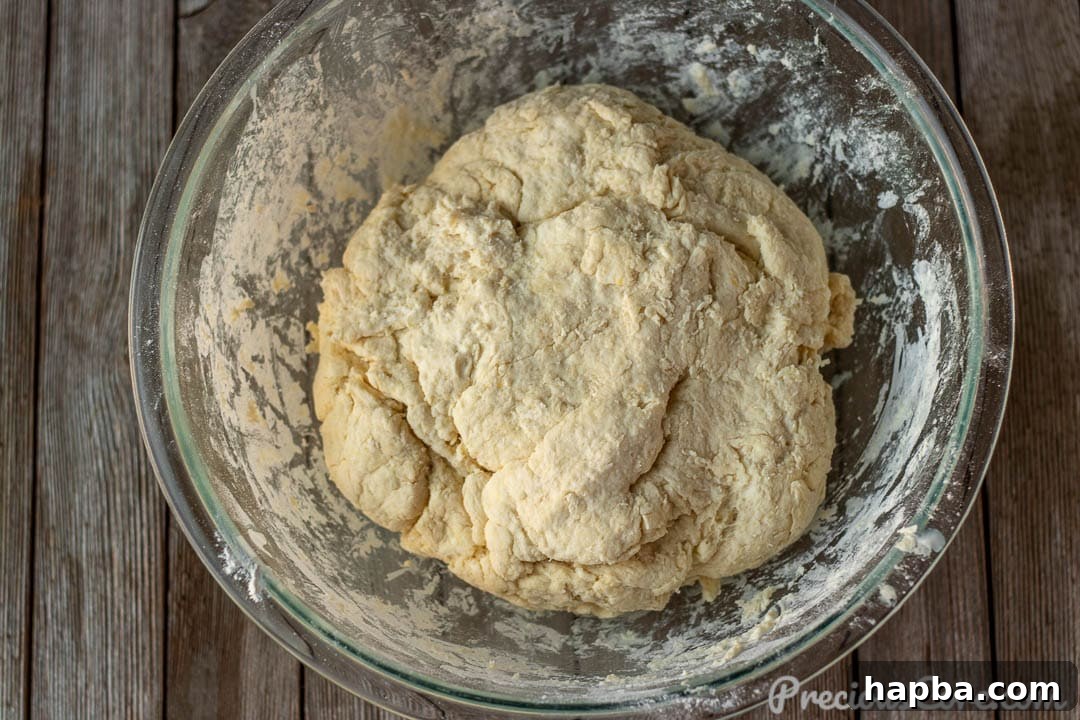
4. Create Flaky Layers (The Lamination Process): Lightly flour your work surface and transfer the dough onto it. Gently press the dough down or use a rolling pin to flatten it into a rectangle about half an inch thick. Then, fold the dough into thirds, like a letter. Rotate the dough horizontally, and repeat the pressing/rolling and folding process two more times. This folding technique is essential for building those beautiful, flaky layers.
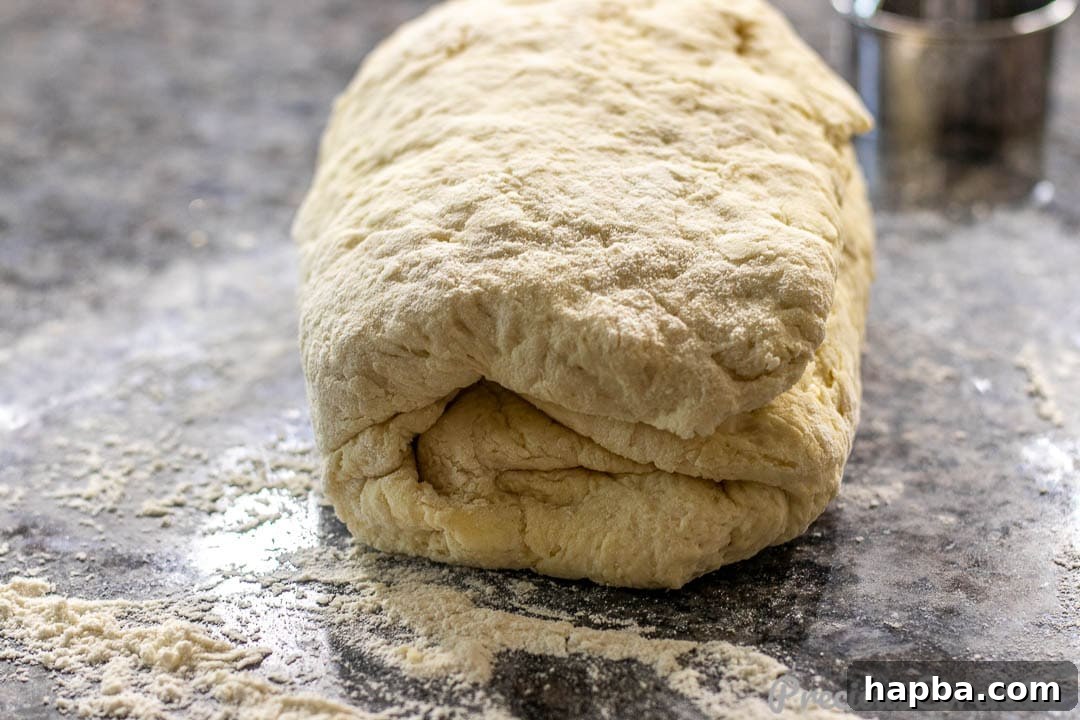
You should aim to fold the dough a total of three times, each time pressing or rolling it back to approximately half an inch thick before folding again. This layering technique is what gives biscuits their signature texture.
5. Cut the Biscuits: After the final fold and roll, the dough should be about half an inch thick. Use a 2.5-inch biscuit cutter (or the rim of a sharp-edged glass) to cut out rounds. Press straight down without twisting the cutter. Twisting can seal the edges, preventing the biscuits from rising properly.
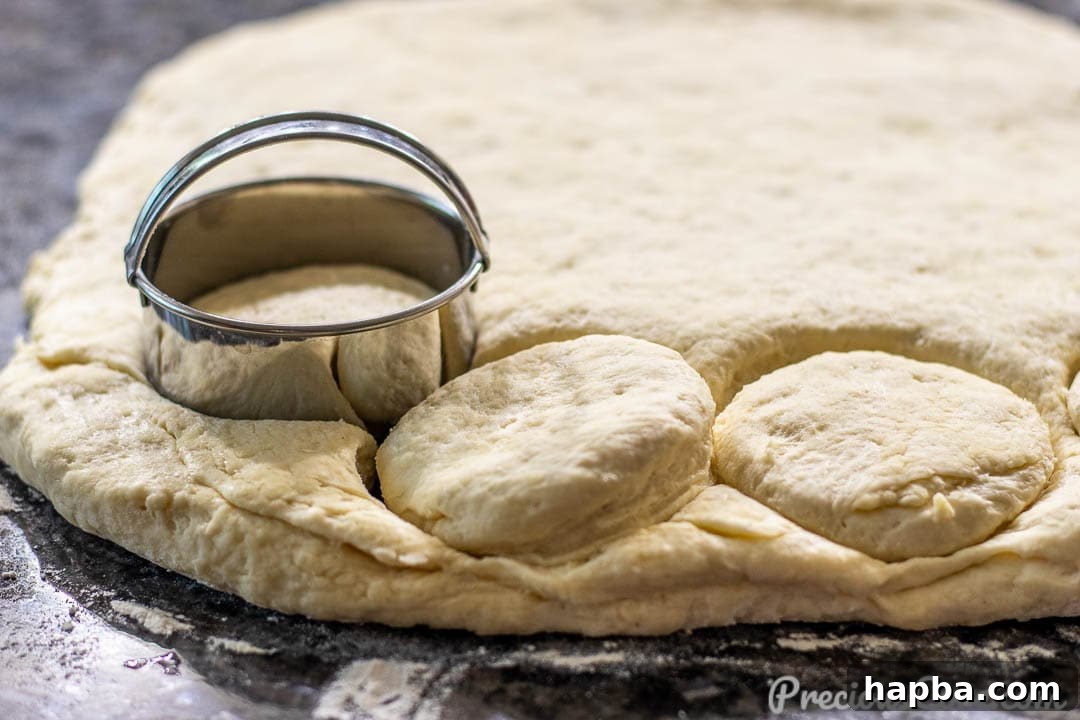
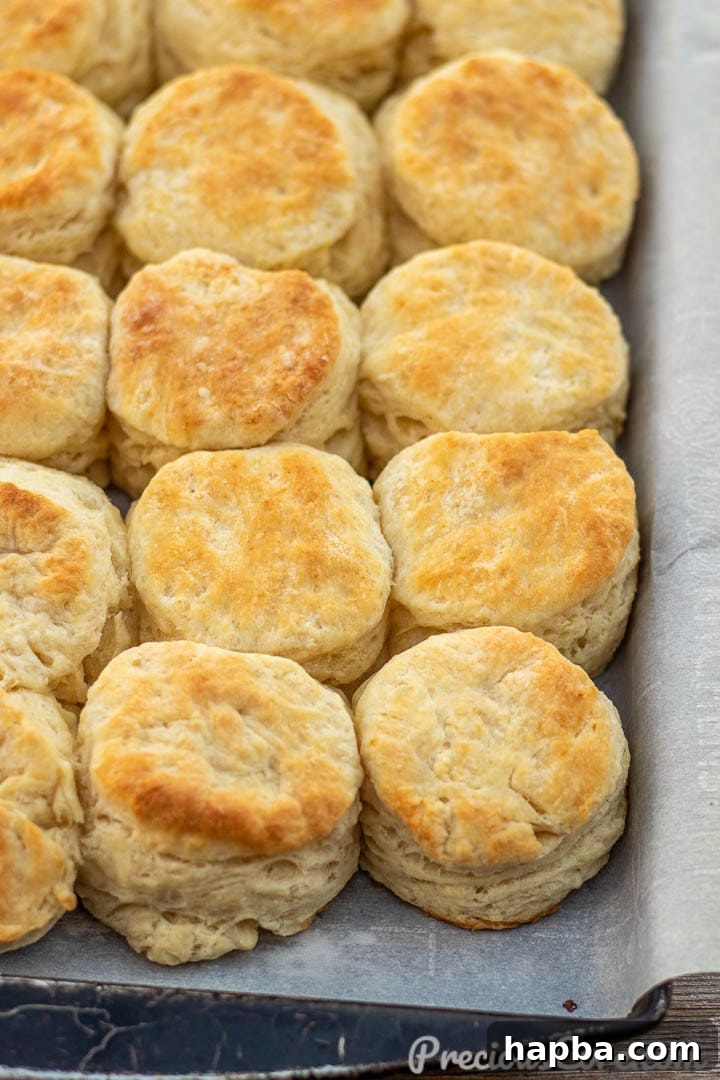
6. Arrange for Baking: Place the cut-out biscuits on a large baking sheet lined with parchment paper. Crucially, arrange them so they are lightly touching each other. This proximity helps the biscuits rise taller and more evenly during baking.
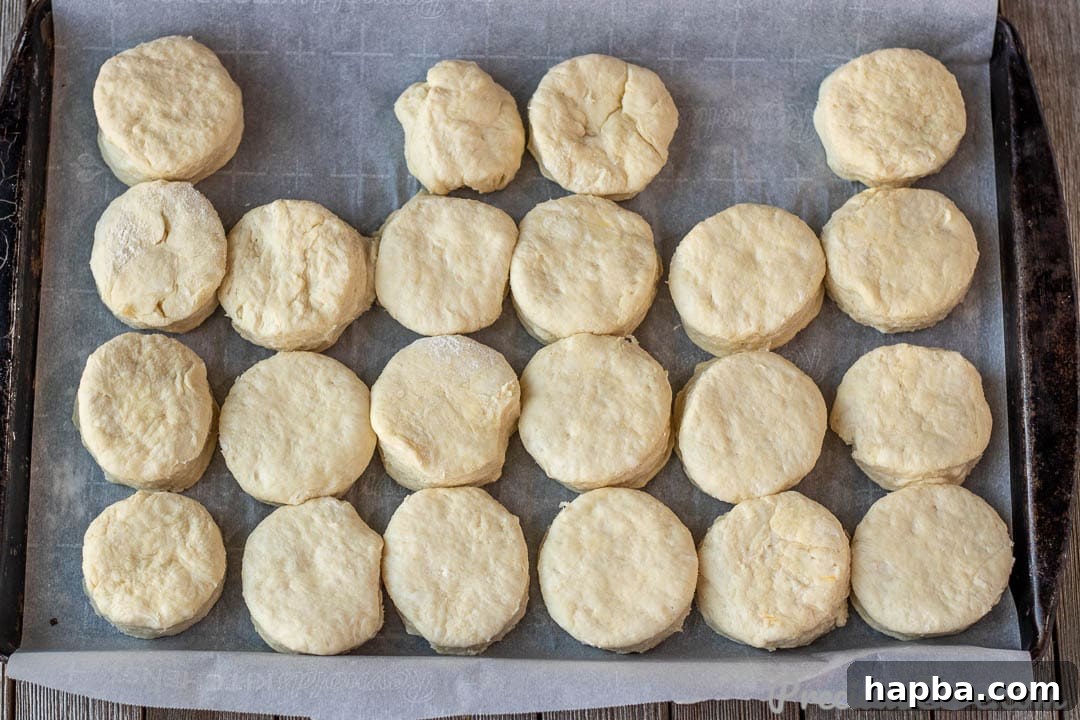
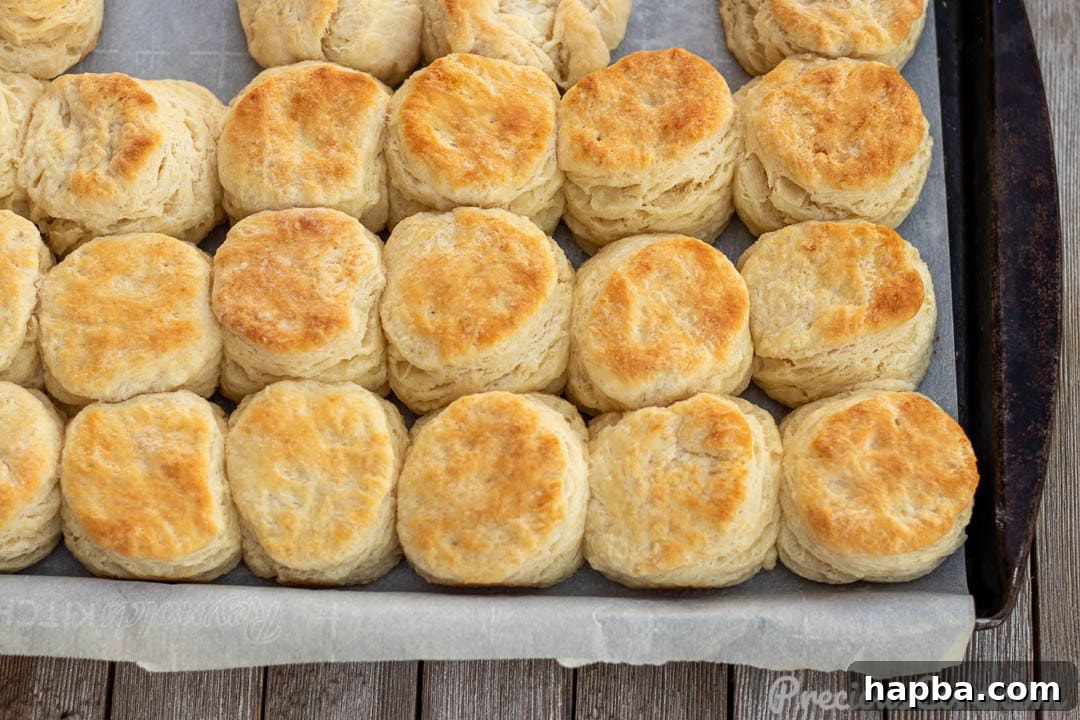
7. Bake to Golden Perfection: Bake in a preheated oven (425 degrees F or 220 degrees C) for approximately 15 minutes, or until the tops are beautifully golden brown and the biscuits have puffed up considerably.
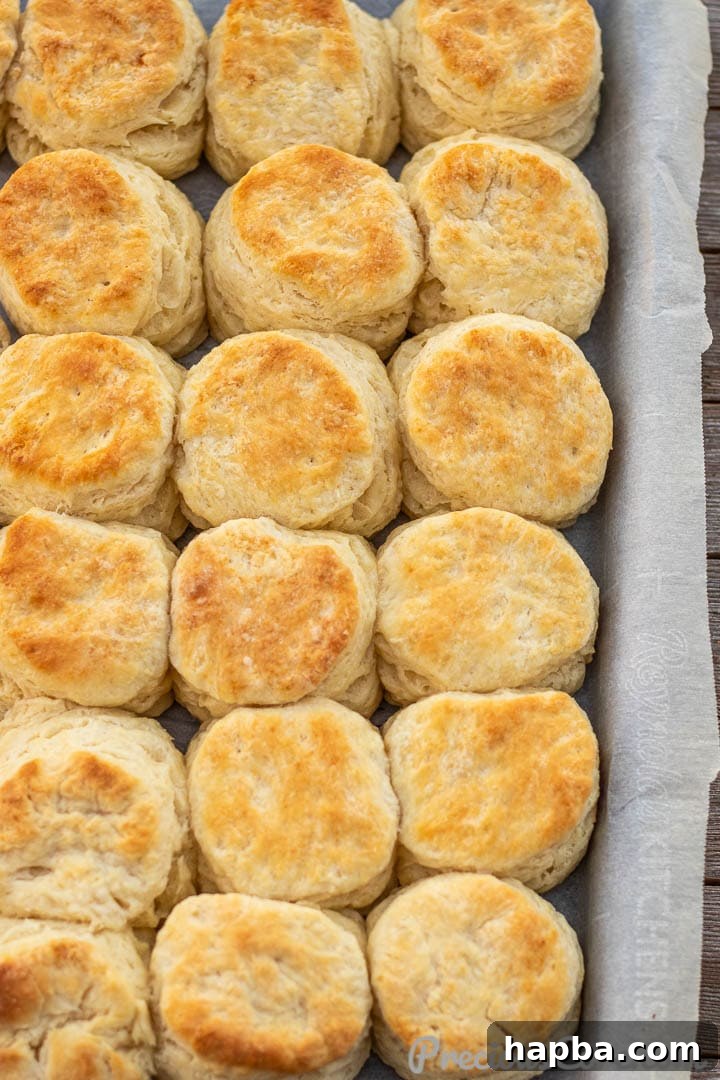
8. Serve Warm: Allow them to cool slightly before serving warm with your favorite toppings like butter, jam, or even savory gravy.
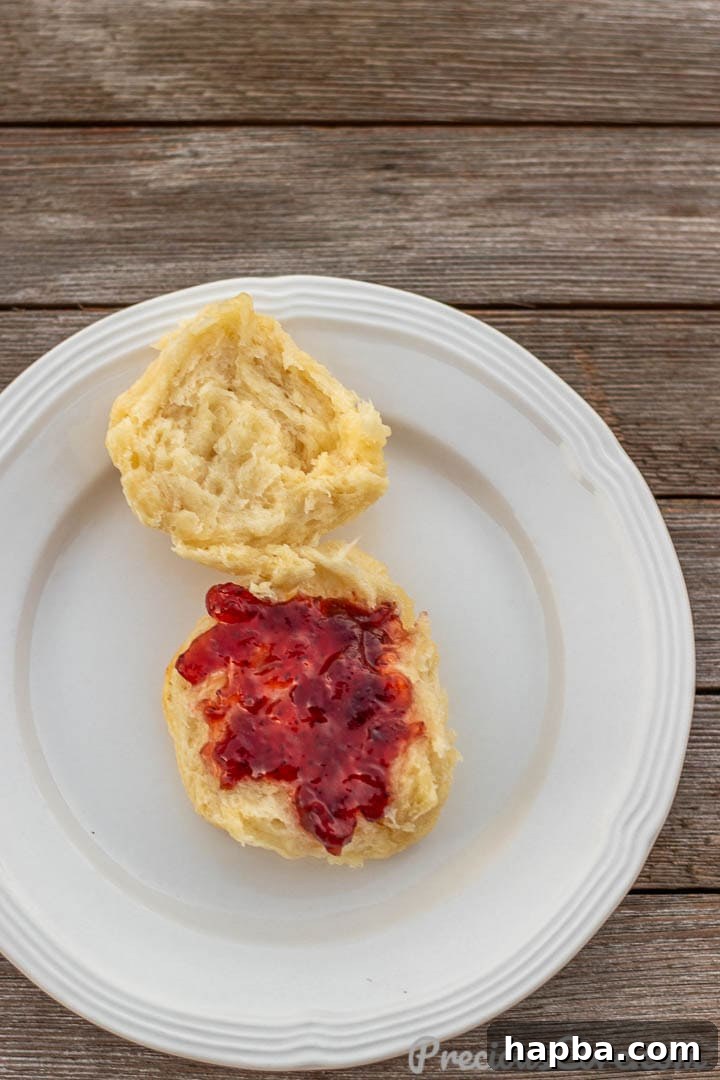
If you love quick and easy bread recipes, you might also enjoy this delicious Cornbread Without Buttermilk.
Expert Tips for Flawless Flaky Biscuits Every Time
While the recipe itself is straightforward, a few key techniques and considerations can elevate your homemade buttermilk biscuits from good to absolutely phenomenal. Pay attention to these expert tips for guaranteed success:
- Keep Everything COLD: This is perhaps the most critical tip. Both your butter and buttermilk must be very cold. Cold butter melts slowly in the oven, creating pockets of steam that result in those desirable flaky layers. If the butter melts before baking, you’ll end up with tough, dense biscuits. Don’t take ingredients out of the fridge until you’re ready to use them.
- Grate the Butter for Easy Incorporation: Grating cold butter is a fantastic hack! It ensures the butter is evenly distributed into fine pieces throughout the flour without overworking the dough. If you don’t have a grater, you can cut the butter into small cubes and then use a pastry blender or your fingertips to work it into the flour until it resembles coarse crumbs with some pea-sized pieces remaining.
- Avoid Overworking the Dough: Biscuit dough is not like bread dough. Excessive kneading or mixing develops the gluten, which leads to tough, chewy biscuits instead of light, tender ones. Mix just until the ingredients are combined and the dough comes together. A shaggy, slightly crumbly dough is a good sign.
- Layering is Key for Flakiness: The folding technique (laminating) is what creates those beautiful, distinct layers. Don’t skip this step! It helps distribute the butter evenly and builds structure.
- Press Straight Down When Cutting: When using your biscuit cutter, press firmly straight down into the dough. Resist the urge to twist the cutter. Twisting seals the edges of the dough, which can hinder the biscuits’ ability to rise properly and prevent those glorious layers from separating.
- Bake Biscuits Touching: Arrange your cut biscuits so they are lightly touching each other on the baking sheet. This creates “steam walls” that encourage the biscuits to rise taller and ensures a softer side texture.
- Use Real Buttermilk (or a DIY Substitute): While you can create a buttermilk substitute, real buttermilk offers the best flavor and acidity for optimal results. To make your own substitute, simply pour 1 tablespoon of white vinegar or lemon juice into a liquid measuring cup. Fill the rest of the cup with regular milk (dairy or non-dairy) until it reaches the 1-cup line. Let it sit for 5-10 minutes until it slightly curdles.
- Don’t Forget to Preheat Your Oven: Ensure your oven is fully preheated to the correct temperature before placing the biscuits inside. A hot oven helps the butter release steam quickly, contributing to a better rise and flakier texture.
Recommended Tools for Biscuit Baking Success
Having the right tools can make your biscuit-making process even smoother and more enjoyable:
- Biscuit Cutters: A good set of biscuit cutters in various sizes is incredibly helpful. I typically use the 2.5-inch cutter for perfect individual servings.
- Measuring Cups and Spoons Set: Essential for accurate ingredient measurements, ensuring consistent results every time.
- Parchment Paper: Liners for your baking sheets make for easy cleanup and prevent sticking.
- Box Grater: For grating cold butter quickly and efficiently.
- Rolling Pin: For evenly flattening the dough to create those essential layers.
Frequently Asked Questions About Buttermilk Biscuits
New to biscuit baking or encountering common challenges? Here are some answers to frequently asked questions to help you achieve biscuit mastery:
Can I make biscuit dough ahead of time?
Yes, you can! You can prepare the dough and cut out the biscuits, then place them on a parchment-lined baking sheet and freeze them until solid (about 30-60 minutes). Once frozen, transfer them to an airtight freezer bag. When ready to bake, place the frozen biscuits on a baking sheet and bake them straight from frozen, adding a few extra minutes to the baking time (typically 18-20 minutes at 425°F/220°C).
Why are my biscuits tough?
Tough biscuits are almost always a result of overworking the dough. When you knead or mix biscuit dough too much, you develop the gluten in the flour, which makes the biscuits dense and chewy rather than light and flaky. Mix only until the ingredients are just combined and the dough comes together.
My biscuits didn’t rise, what went wrong?
Several factors can cause biscuits not to rise:
- Expired Leavening Agents: Make sure your baking powder and baking soda are fresh.
- Warm Butter/Buttermilk: If your butter or buttermilk was too warm, the butter would melt into the dough prematurely, preventing steam pockets from forming.
- Twisting the Cutter: Twisting the biscuit cutter seals the edges of the dough, making it harder for the biscuits to rise. Always press straight down.
- Under-mixing: Not mixing enough could mean the leavening agents aren’t properly distributed.
How do I store leftover homemade biscuits?
Store leftover biscuits in an airtight container or bag at room temperature for up to 2-3 days, or in the refrigerator for up to a week. For longer storage, you can freeze baked biscuits for up to 2-3 months.
What’s the best way to reheat biscuits?
To reheat, place biscuits in a preheated oven at 300°F (150°C) for about 10-15 minutes, or until warmed through. You can also reheat them in a microwave for 20-30 seconds per biscuit, though this might make them a little softer.
What savory dishes pair well with buttermilk biscuits?
Buttermilk biscuits are incredibly versatile! They are fantastic with fried chicken, sausage gravy, chili, stew, or even alongside a hearty breakfast casserole. They can also serve as a quick bread for sandwiches.
Buttermilk Biscuits
15
15
30
21
biscuits
Ingredients
- 1 cup unsalted butter (226 grams) cold
- 4 cups all-purpose flour (500 grams) plus more for work surface
- 4 teaspoons baking powder
- 1/2 teaspoon baking soda
- 1 teaspoon salt
- 2 tablespoons sugar
- 2 cups buttermilk (500 ml) cold
Instructions
-
Preheat oven to 425 degrees F (220 degrees C). Line a large baking sheet with parchment paper.
-
Grate cold butter into a large bowl using the large holes of a box grater.
-
Add the flour, baking powder, baking soda, salt, and sugar to the bowl with the grated butter.
-
Mix with your fingertips or a pastry blender until just combined. The mixture should resemble coarse crumbs with visible shreds or pea-sized pieces of butter. Do not overmix.
-
Pour in the cold buttermilk and mix gently with a spoon or your hands until a shaggy dough forms. Be careful not to knead or overwork the dough.
-
Create Layers: Lightly flour a clean work surface and transfer the dough onto it. Gently press the dough down or roll it with a rolling pin into a rectangle about half an inch thick. Fold the dough into thirds, like a letter. Rotate the dough horizontally, then press/roll it out to half an inch thick again. Repeat this folding and rolling process a total of 3 times.
-
After the final fold, roll the dough one last time to half an inch thick.
-
Using a 2.5-inch biscuit cutter (or a sharp-edged cup), cut out circles from the dough. Press straight down firmly without twisting the cutter. This technique helps the biscuits rise better and maintains those flaky layers.
-
Place the cut-out biscuits on the prepared baking sheet, ensuring they are lightly touching each other. This encourages a taller rise.
-
Bake in the preheated oven for approximately 15 minutes, or until the tops are golden brown and the biscuits are fully risen.
-
Serve your homemade buttermilk biscuits warm, with your favorite jam, butter, or gravy. Enjoy!
Notes
Do not knead the dough. Biscuit dough should not be kneaded like bread dough, as this can lead to tough biscuits.
Don’t twist the cutter. When cutting the dough, press straight down with your biscuit cutter or cup. Twisting the cutter seals the edges, preventing the biscuits from rising optimally.
Let the biscuits touch. Arranging the biscuits so they lightly touch each other on the baking sheet will help them rise taller and more evenly.
Nutrition Information (per biscuit)
Calories: 183kcal |
Carbohydrates: 21g |
Protein: 3g |
Fat: 10g |
Saturated Fat: 6g |
Polyunsaturated Fat: 0.5g |
Monounsaturated Fat: 2g |
Trans Fat: 0.4g |
Cholesterol: 26mg |
Sodium: 243mg |
Potassium: 59mg |
Fiber: 1g |
Sugar: 2g |
Vitamin A: 308IU |
Calcium: 77mg |
Iron: 1mg
Additional Information
If you make this recipe, please consider leaving a star rating below. Your feedback helps others discover and enjoy this recipe! Thank you!
*This post contains affiliate links, which means I may earn a small commission if you make a purchase through them, at no extra cost to you.